5
Parts & Service: 020 8988 7400/E-mail:Parts@clarkeinternational.com or Service@clarkeinternational.com
UNPACKING & ASSEMBLY
UNPACKING
Before assembling, please check contents against the following list of loose
items and advise your dealer immediately if any parts are missing. Refer also
to parts list & diagram on pages 24 & 25.
4 x Legs
1 x Ash-pan & Handle
1 x Flue Collar
1 x Fixings Kit (nuts, bolts, washers, Fire Cement & 2 x hex keys)
TOOLS REQUIRED
13mm spanner (foot bolts)
10mm spanner (baffle assembly bolts and blanking plate nuts)
Small hex Key (supplied) - window glass retainers
Large hex key (supplied) - flue collar & blanking plate
A full range of flue pipes and fire cement is available from your Clarke dealer.
WARNING: DUE TO THE WEIGHT OF THE STOVE IT IS RECOMMENDED
THAT TWO PEOPLE PERFORM THE UNPACKING AND ASSEMBLY.
Unpack the stove and remove packing
materials. Open the doors and remove the
legs, flue collar and fixings kit from inside the
stove.
1. Place the stove on a soft surface such as
the polystyrene packing materials from
the crate and tilt the stove back.
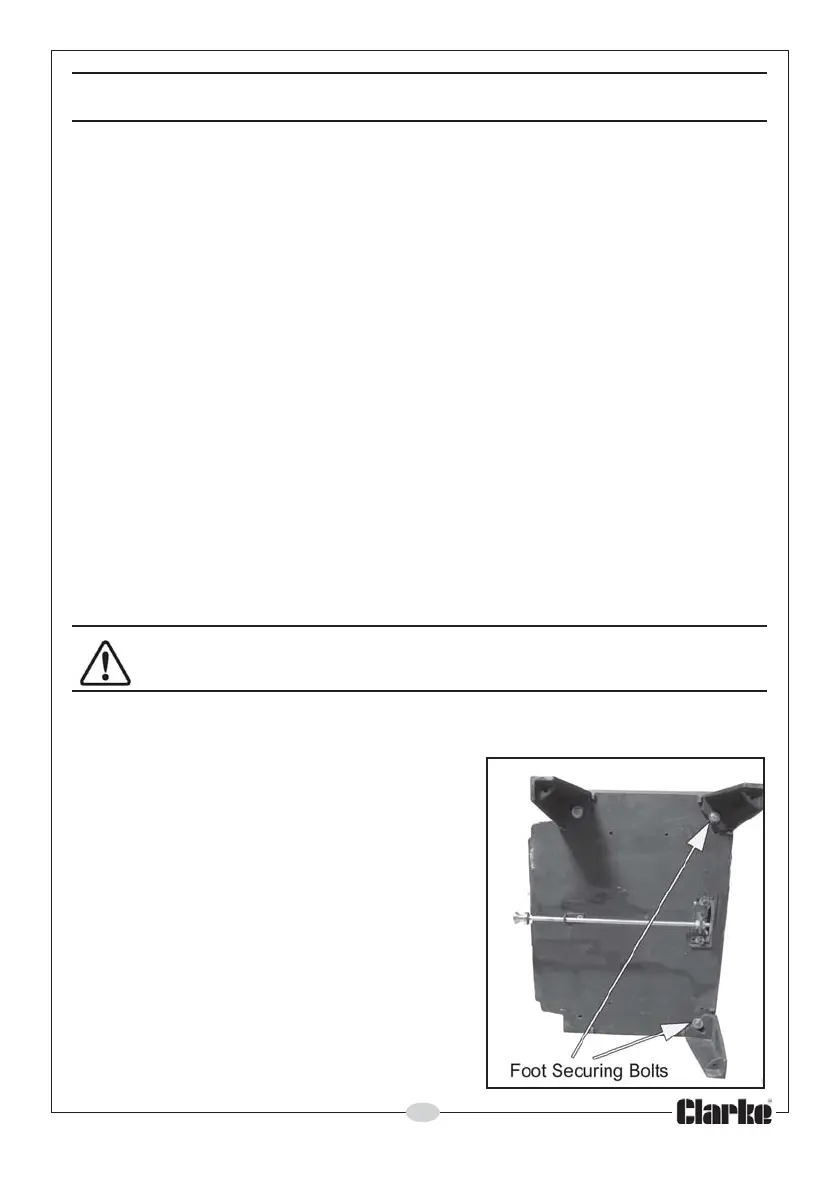
2. Attach the legs using the bolts and
washers supplied as shown in Fig 1
before standing the stove upright.
3. If the stove is to be connected to a
vertical chimney above, attach the flue
adaptor as shown in Fig 2 overleaf,
FIG 1