30
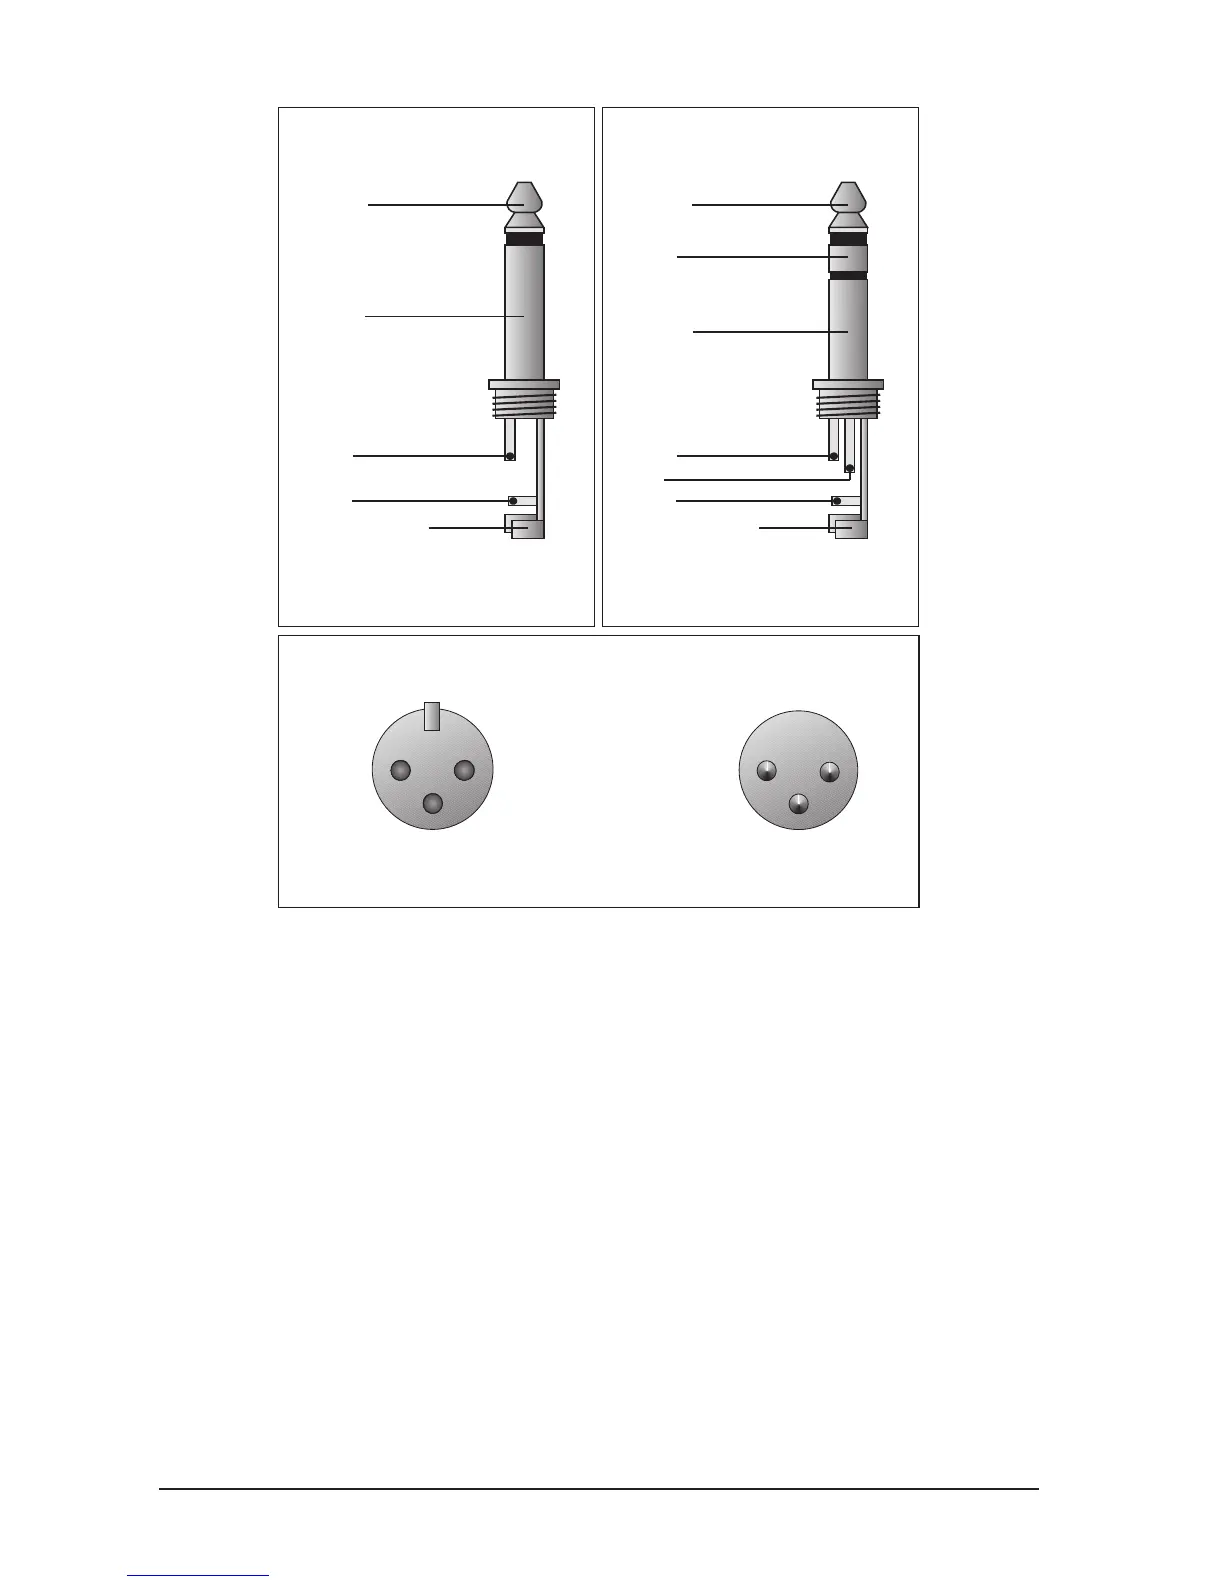
Unbalanced use of
mono 1/4" jack plugs
Ring
Balanced use of
stereo 1/4" jack plugs
Balanced use with XLR connectors
1 2
3
2 1
3
Input
Output
Tip =
Signal
Tip =
hot (+ve)
Sleeve =
Ground / Shield
Sleeve =
Ground / Shield
Tip
Tip
Sleeve
Sleeve
Strain relief clamp
Strain relief clamp
Ring =
cold (-ve)
For connection of balanced and
unbalanced plugs, ring and sleeve have
to be bridged at the stereo plug.
1 = Ground / Shield
2 = hot (+ve)
3 = cold (-ve)
For unbalanced use pin 1 and pin 3 have to be bridged
Fig. 5.2: Different plug types
5.4 MIDI connections
The MIDI standard was developed in the early 1980s to allow electronic musical instruments from different
manufacturers to communicate with each other. The use of MIDI has developed over the intervening years to
the stage where it is now common to find complete recording studios operating entirely on a MIDI basis. The
centerpiece in such a studio is usually a computer running a sequencer software which not only controls
various keyboards, samplers and sound modules, but can also run the programming of outboard effect
devices, typically digital reverberation and delay units. The ULTRAMIZERPRO may be controlled in real time
in this studio environment.
+ MIDI for Musical Instruments Digital Interface.
The MIDI connectors found on the rear panel are of the universally used 5 pin DIN type. You require suitable
MIDI cables to connect the ULTRAMIZERPRO to other MIDI devices. Normally complete cables will be
purchased for this use, you can of course make your own, using a high quality cable with two cores and
shielding (like microphone cable), with as connectors two good 180 degree DIN plugs. Pin 2 (center) is
connected to the cables shield, pins 4 and 5 (left and right next to 2) carry the two cores, pins 1 and 3 are not
used. MIDI cables should have a maximum length not exceeding 45 feet.
MIDI IN: to receive MIDI-data. The receive MIDI channel is set in the MIDI SETUP menu.
MIDI THRU: The unaltered signal is spresent at the MIDI THRU connector. Several ULTRAMIZER PROs can
5. INSTALLATION