10
HOW TO USE YOUR BLENDER
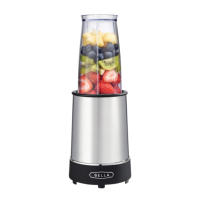
Using the Blending Jug/ Tumblers
• Assemble the Blending Jug correctly with the blade tted on the base of the Jug rmly to prevent spills.
Add ingredients to the Blending Jug, taking care not to overll beyond the MAX line. Place the lid rmly
into position and ensure the stopper is rmly positioned in the lid.
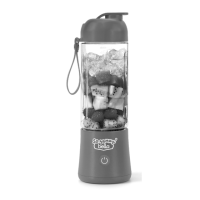
• Alternatively add the food or liquid that requires
blending to the Tall or Short Tumbler before
adding the blade, again taking care not to exceed
maximum line. Ensure the blade unit ts snugly
onto the Tumbler to avoid leakage.
• Insert the base of the Blending Jug or invert the
Tumbler onto the motor base tting the three tabs
into the slots on the base, press down and turn
clockwise until the blade attachment tabs lock
securely in position (See Fig 6).
Pre-set Controls
• Press the POWER BUTTON, the power indicator light will ash.
• Press PRE-PROGRAMMED buttons to begin processing. The blender is equipped with a safety device that
will cause the control panel lights to ash if the blade collar is not locked properly in position on the
motor base. Reposition until the unit is locked correctly in place.
• The PRE-PROGRAMMED button will illuminate during use and continue to operate until the task
is nished.
• To stop blending at any time press the illuminated button, check the results and if necessary add liquid
if required.
Manual Buttons
• The HIGH and LOW buttons allow you to have control rather than the button being pre-set. They will
continue to mix until you press the button again to stop the process. When using this setting the motor
should not be operated for more than 1 minute at a time, allowing the motor to rest for 3 minutes before
continuing. The motor will automatically switch off after a minute of continuous use as a safety measure.
Finished Blending
• After blending in the Jug, turn the Jug anti-clockwise to unlock and remove the Jug from the base. Take
off the lid using the tab at the side, the spout makes pouring easy.
• After blending in the Tumbler, turn it anti-clockwise to remove the Tumbler and then invert it, unscrew the
blade collar anti-clockwise and remove off the Tumbler.
• The Tumbler ring or Travel lid can be added onto the top to enable you to drink comfortably from the
container; alternatively you can use the Storage lid to keep food fresh in the fridge for a later date.
Processing Capacity Chart
Quantity for
processing
Capacity Max process
volume
Ice Cubes
Blending Jug Large 1500ml 950ml 10 cubes + 180ml
liquid
Large Tumbler Medium 900ml 700ml 7 + 120ml liquid
Small Tumbler Small 600ml 350ml 4 + 60ml liquid
Figure 6