tiles. Please note, when positioning your cooker against a wall, ensure there is
sufficient clearance for the screw heads on the back panel.
This appliance is designed not to project in front of standard 600mm worktops
(excluding handles). To achieve the best fit the cooker must be pushed against the
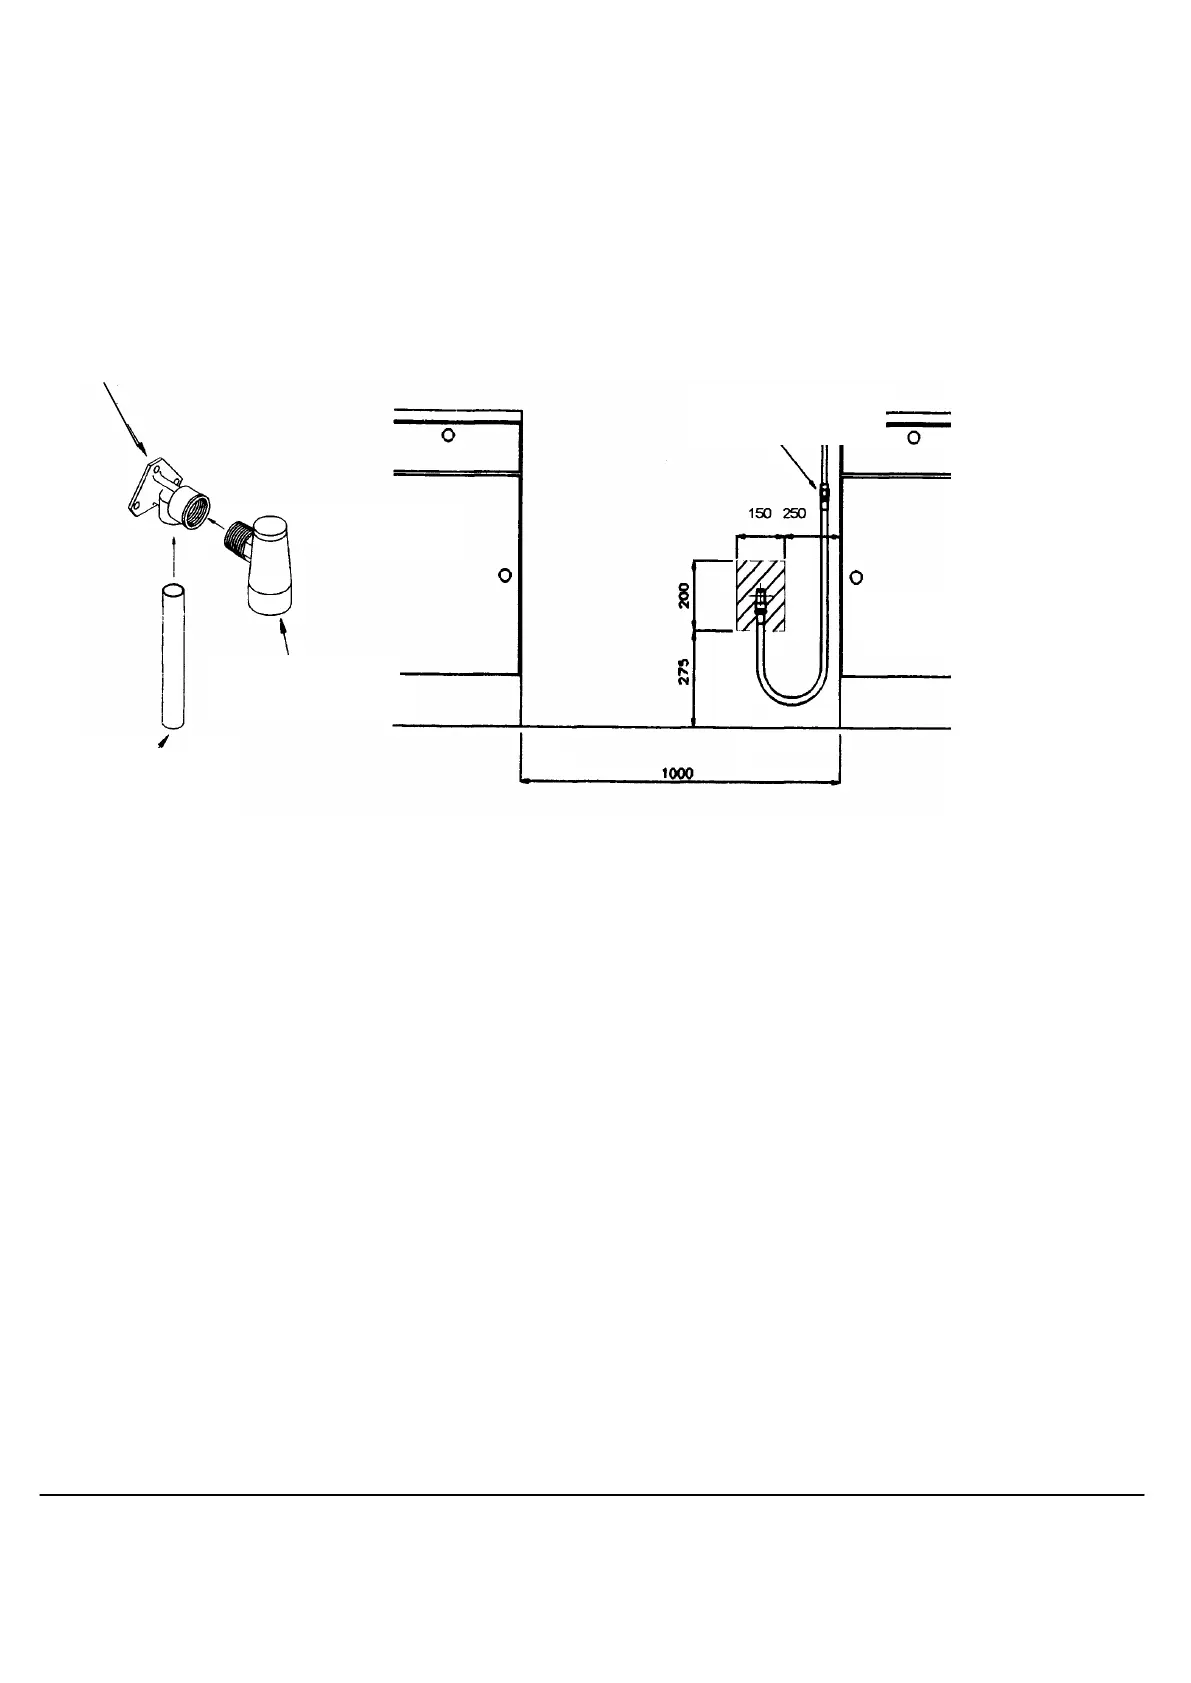
wall. If the wall mounted adapter back-plate (Fig.1) is to be fitted behind the
appliance then the suitable area for this fitting is shown as the area in (Fig.2).
Note: The adapter back-plate requires chasing into the wall if it protrudes
more than 40mm. This is to allow the cooker to be pushed back to the wall.
Fig. 1 Fig. 2
Any overhanging surface or cooker hood should be at least 760mm (30") above the
cooker hob. We do not recommend positioning the cooker below wall cupboards, as
the heat and steam from the cooker may cause damage to the cupboard and its
contents.
Excess steam from the oven, vents out at the top back edge of the cooker, so make
sure that the walls behind and near the cooker are resistant to heat, steam and
condensation.
Your cooker must stand on a flat surface so that when it is in position the hob is
level. The cooker is fitted with rear wheels and will slide into position easily.
Movement of your cooker is most easily achieved by lifting the front, as follows.
Open the oven doors sufficiently to allow a comfortable grip on the underside front
edge of the oven roofs, avoiding grill elements or oven furniture.
Adjust the cooker at the rear to the required height, using the 2 jacking screws
situated behind the rear access cover and secure with the lock-nuts. Position the
cooker and adjust the height at the front with the 2 jacking screws situated at the
front underside. Check that the cooker is level by using a spirit level (adjusting the
jacking screws if necessary). It is important that the cooker is stable and level for
the overall cooking performance.
Installation Instructions