15
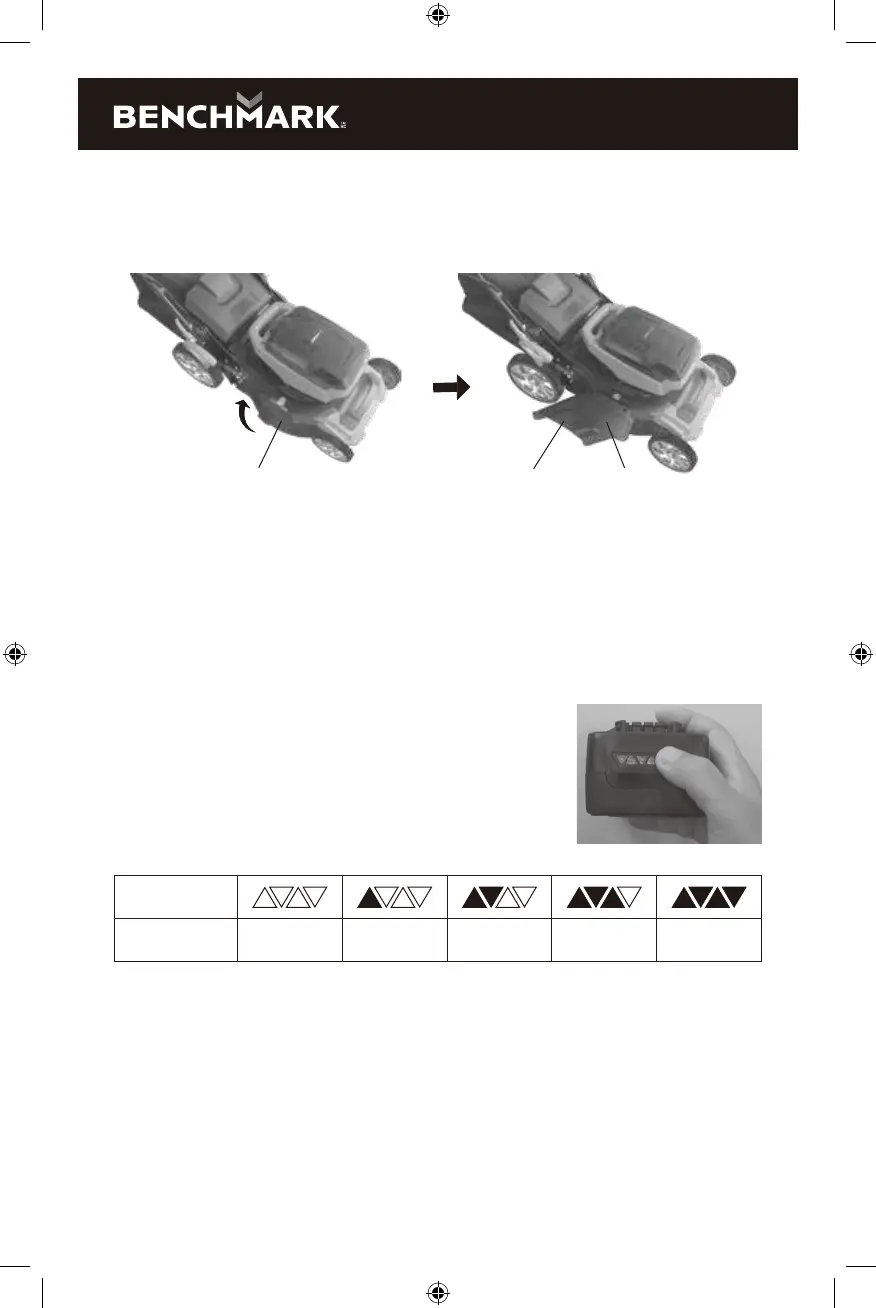
5. To use the side chute option, remove the grass catcher (bag) and insert the
mulching plate. a) Lift the side chute discharge cover (1) with one hand and
hook in the side discharge chute (2) with the other hand (Fig. 5b). b) Release
the side discharge cover to secure the chute in position.
FIG. 5b
1 2 1
CHECKING THE BATTERY CHARGE STATUS
The level of charge remaining in the battery can be checked by using the battery
LED power indicator that is contained on the end of the battery.
NOTE: The battery charge remaining may be checked while the battery is installed
in the tool with the ON/OFF switch turned OFF. It may also be checked while the
battery is removed from the tool. DO NOT check the battery charge remaining
while the battery is in the charger.
You will get a false reading and you may also damage the
battery status system.
1. Press and hold the battery status button located on
the end of the battery
2. One or more of the four LED lights in the LED window
will come ON to indicate the amount of charge that is
remaining in the battery as follows:
Charge level
indicator
Amount of charge
remaining
0-10% 10-25% 25-50% 50-75% 75-100%
3. Release the battery status button to turn the LEDs OFF.
ASSEMBLY AND OPERATING
CHARGING THE BATTERY PACK
1. Place the battery charger (1) in a dry location near a 110–120V 60 Hz
electrical outlet (Fig. 6).
2. Plug the battery charger into the outlet and make sure the green LED indicator
light (5) comes ON. If it does not, refer to the chart (Fig. 7) to identify the problem.
5125-016k EnProdManual P.indd 15 2020-12-17 2:09 PM