LR-10000 Low-Rise Scissor Lift 17 P/N 5900075 — Rev. B — August 2021
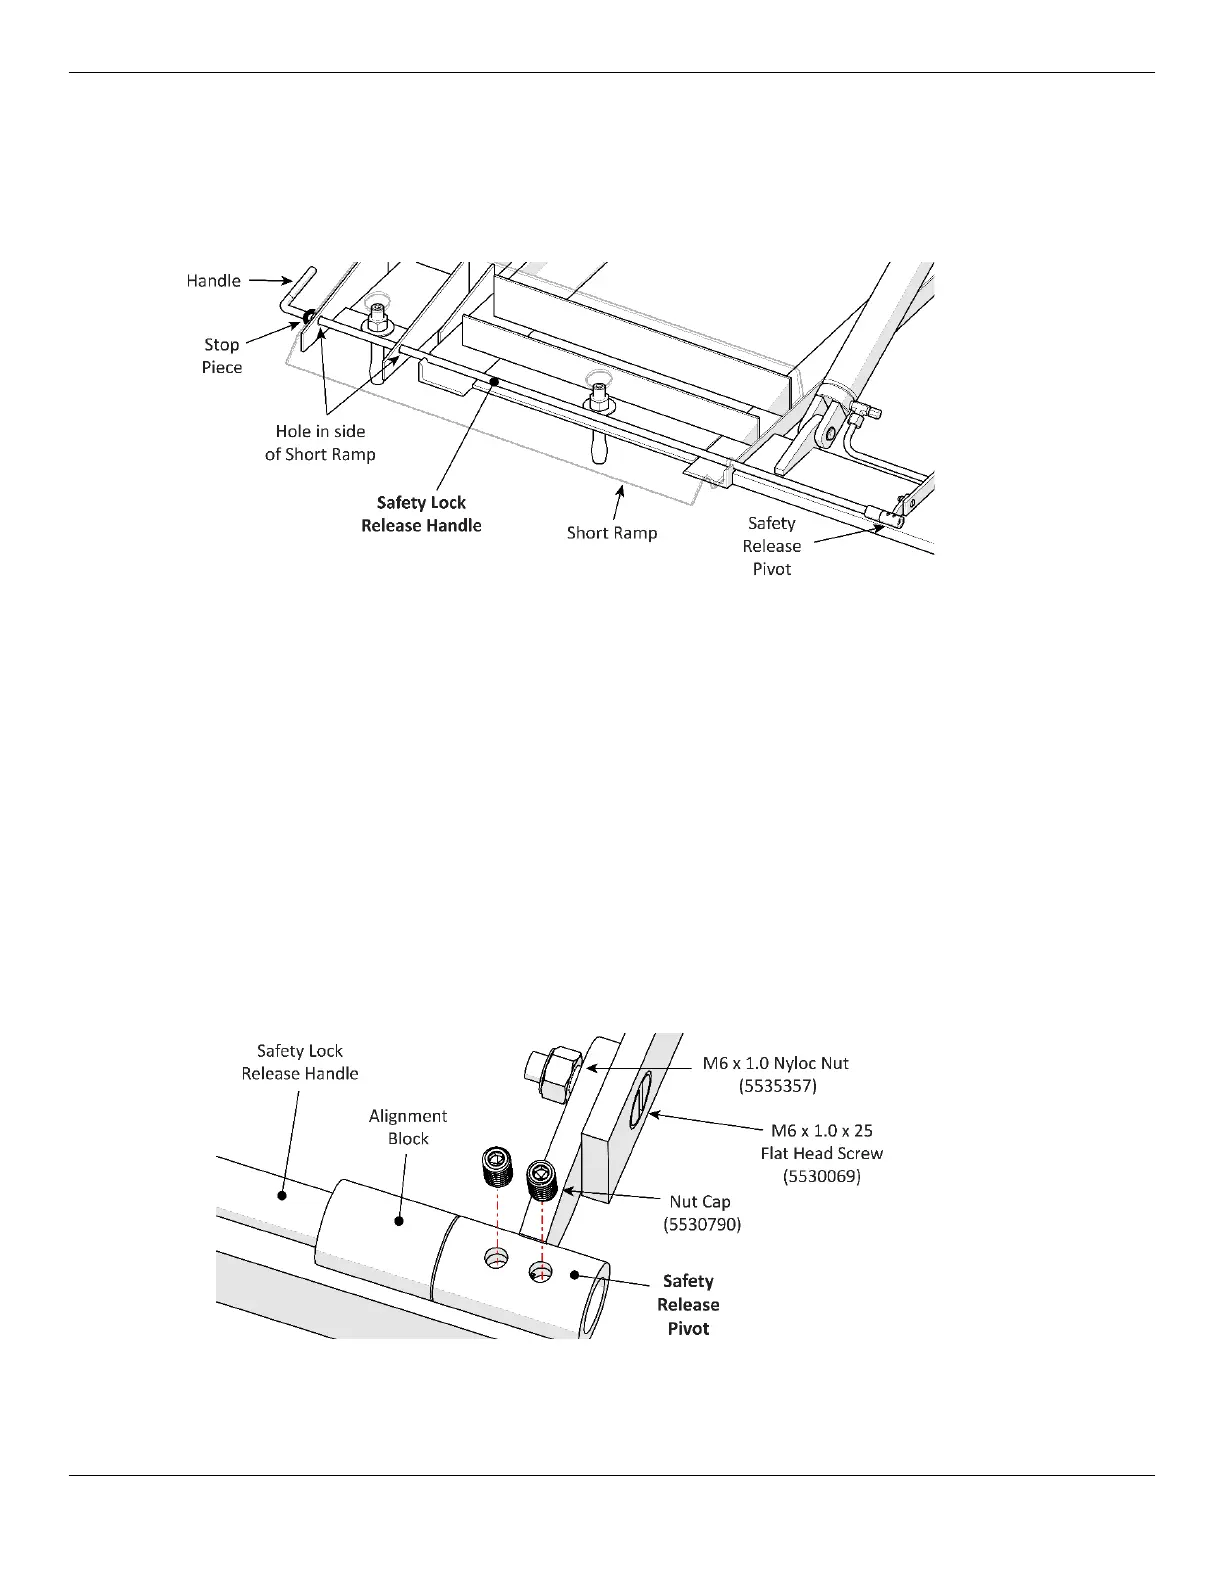
Install the Safety Lock Release Handle
This section describes how to install the Safety Lock Release Handle, which moves the Safety Lock
Bar up so the Safety Locks cannot engage, allowing the Lift to be lowered back down to the ground.
The following drawing shows the necessary components for installing the Safety Lock Release Handle.
Short Ramp end of the Lift shown, closest to the Power Unit Stand. Not drawn to scale. Not all
components are shown.
To install the Safety Lock Release Handle:
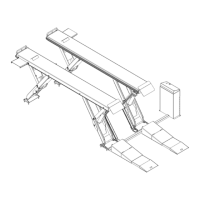
1. Find the Safety Lock Release Handle, the Safety Release Pivot, two Nut Caps, a Bolt, and Nut.
2. Push the Safety Lock Release Handle through the hole on the left side of the Short Ramp until it
comes out the hole on the right side of the Short Ramp.
3. Push on the Handle to guide the Safety Lock Release Handle through the Alignment Block.
4. Keep pushing until the Stop Piece is up against the left side of the Short Ramp.
5.
Moving to the other end of the Safety Lock Release Handle
, slip the Safety Release
Pivot over the end of the Safety Lock Release Handle coming out of the Alignment Block.
6. Put on the Bolt and Nut to secure the Safety Release Pivot; finger tighten the Nut.
7. Put the Nut Caps into place via the holes in the Safety Release Pivot; finger tighten the Nut Caps.
Close-up of the connections to make to Safety Release Pivot. Not all components are shown.
8. Move the Handle of the Safety Lock Release Handle up and back to make sure it is working.
9. Use the appropriate tools to fully tighten the Nut and the Nut Caps.