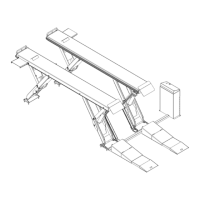
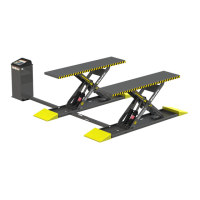
SP-7XE/F Full-Rise Scissor Lift 13 P/N 5900010 — Rev. B3 — September 2023
Installation Checklist SP-7XE
Following are the steps needed to install a SP-7XE Lift. Perform them in the order shown.
☐ 1. Review the installation Safety Rules.
☐ 2. Plan for Electrical Work.
☐ 3. Make sure you have the necessary Tools.
☐ 4. Select the Installation Site.
☐ 5. Create a Floor Plan.
☐ 6. Verify there is adequate clearance on all sides of the Lift.
☐ 8. Create Chalk Line Guides.
☐ 9. Move both bases into the chalk lines and Lift both Platforms onto the same safety lock.
☐ 10. Evaluate for out of level conditions and calculate shim requirements
☐ 11. Drill then install Anchors and Shim as required to bring the Platforms into a level condition.
☐ 12. Torque all anchors to secure, then tuckpoint cement between the base and the concrete floor
to fill voids under the Base and lock the Shims into place.
☐ 13. Assemble the Console and attach the Power Unit.
☐ 14. Anchor the Console.
☐ 15. Learn about Hydraulic Fluid Contamination.
☐ 16. Learn about Thread Sealants.
☐ 17. Connect the Hydraulic Hoses.
☐ 18. Learn About Compression Fittings and Tubing.
☐ 19. Connect the Air Lines.
☐ 20. Install the Hose Covers.
☐ 21. Connect the Power Unit (Electrician required).
☐ 22. Install a Power Disconnect Switch and Thermal Disconnect Switch (Electrician required).
☐ 23. Perform an Operational Test.
☐ 24. Add the Ramp Extensions.
☐ 25. Add the Drive-up Ramps.
☐ 26. Review the Final Checklist.
☐ 27. Leave the Manual for the owner/operator.