12
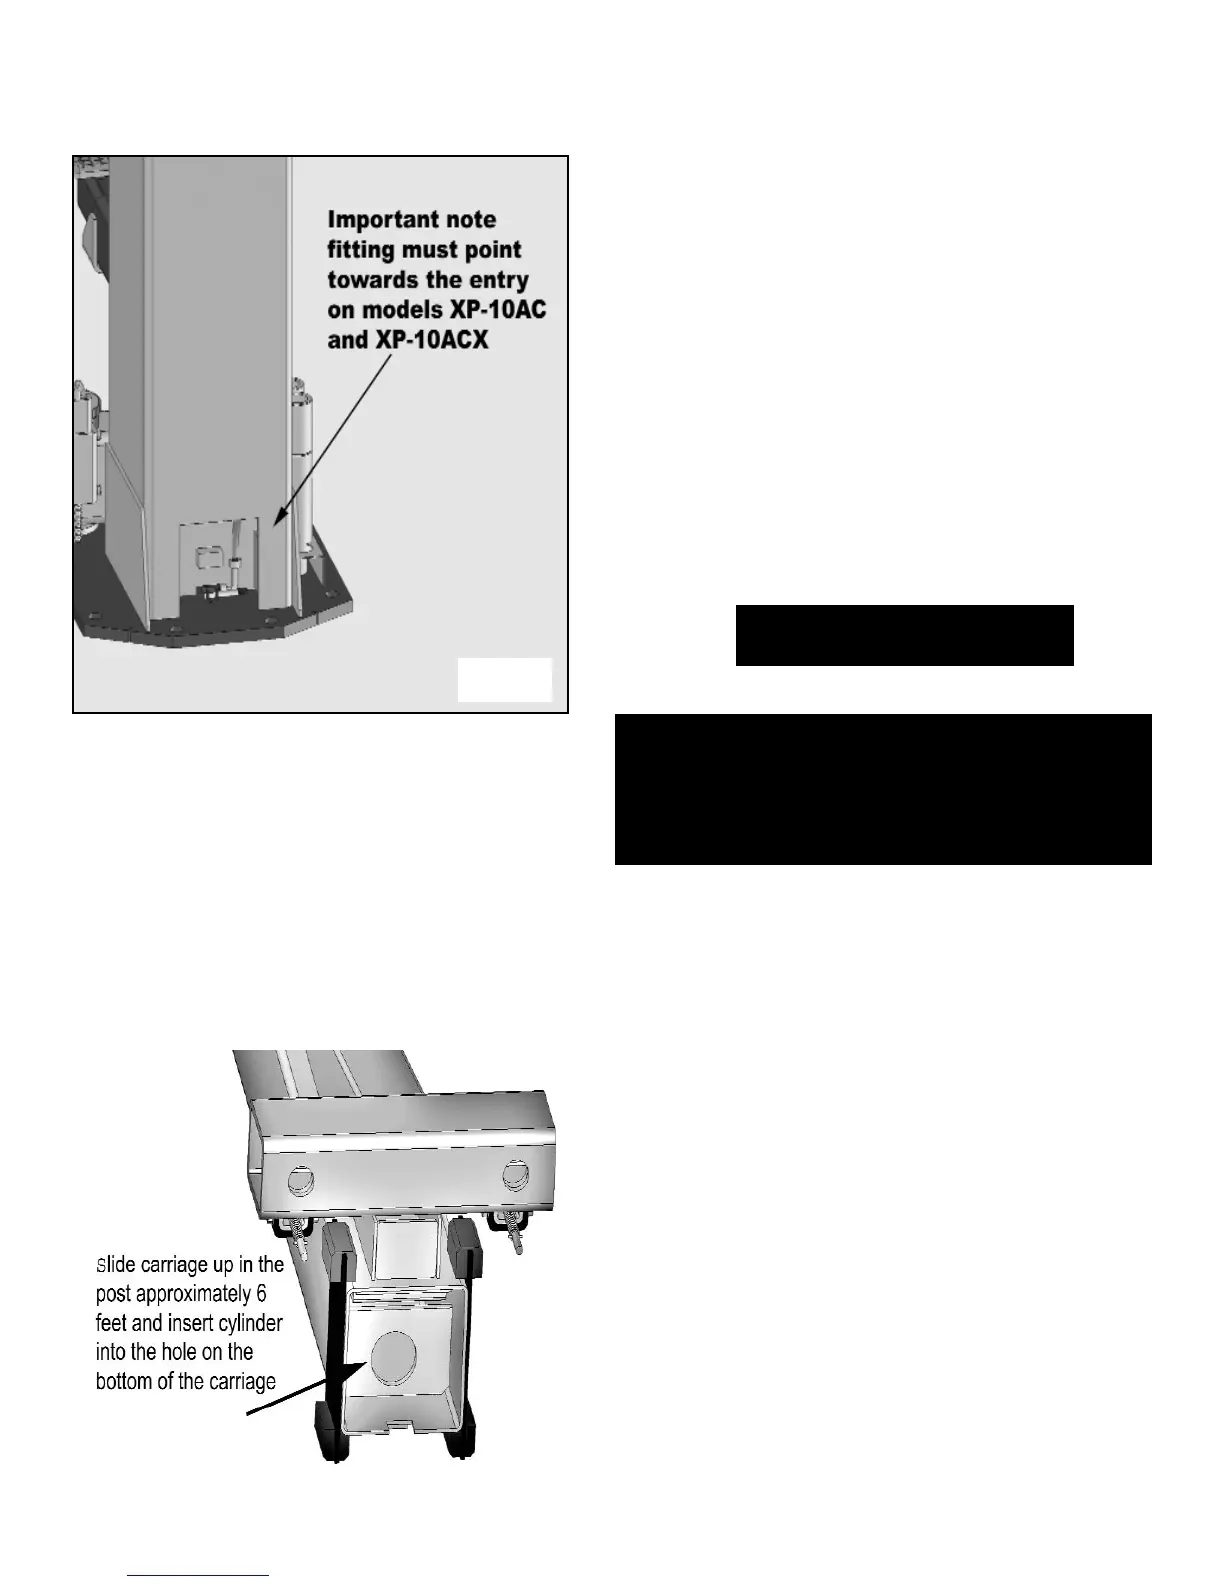
2. Install the cylinder fittings in cylinder ports so
that each fitting points towards the entrance side
of lift. ( Fig 3 ).
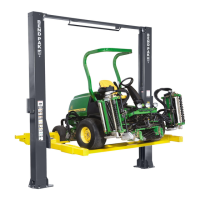
3. At this point install the cylinders into the car-
riages. With the post on the ground slide the
carriage towards the top of the post approxi-
mately 6 feet. Insert the casing side of the cylin-
der into the entry hole on the bottom of the car-
riage. Push the cylinder in all the way until the
collar touches on the carriage. Slide the carriage
all of the way back down until the cylinder makes
contact with the base plate of the post. (Fig 4).
5. Route both hoses in their respective columns
PRIOR to raising columns to their vertical position.
When routing the hydraulic hose through the
columns, make sure to route through the retaining
clips welded inside each column. Make sure that
the hose is clear of any moving parts. It may be
necessary to tie hose clear of obstruction by using
nylon tie straps or wire.
Important Note
When routing the hydraulic hose through the
columns, make sure to route through the
retaining clips welded inside each column.
Fig 3
Fig 4