EasyManua.ls Logo

Beninca BULL624 SW User Manual

Beninca BULL624 SW
56 pages
Go to English
To Next Page IconTo Next Page
Page #1 background imageLoading...
Page #1 background image
L854200378
09/2022 rev 0
BULL624 SW
UNIONE NAZIONALE COSTRUTTORI
AUTOMATISMI PER CANCELLI, PORTE
SERRANDE ED AFFINI
Question and Answer IconNeed help?

Do you have a question about the Beninca BULL624 SW and is the answer not in the manual?

Beninca BULL624 SW Specifications

General IconGeneral
Motor Power300 W
Max Gate Weight600 kg
Protection RatingIP44
Power Supply230 Vac
Operating Temperature-20°C to +50°C
Voltage230 Vac
Safety FeaturesObstacle detection

Summary

WARNING

1) SPECIFICATIONS

2) GENERAL INFORMATION

3) PRELIMINARY CHECKS

4) INSTALLATION

5) POSITIONING OF THE FOUNDATION PLATE

Securing the foundation plate to the ground using anchors.

6) FITTING OF THE RACK

7) POSITIONING AND ANCHORING OF THE ACTUATOR

Mounting the gear motor onto the foundation plate.

8) POSITIONING OF THE LIMIT SWITCH BRACKETS

9) MANUAL OPERATION

How to operate the gate manually in case of power failure.

10) HOW TO INSTALL THE MAGNETS

Fitting onto the limit switch brackets

Attaching magnets to limit switch brackets.

Fitting onto the rack

Attaching magnets directly to the rack.

11) BUFFER BATTERIES

12) WIRE DIAGRAM

13) CONTROL UNIT CP.B24-SW ELECTRICAL CONNECTIONS

Mains power supply selection

Selecting 230Vac or 115Vac power input.

Motor connection

Connecting the 24Vdc motor.

Limit switches connection

Connecting limit switches (SWO, SWC).

Antenna connection

Connecting the antenna for radio receiver.

Control inputs

Connections for Step-by-Step, STOP, Photocell, Blink, AUX.

KNX interface

Connecting the KNX interface card.

Battery charger connection

Connecting the optional battery charger.

14) ARC TRANSMITTERS

15) AUTOSET

Procedure description

Steps to set operating parameters like start/end positions.

16) CHANGES TO SLOWING SPACES

Disabling the slowing phases

How to disable the deceleration phases.

17) TRIMMER FUNCTION

TCA Trimmer

Adjusting automatic closing time.

AMP Trimmer

Adjusting sensor sensitivity for obstacle detection.

18) DIP-SWITCH FUNCTION (S1)

DIP 1

Enabling pre-flashing, AUX output, and remote acquisition.

DIP 2

Configuration of PHOTO input and SS key modes.

DIP 3

Enabling IBL, IBCA, and SCL functions.

DIP 4

Disabling the ESA energy saving function.

19) OPENING AND CLOSING MOVEMENT SPEED ADJUSTMENT

20) OPERATOR PRESENT MODE

21) CONFIGURATION OF BUILT-IN RECEIVER (MANUAL STORAGE)

Storage of a transmitter key

Memorizing transmitter keys for operation.

Deletion of a radio code

Removing stored radio transmitter codes.

Remote acquisition of a transmitter

Copying transmitter functions to new units.

23) TOTAL RESET

24) LED DIAGNOSTICS

LD1 indications

Meaning of LD1 LED status (flashing, on).

LD2 indications

Meaning of LD2 LED status (on, flashing).

LD1+LD2+LD3 indications

Combined LED status for errors.

LD2+LD3 indications

Combined LED status for thermal protection.
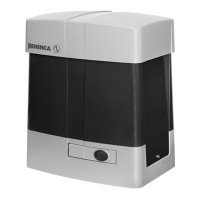
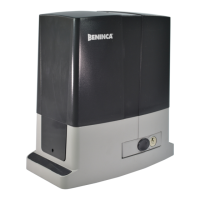
Related product manuals