4 135113 Rev C 4/2/18
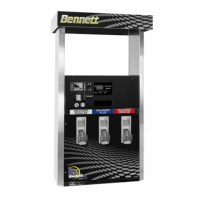
STAND ARD MODELS
The following Inlets and Outlets sizes are used for Standard models.
CAUTION: Dispensers must be installed with
provisions for expansion relief, which will relieve at
pressures not to exceed 50 psi (345 mPA). Do not use
line check valve between dispenser and tank unless
provided with relief valve.
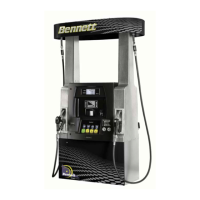
BIG FUELER MODELS
The following Inlets and Outlets sizes are used for Big Fueler models.
Pump Inside Dispenser Sump (Opening)
13“ x 30” (33 cm x 76 cm)
Satellite Inlets (Female)
Satellite Outlets (Female)
STEP 5 – FIND FOOTPRINT
Use the chart below to determine what footprint to use for your model number. Note: The letter X denotes options not identified.
3000 SERIES ELECTRON IC STANDARD
3700, 3800, 3900 Models | High Hose and Low Hose | Standard Flow Rates | Remote
3700, 3800, 3900 Models | High Hose and Low Hose | Standard Flow Rates | Suction
3XXXSNR-XXXX2
3XXXSNR-XXXXA
3700, 3800, 3900 Models | High Hose | Standard Flow Rates | Remote | Quad or Active 4
3700, 3800, 3900 Models | High Hose | Standard Flow Rates| Suction | Quad
3000 SERIES ELECTRON IC BIG FUELER
3700, 3800, 3900 Models | Low Hose | Remote | Master / Combo | High Flow Big Fueler
3700, 3800, 3900 Models | Low Hose | Remote | Satellite | High Flow Big Fueler
3700, 3800, 3900 Models | High Hose and Low Hose | Suction | High Flow Big Fueler
3700, 3800, 3900 Models | High Hose | Master | Remote | High Flow Big Fueler
3700, 3800, 3900 Models | High Hose | Satellite | Remote| High Flow Big Fueler
3700, 3800, 3900 Models | High Hose | Combo | Remote | High Flow Big Fueler
STEP 6 – ANCHORING THE DISPENSER TO THE ISLAND
The dispenser must be bolted firmly to the concrete island. The dispenser base is provided with anchor bolt holes refer to the footprint drawing for
dimensions. Anchor bolts embedded in the concrete island must be no less than ½” (1.3 cm) diameter. The threaded ends of the anchor bolts
should project 1-1/2” (3.8 cm) above the concrete.
On the Low Hose dispenser, 2 anchor bolts required minimum.
On the High Hose dispenser, 4 anchor bolts required minimum in the outer 4 mounting holes.
Refer to the Footprint Drawing used for your dispenser model.
When anchoring the dispenser, always level the dispenser with metal shims before bolting to the island. Place the metal shims at the location of
the anchor bolts so the dispenser frame is not distorted when the anchor bolts are tightened down. Improper shimming that result in misaligned
frames is NOT covered under the Bennett Limited Warranty!
STEP 7 – PREPARING FIELD WIRING
The dispenser’s field wiring connections are in the upper electronics head (electrical enclosure) of the dispenser or in the lower area of the
dispenser if the unit was ordered with the optional explosion proof junction box. Pull 72” (182.9 cm) extra wire to reach the top of the dispenser.
Note: All field wiring must be stranded copper, oil and gas resistant (THHN) color coded, with a 600-volt insulation rating. See wiring diagrams for
proper wire sizes. DO NOT use wire nuts. The ends of the wires should be clean and free from oxidation
1. Using the door keys shipped with the dispenser, (on side 1) unlock the two locks on the lower door and/or upper door panel of the
electronics enclosure, and open the door.
2. Pull the dispenser wires through the underground conduit and through the primary or optional secondary conduit locations located on
the vapor deck and terminate wires according to the wiring diagrams provided in the upper electronic enclosure.
3. If there is an optional junction box, follow the wiring diagrams provided in the upper electronics enclosure and wire to the terminal strip
and flying leads in the junction box.
4. Make sure that the copper ends of the wires are clean and free of oxidation.
Pump Inside Dispenser Sump (Opening)
13“ x 30” (33 cm x 76 cm)
Satellite Outlets (Female)