5 135113 Rev C 4/2/18
STEP 8 - FIELD WIRING
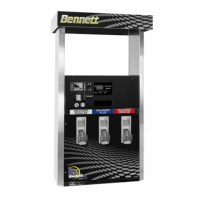
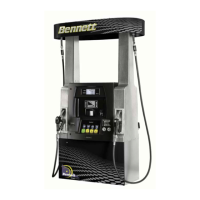
Follow the sections below for proper equipment grounding, dispenser AC power, and console communication. The 3k dispenser can be ordered as
a one or two hose unit. Note: 1, 2, or 4 hose units have one CPU board an Active 4 unit will have two CPU boards. The CPU board is where the field
wires will connect if the optional junction box is not ordered.
PROPER EQUIPMENT GRO U NDI NG
Grounding provides a path of least resistance for electric current to reduce the risk of electric shock. Grounding is also required to protect the
dispenser’s computer from external electrical noise generating devices. The ground wire connection must provide 1 ohm (or less) resistance to
earth ground.
1. Connect a 12-gauge (minimum), green or green/yellow stranded wire to the grounding terminal on the electronics enclosure deck. Only one
ground wire is required per dispenser.
2. Pull a continuous (one-piece) green or green/yellow, 12 gauge stranded THHN ground wire through the junction box and 3/4” (1.9 cm) conduit
and secure at ground lug near the terminal strip in the dispenser’s Junction Box. Terminate the other end at the main panel breaker box
ground bar. Do not terminate at the neutral bar of a sub-panel or rely on metal conduit for this ground connection. Each dispenser’s
grounding post must be within 1-ohm resistance to earth ground potential. You must verify to within 1 ohm of the ground rod. Do not use
wire nuts on ground circuits, use only compression type connectors. This is required to initiate Bennett’s Limited Warranty.
DISPE NSER AC POWER
Each dispenser uses one 120V, 50/60 Hz, or 240V, 50/60 Hz circuit for dispenser power. Make sure the power source has the correct frequency and
voltage. Connect the electrical circuit to the terminal strip on the CPU board. Only one dispenser electronics Hot and Neutral needs to be pulled per
dispenser.
WARNING: ALL DISPENSER AC POWER CIRCUITS (FOR REMOTES ONLY) MUST BE ON THE SAME PHASE OR DAMAGE WILL OCCUR TO
THE DISPENSER 719 CPU OR THE SUB-PUMP RELAY BOX.
Green or Green/Yellow #12 Wire - Ground
White #14 Wire - 120V Neutral Electronics Power
OR
Red #14 Wire - 240V L2 Electronics Power
Black #14 Wire – L1 Electronics Power
1. Connect the White (Neutral) 14ga. wire in 120V circuits or the Red 14ga. wire in 240V circuits to terminal 2 of TS2 on the CPU board. The CPU
board is located on the upper electronics deck.
2. Connect the Black (Hot) 14ga. wire to terminal 3 of TS2 on the CPU board.
3. Electronic power must be connected to a dedicated 15-amp neutral breaking circuit breaker. Electronic power for all dispensers at an
installation must be wired to the same AC line phase or damage from cross phasing will result in the remote sub-pump relay control circuits.
CONSOLE COMM UNI CATIO N
A specific Personality Module is needed for the Current Loop Communication, Generic Current Loop Communication, RS-485 Communication, and
Pulse Output for Fleet Management. The dispenser MUST have the correct module for the dispenser to communicate properly. Refer to the
sections below for detailed instructions.
Generic Current Loop and Bennett Current Loop
BENNETT CURRENT LOOP FUEL COMMU NIC ATION (121982)
To be used with Bennett 515 Box, TMX, Comdata, FIS-CAL, VeriFone Commander, Ruby, and Sapphire remote consoles. Bennett Current Loop uses
a 4-wire protocol.
Use the table below to determine how many wires your communication console requires and the connection points for this type of
communication. Note: Connections will vary depending on the dispenser model and options.
1-SIDED DISPENSER COMMUNICATION = 2 FIELD WIRES (REQUIRED)
Orange #18 Wire - Bennett Current Loop Communication (+positive)
Current Loop Personality Module
Yellow #18 Wire - Bennett Current Loop Communication (-negative)
Current Loop Personality Module