Positioning your projector 15
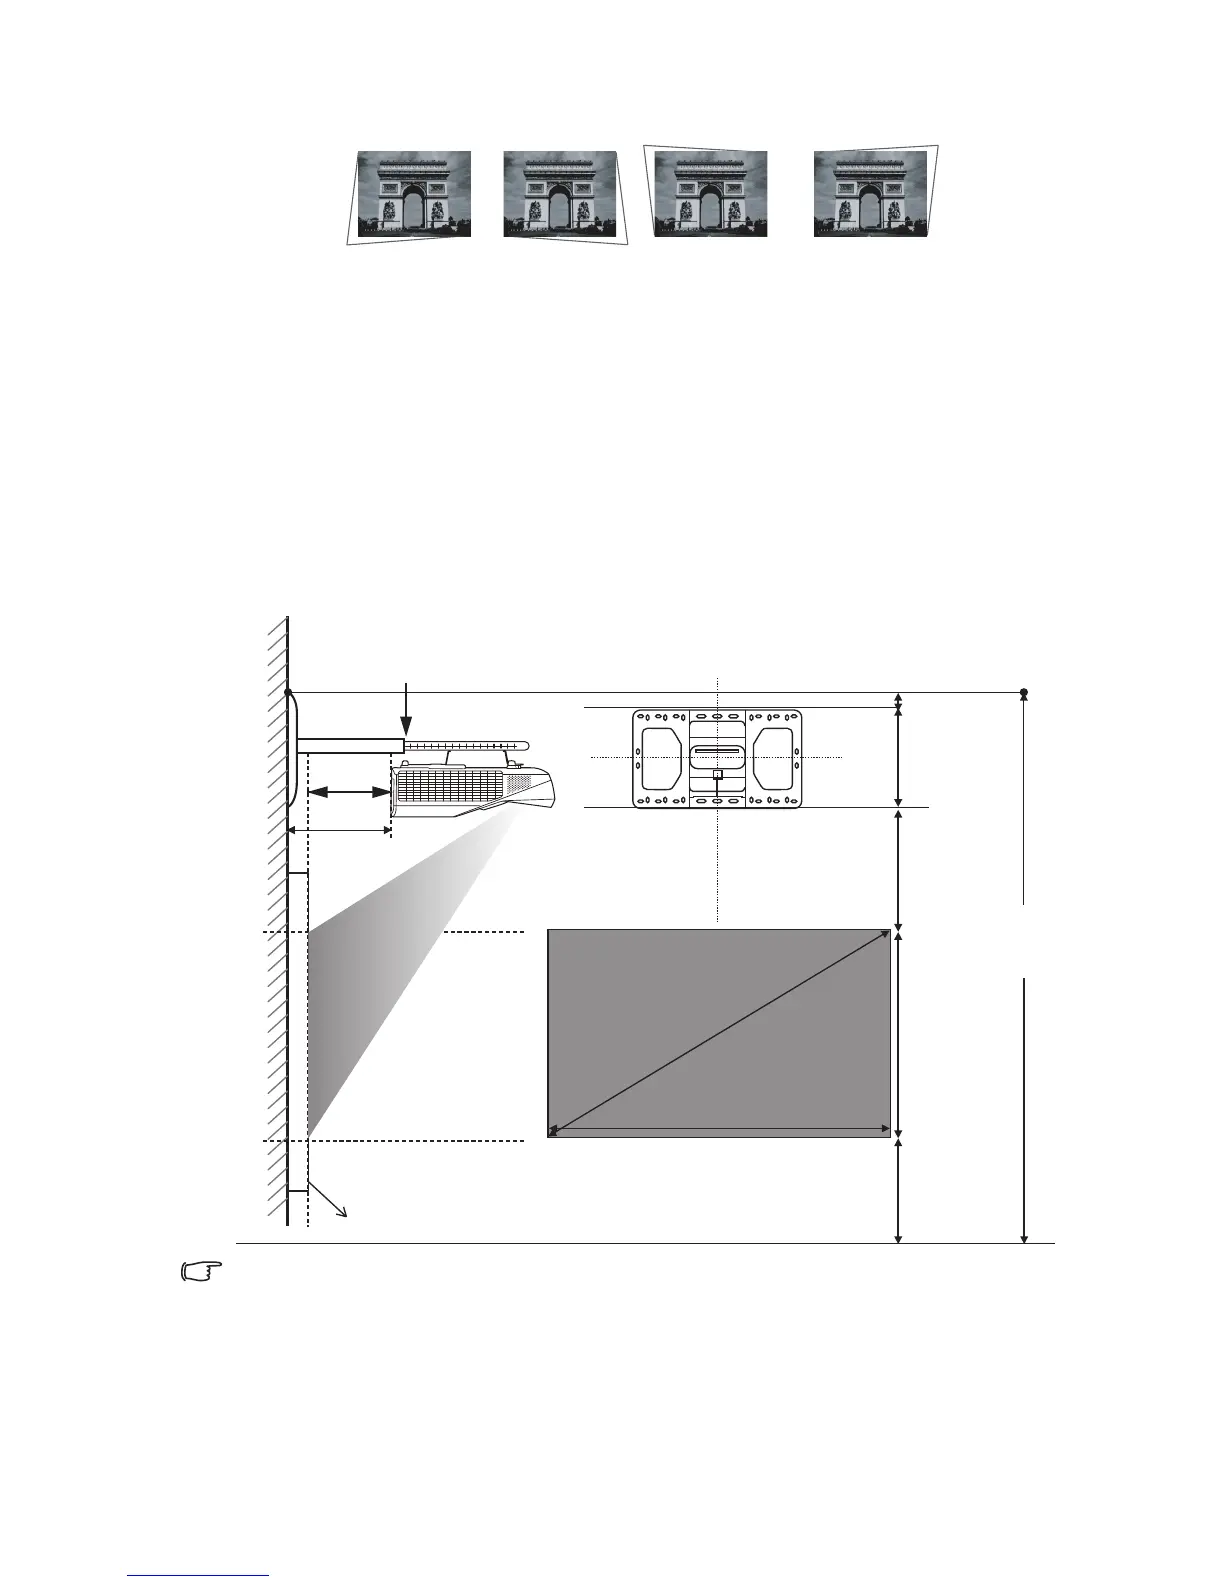
• Corner fit correction
• Surface fit correction
Set up your screen via the QUICK INSTALL hotkey on the remote control. You can
also go to the SYSTEM SETUP: Basic > Projector Installation menu after turning on
the projector. See "Using the menus" on page 25 on how to use the OSD menu.
Your room layout or personal preference will dictate which installation location you select.
Take into consideration the size and position of your screen, the location of a suitable
power outlet, as well as the location and distance between the projector and the rest of
your equipment.
Obtaining a preferred projected image size
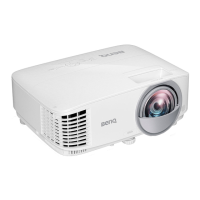
Projection dimensions
• Installation distance D is measured from the projector rear side to the wall surface, which is also indicated
on the scale of the wall mount.
• Projection distance a is measured from the projector rear side to the projection surface.
• Vertical offset V is measured from the bottom edge of the wall plate to the top edge of screen.