26
10.3 Packing/Seal Service
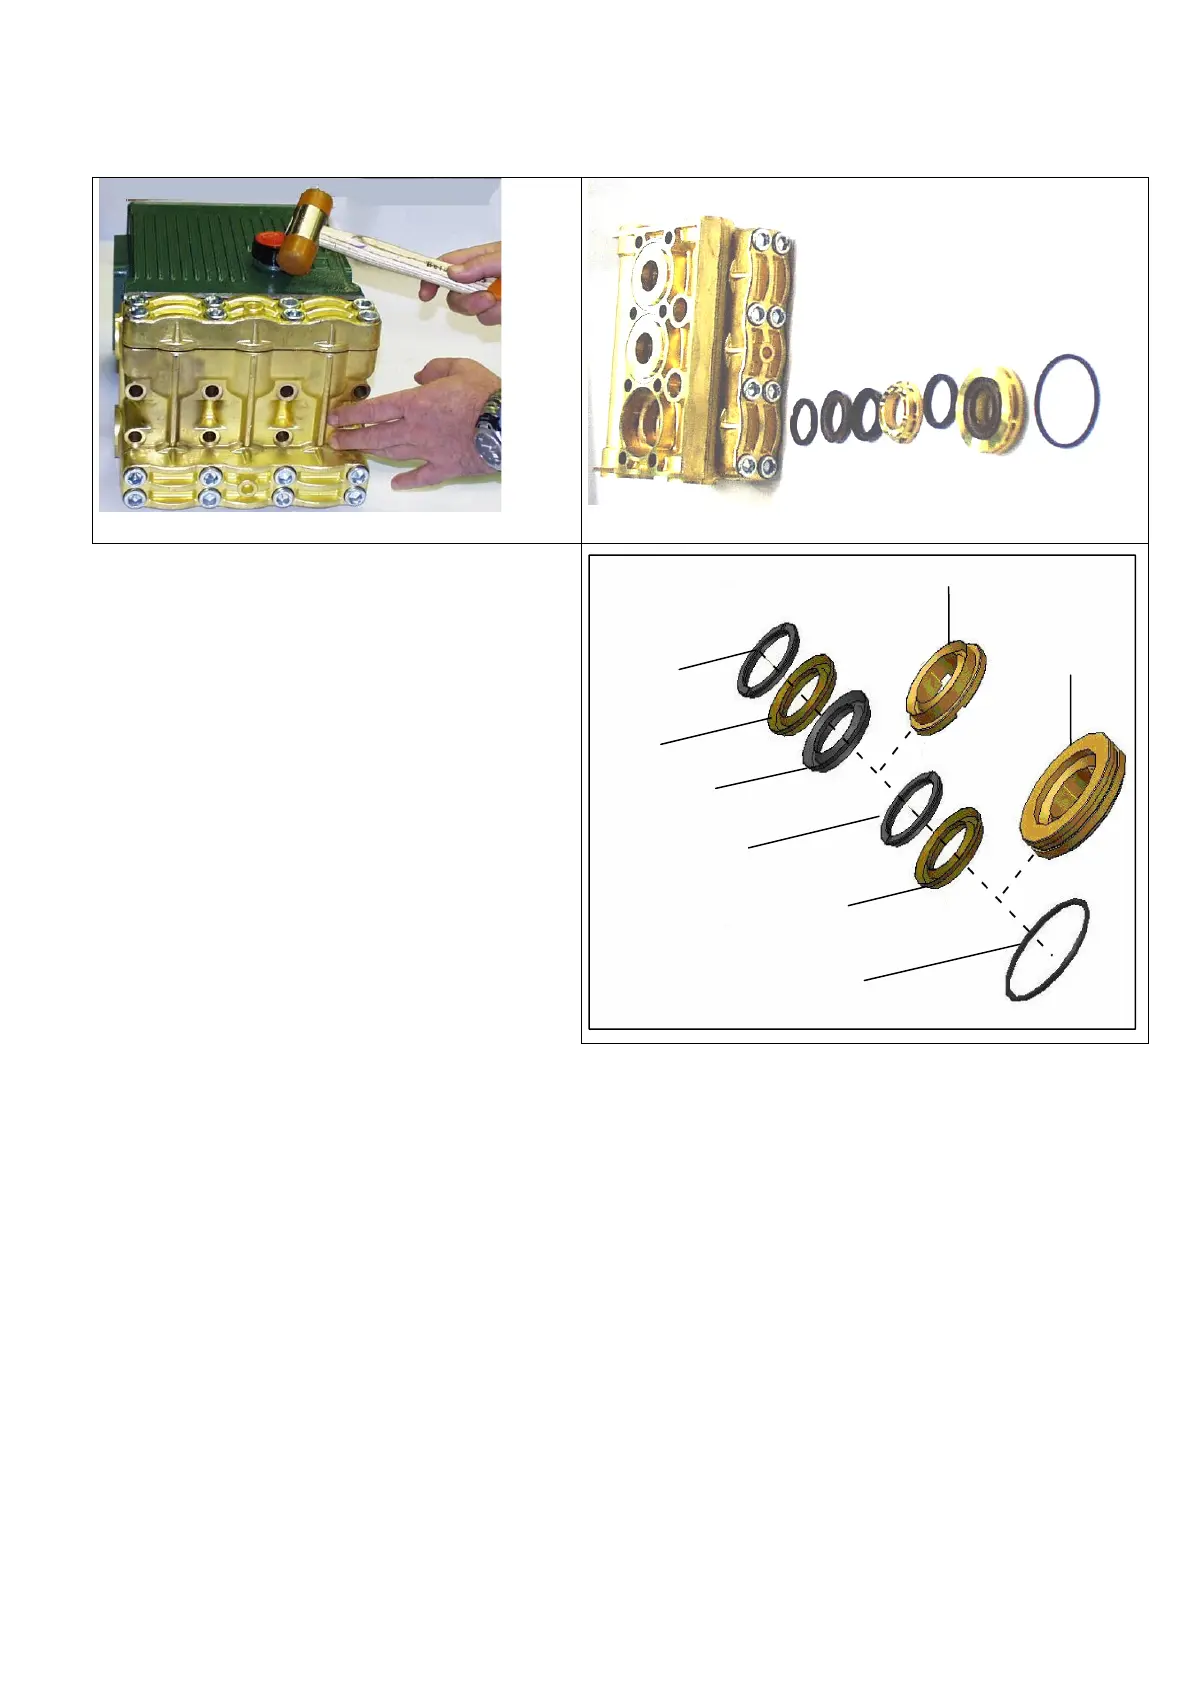
Disassembly
1. Using a 10mm allen spanner, remove
the head screws, and take out the
head with a plastic hammer.
2. Extract the packing assemblies using
a proper packing extractor (see table
at page nr. 29).
If you do not have an extractor you can use
expansion pliers and proceed as follows:
The picture represents a generic seals as-
sembly; while the proper composition is
shown for every pump model in the instruc-
tion sheet attached to the kit.
.
Assembly
1. Lubricate the new seal and install it in the head housing using the proper tool (see
chart. page 29) in order to not damage the external edge.
2. Replace the seals or the complete seals assembly as needed; consider that the
gland realized in brass must be substituted only in case of clear wear signs.
3. Lubricate the plungers with waterproof grease. Reassemble the head focusing on the
plungers and using a plastic hammer until it touches the crankcase.
Tighten the 8 M12 screws to 68 Nm torque.
Pump head
Thrust
ring
Front
seal
Antiextrusion
ring
Thrust
ring.
Back seal
O-ring
Front gland
Rear gland