24
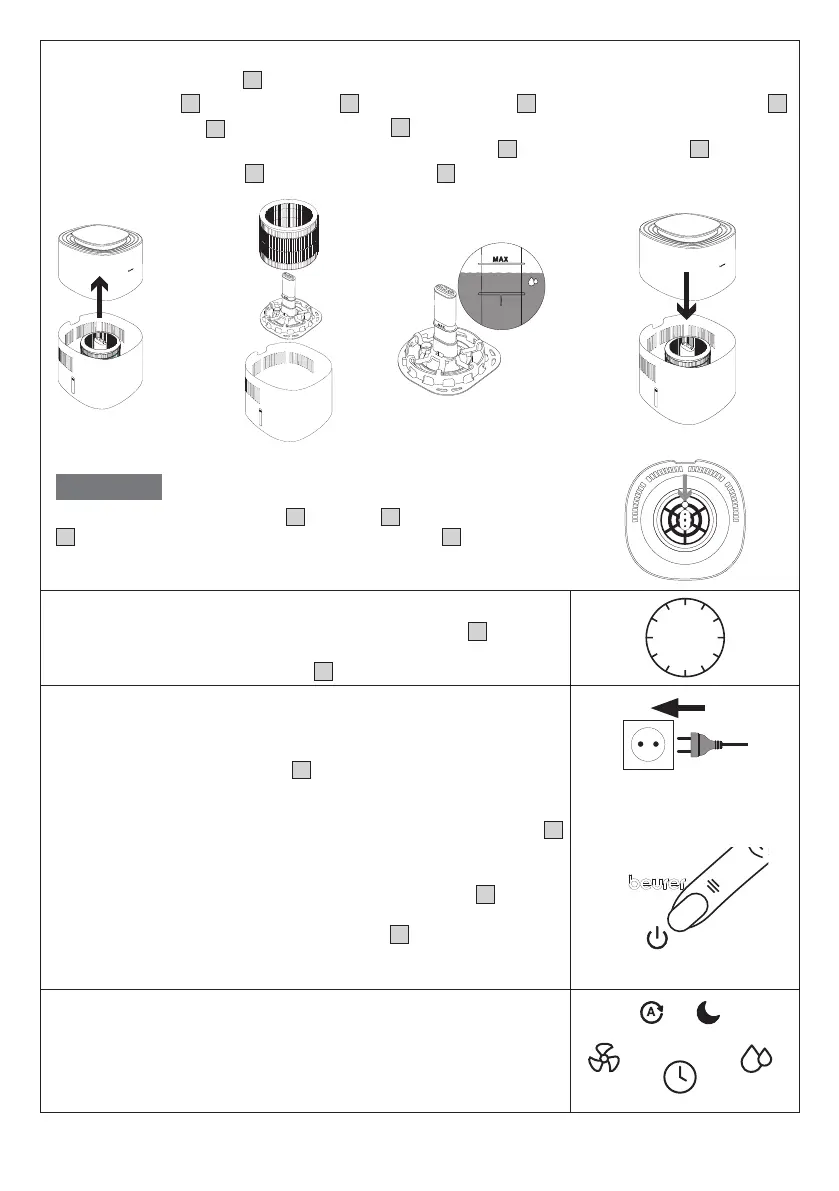
Step 2: Fill the water tank
1. Remove the motor unit
3
upwards.
2. Insert the filter
4
into the water tank
8
using the filter holder
7
including the water level sensor
5
.
3. Fill the water tank
8
up to the “Max.” mark
6
with cold tap water or distilled water. The water tem-
perature should not exceed 40°C. Do not fill the water tank
8
above the “Max.” mark
6
.
4. Now put the motor unit
3
back on the water tank
8
.
NOTICE
When inserting the filter holder
7
incl. filter
4
and water level sensor
5
, make sure that the round hole of the filter holder
7
is on the small
raised area on the bottom of the water tank.
Step 3: Allow the filter to become saturated
To ensure optimum humidification output, allow the filter
4
to absorb
water for 30 minutes before switching on the air humidifier (the water
level may fall below the “Max.” mark
6
during this process).
30
min
Step 4: Switch on the air humidifier
1.
Insert the mains plug into a suitable socket. Ensure that the cable
does not pose a trip hazard.
2.
Press the ON/OFF button
10
to switch on the air humidifi-
er. During initial use, the air humidifier will be in Auto mode
A (see section “7.3 Setting the fan speed/mode” ) by default.
The current relative humidity of the room is shown on the display
11
after a few seconds.
3. As soon as the water in the water tank is used up, the air humidifier
switches o automatically and the water tank indicator
20
lights up
on the control panel. If the water tank is empty, no humidity values
are shown. Now either refill the water tank
8
with water or switch
on the filter drying function as required (see section 8.1 on the filter
drying function).
Step 5: Set additional functions
You can now optionally set the following functions:
Target humidity, fan speed/mode and timer function.
For more information on the individual functions, see sections 7.2 to 7.4.
 Loading...