EasyManuals Logo

Biostar A620MP-E PRO User Manual

Biostar A620MP-E PRO
164 pages
To Next Page IconTo Next Page
To Previous Page IconTo Previous Page
Page #10 background imageLoading...
Page #10 background image
10 | Chapter 2: Hardware installaon
<TypeB>
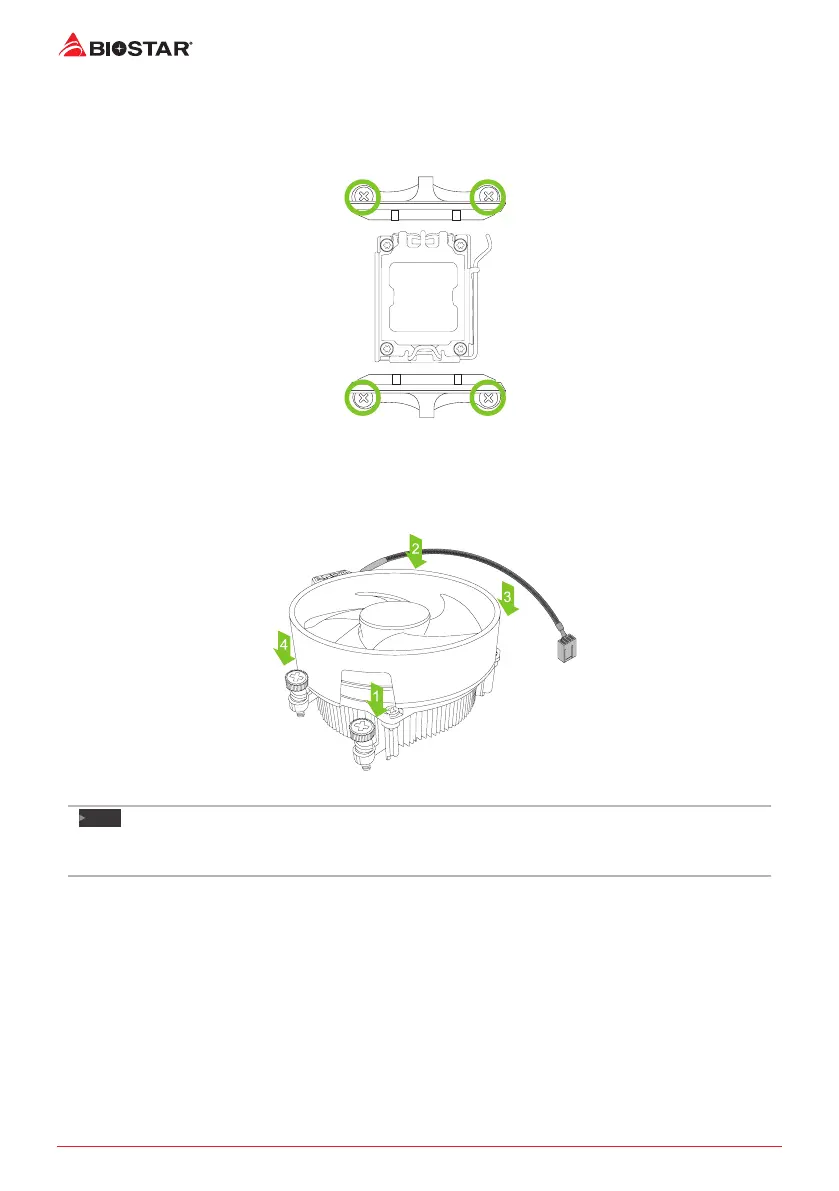
Step 1: Remove the heatsink and fan assembly bracket on the motherboard and keep the
cooler backplane under the motherboard.
Step 2: Place the heatsink and fan assembly on top of the installed CPU and make sure that the
fan cable is closest to the CPU fan connector. Please refer diagram to the following screw into
the screw hole in the order shown.
Note
» 
»
Do not forget to connect the CPU fan connector.
» 
»
For proper installaon, please kindly refer to the installaon manual of your CPU heatsink.

Table of Contents

Questions and Answers:

Question and Answer IconNeed help?

Do you have a question about the Biostar A620MP-E PRO and is the answer not in the manual?

Biostar A620MP-E PRO Specifications

General IconGeneral
Audio chipRealtek ALC897
Component forPC
Motherboard chipsetAMD A620
Audio output channels7.1 channels
Motherboard form factormicro ATX
Motherboard chipset familyAMD
Processor socketSocket AM5
Compatible processor seriesAMD Ryzen 5 7th gen, AMD Ryzen 7 7th Gen, AMD Ryzen 9 7th Gen
HDCPYes
DirectX version12.0
Parallel processing technology support-
Memory slots typeDIMM
Number of memory slots4
Supported memory typesDDR5-SDRAM
Maximum internal memory128 GB
Supported memory clock speeds4800, 5200, 5400, 5600, 6000 MHz
Wi-FiNo
LAN controllerRealtek RTL8125B
Ethernet interface type2.5 Gigabit Ethernet
USB 2.0 ports quantity2
USB 3.2 Gen 1 (3.1 Gen 1) Type-C ports quantity0
Cables includedSATA
Supported storage drive interfacesSATA III
Weight and Dimensions IconWeight and Dimensions
Width244 mm

Related product manuals