Chapter 2: Hardware installaon | 13
H510MHP
l
B560MHP
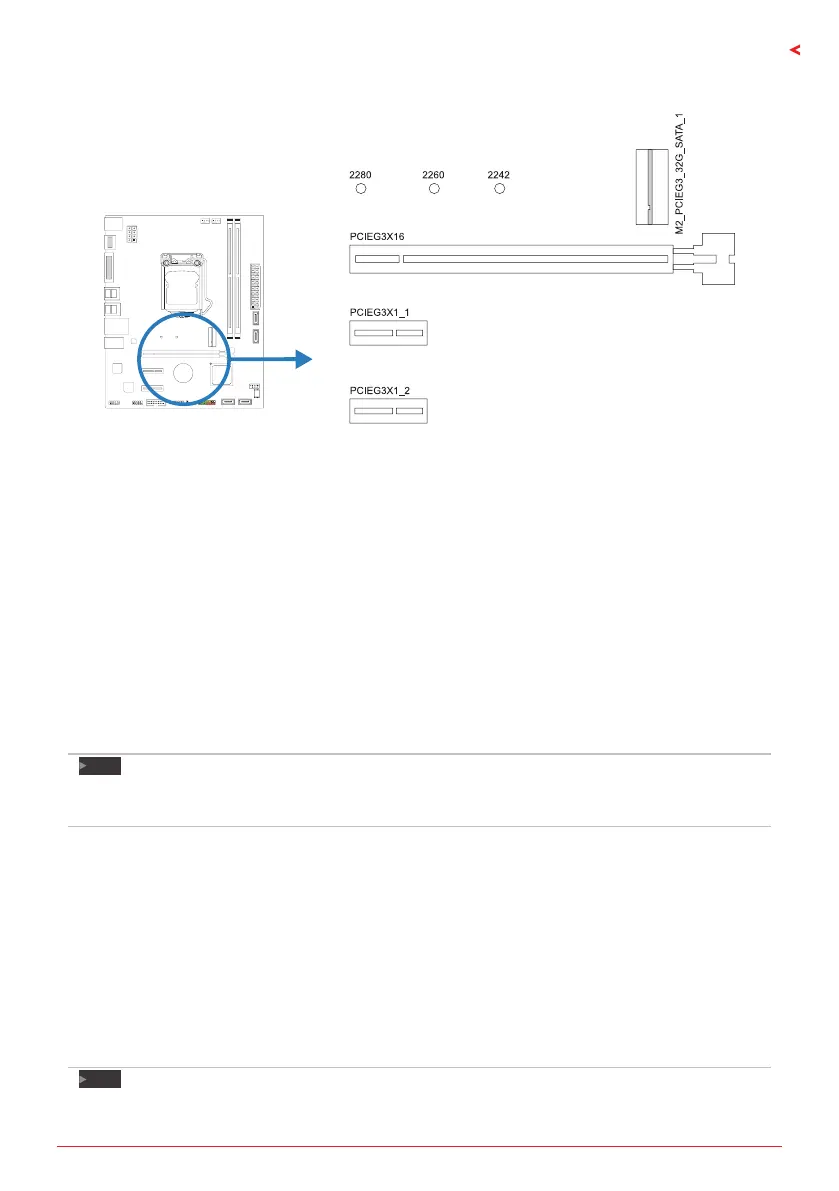
2.5 Expansion Slots
PCIEG3X16: PCI-Express Gen3/Gen4 x16 Slot
• PCI-Express 3.0 compliant.
The maximum bandwidth of the PCle slot 32GB/s
• PCI-Express 4.0 compliant.
The maximum bandwidth of the PCle slot 64GB/ss.
PCIEG3X1_1 ˴ PCIEG3X1_2: PCI-Express Gen3 x1 Slots
• PCI-Express 3.0 compliant.
• Data transfer bandwidth up to 1GB/s per direcon; 2GB/s in total.
M2_PCIEG3_32G_SATA_1: M.2 (M Key) Socket
• The M.2 slot supports M.2 Type 2242/2260/2280 SSD module. When installing M.2 SSD
module, please place the screw and hex pillar to correct posion.
• Supports M.2 SATA III (6Gb/s) module and M.2 PCI Express module up to
Gen3x4 (32Gb/s).
Note
»
WhenusingSATASSDmoduleonPCIE-M2_1slot,theSATA_1connectorwillbedisabled.
»
ThePCle4.0onlydependsonRocketLakeCPUs
Install an Expansion Card
You can install your expansion card by following steps:
• Read the related expansion card’s instrucon document before install the expansion card into the
computer.
• Remove your computer’s chassis cover, screws and slot bracket from the computer.
• Place a card in the expansion slot and press down on the card unl it is completely seated in the
slot.
• Secure the card’s metal bracket to the chassis back panel with a screw. (This step is only
for installing a VGA card.).
• Replace your computer’s chassis cover.
• Power on the computer, if necessary, change BIOS sengs for the expansion card.
• Install related driver for the expansion card.
Note
»
PleasebenotethatyouwillneedtouseM2typescrewdriverifyouwanttoinstalloruninstallthe
screw.Itisrecommendednottouseascrewdriverthatdoesnotmeetthespecicaons,otherwise
 Loading...