7171
Controlling Videohub with Hardware
Daisy Chaining Multiple GPI and Tally Interfaces
The GPI and Tally Interface supports 8 GPIs and 8 GPOs at a time, which should be enough for most live
television situations. However, if you have more than 8 cameras then you may want to daisy chain a second
or third GPI and Tally Interface.
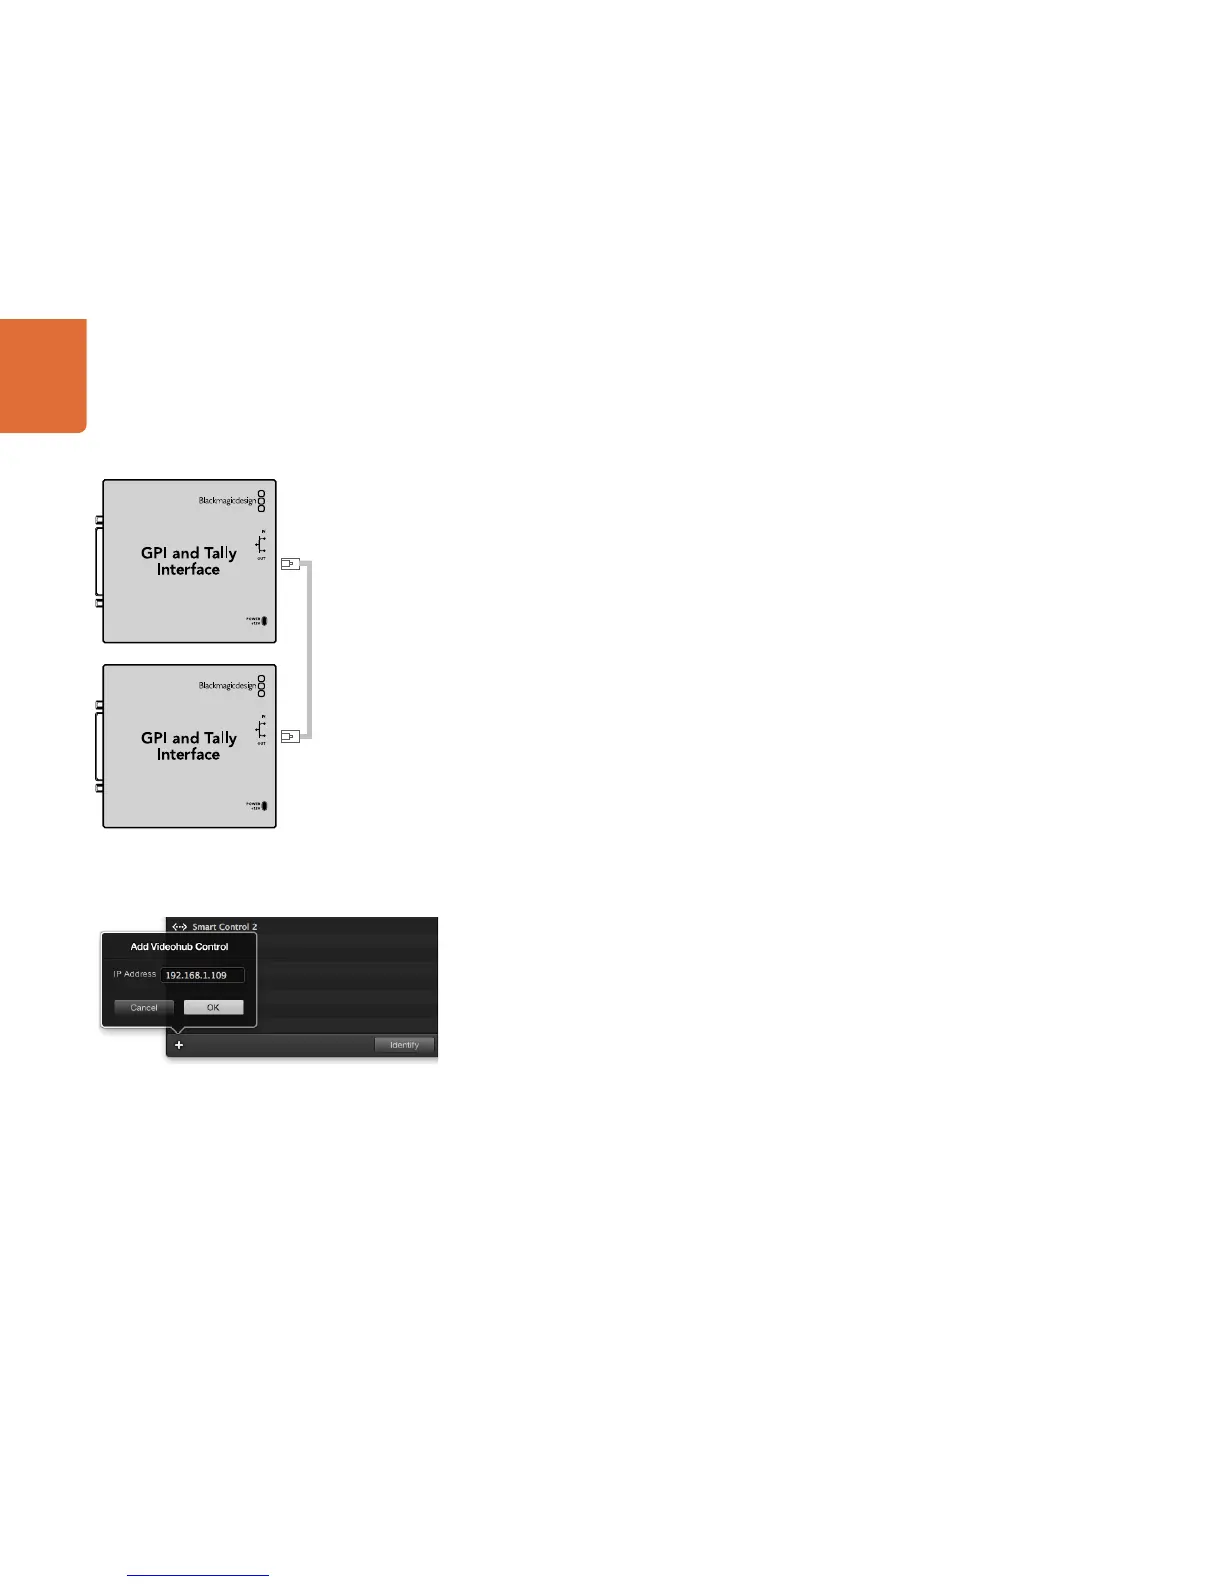
The GPI and Tally Interface has two ethernet ports so that you can connect one port to a Videohub and use
the other port to link other GPI and Tally Interfaces together.
Step 1. Connect power to the first GPI and Tally Interface.
Step 2. Connect a standard RJ45 ethernet cable from your Videohub or network to the ethernet IN port
on the GPI and Tally Interface.
Step 3. Connect power to the second GPI and Tally Interface.
Step 4. Connect a standard RJ45 ethernet cable from the ethernet OUT of the first GPI and Tally Interface
to the ethernet IN port on the second GPI and Tally Interface.
This can be repeated for as many GPI and Tally Interfaces as you need as long as power is supplied to all
units in the chain.
Sometimes it can get confusing to know which GPI and Tally Interface you are working with when you have
several connected. Select the GPI and Tally Interface in the Videohub Control Panels pane and click the
Identify button. The LED next to the ethernet IN port on the selected device will light up.
Adding a GPI and Tally Interface Over a Network
You may want to configure a second GPI and Tally Interface but it may be in another location and only
accessible over a network. You can add it to your list manually by entering its IP address into the Videohub
Control Utility.
If you do not know the IP address of the GPI and Tally Interface you want to add, connect it to a computer
with USB, open the Videohub Control Utility and note down the IP address in the Network Settings tab.
If you do not have access to the unit because it is in another location, you can find it on the network using
the Bonjour browser. This application will show you all the devices on your network and will give you the IP
address of the GPI and Tally Interface you wish to add.
Step 1. Press the + (add device) button at the bottom of the Videohub Control Panels pane.
Step 2. Type in the IP address of the GPI and Tally Interface and press OK.
Step 3. The second GPI and Tally Interface will appear in the list with any other devices that are connected
to the Videohub.