ENGLISH
7
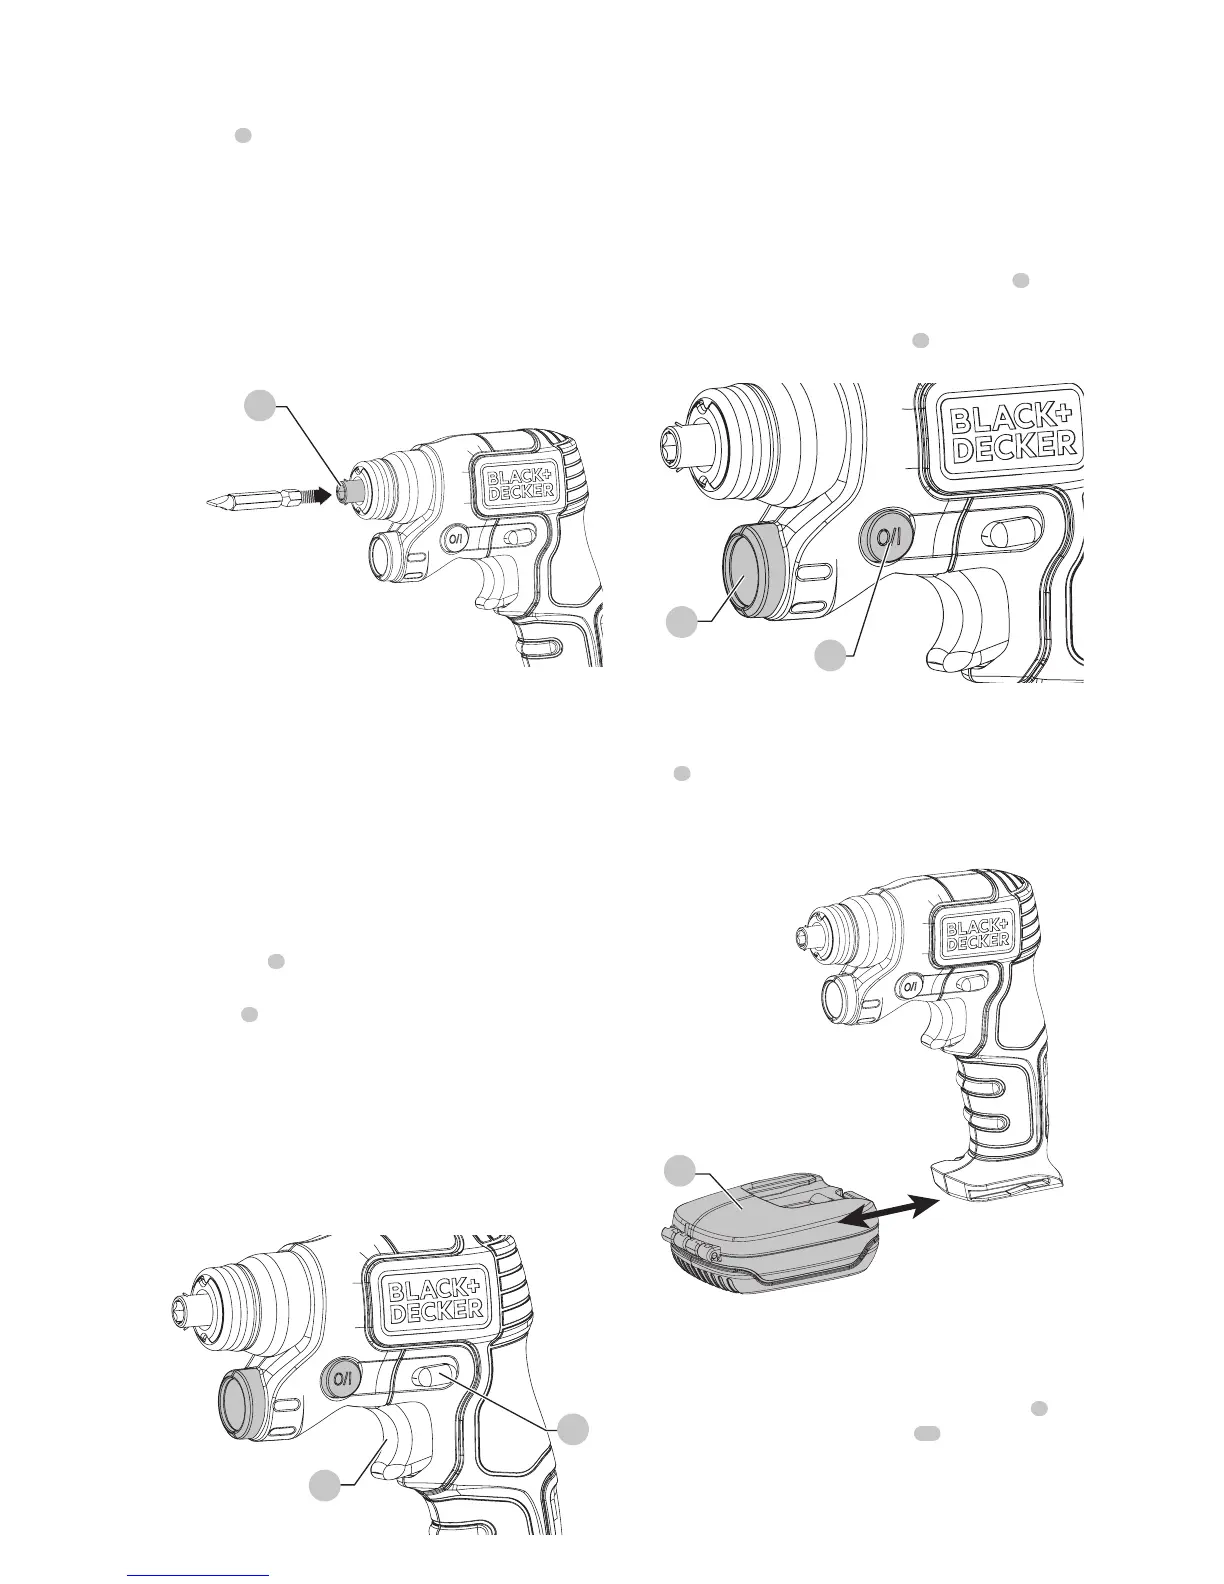
INSERTING AND REMOVING BITS (FIG. C)
• To install a bit, insert it into the cavity in the hex
spindle
3
as shown in figureC.
• To remove the bit, pull it straightout.
• For bit tips, use a bit tipextender.
NOTE: Only hex end bits will fit in spindle
WARNING:
• Do not use screwdriver as a pry bar in anyposition.
• To avoid screwdriver being turned on accidentally,
do not carry in yourpocket.
Fig. C
3
OPERATION
WARNING: To reduce the risk of serious personal
injury, turn unit off and lock the trigger off
before making any adjustments or removing/
installing attachments or accessories. An
accidental start-up can causeinjury.
TRIGGER SWITCH & FORWARD/REVERSE/
LOCK-OFF SLIDER (FIG. D)
• The drill is turned ON and OFF by pulling and releasing
the trigger
1
.
• The forward/reverse/lock-off slider in the center
postion
2
determines the direction of the tool and also
serves as a lock off button.
• To select forward rotation, release the trigger and depress
the forward/reverse/lock-off slider slider to the left.
• To select reverse, slide the forward/reverse/lock-off
slider to theright.
NOTE: When changing the position of the forward/reverse/
lock-off slider, be sure the trigger is released.
Fig. D
2
1
LED WORK LIGHT (FIG. E)
CAUTION: Do not stare into the work light.
Serious eye injury couldresult.
CAUTION: When using the work light
for purposes other than screwdriving or
drilling be sure to remove all accessories.
Unused accessories could cause injury or
propertydamage.
This screwdriver is equiped with an LED work light
4
.
• The LED work light is turned ON and OFF by pressing
the LED work light On/Off switch
5
.
Fig. E
5
4
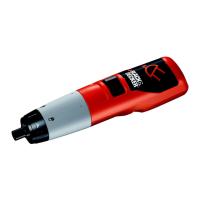
STORAGE CASE (FIG. F,G)
This screwdriver is equiped with an detachable storage
case
9
to help make the jobeasier.
• To install the storage case, slide it into the foot of the
screwdriver, as shown in figureF.
Fig. F
4
• To remove the the storage case, pull it straight out from
the foot of thescrewdriver.
• Hold the case in the palm of your hand or place it on a
level surface. You can then open the storage case
9
by
unlatching the storage case latch
10
and lifting up the
case lid, as shown in figureG.
• When finished, close the case lid and latch the storage
case latch to secure the case lid fromopening.