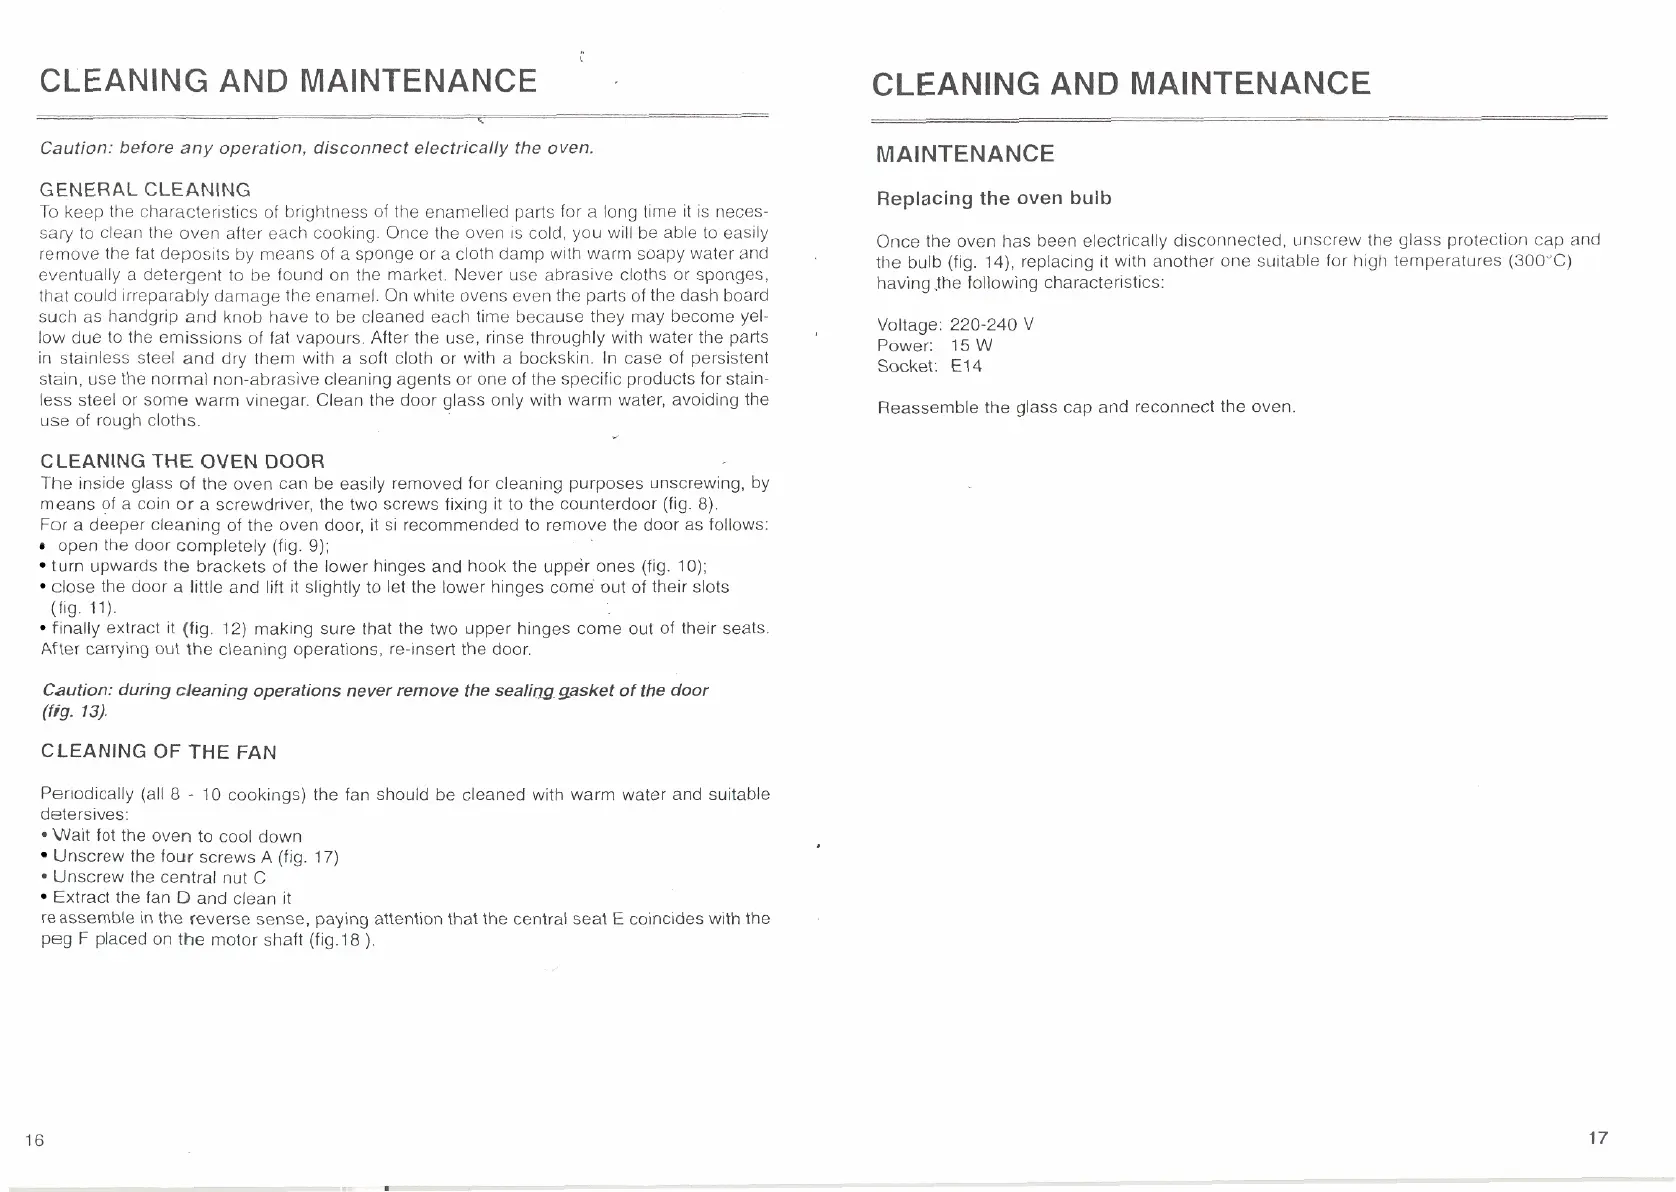
CLEANING
AND
MAINTENANCE
.
Caution: before any operation, disconnect electrically the oven.
GENERAL CLEANING
To keep the characteristtcs of br~ghtness of the enamelled park for a long time it is neces-
sary to clean the oven after each cook~ng. Once the oven is cold, you will be able to easily
remove the fat deposits by means of a sponge or a cloth damp with warm soapy water and
eventually a detergent to be found on the market. Never use abrasive cloths or sponges,
that could irreparably damage the enamel. On white ovens even the parts of the dash board
such as
handgrip and knob have to be cleaned each time because they may become yel-
low due to the emissions of fat vapours. After the use, rinse throughly with water the parts
in stainless steel and dry them wlth a soft cloth or with a bockskin. In case of persistent
stain, use the normal non-abrasive cleaning agents or one of the specific products for stain-
less steel or some warm vinegar. Clean the door glass only with warm water, avoiding the
use of rough cloths.
CLEANING
THE
OVEN DOOR
The inside glass of the oven can be easily removed for cleaning purposes unscrewing, by
means of a coin or a
screwdriver,
the two screws fixing it to the counterdoor (fig. 8).
For a deeper cleaning of the oven door, it si recommended to remove the door as follows:
open the door completely (fig.
9);
turn upwards the brackets of the lower hinges and hook the upper ones (fig. 10);
close the door a little and lift it sliahtlv to let the lower hinaes come out of their slots
",
"
(fig. 11).
finally extract it (fig. 12) making sure that the two upper hinges come out of their seats.
After carrying out the cleaning operations, re-insert the door.
Caution:
during
cleaning operations never remove the sealif~ggasket of the door
(fig.
13).
CLEANING
OF
THE
FAN
Periodically (all
8
-
10 cookings) the fan should be cleaned with warm water and suitable
detersives:
'Wait lot the oven to cool down
Unscrew the four screws
A
(fig. 17)
Unscrew the central nut
C
Extract the fan
D
and clean it
reassemble in the reverse sense, paying attention that the central seat
E
coincides with the
peg
F
placed on the motor shaft (fig.18
).
CLEANING
AND
MAINTENANCE
MAINTENANCE
Replacing
the
oven
bulb
Once the oven has been electrically disconnected, unscrew the glass protection cap and
the bulb (fig. 14),
replacing
it with another one su~table for high temperatures (300°C)
having .the following characteristics:
Voltage: 220-240 V
Power: 15
W
Socket: El4
Reassemble the glass cap and reconnect the oven