ME-GO SERIES SLIDING GATE OPENER USER MANUAL
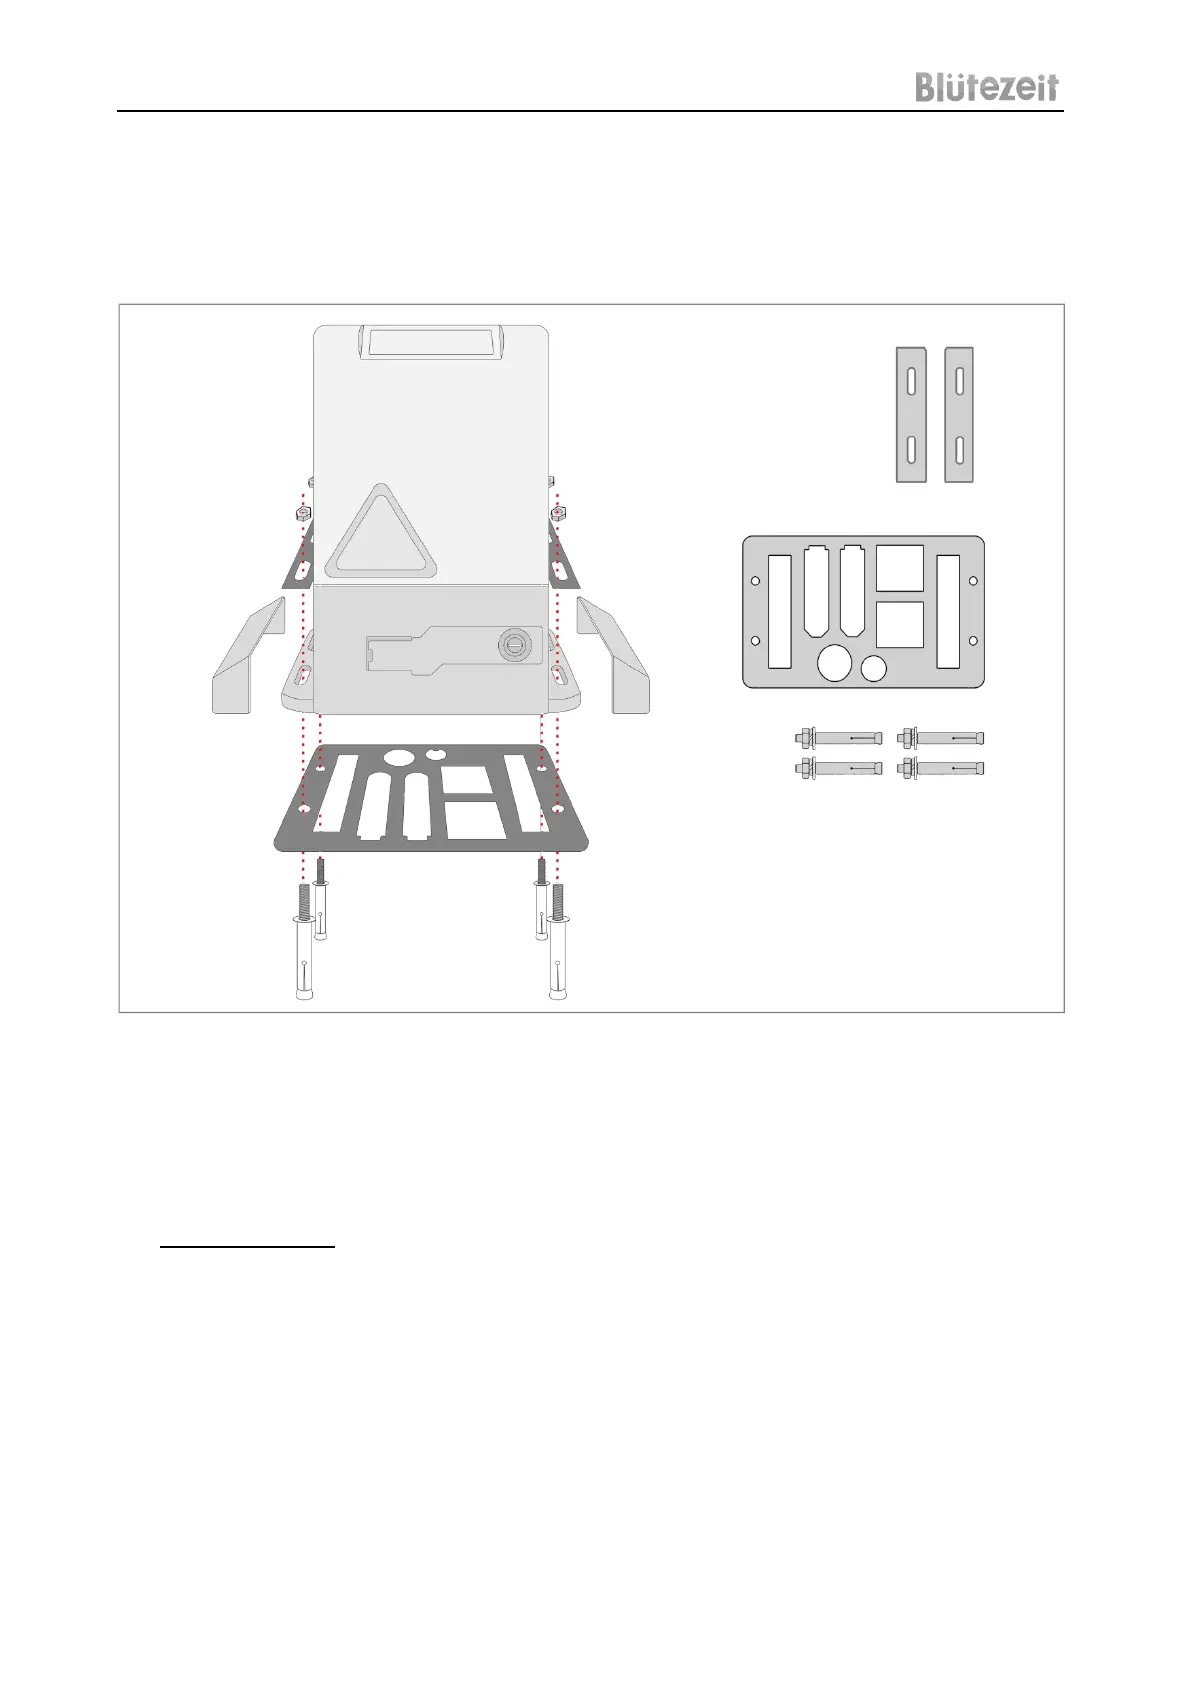
b. Use a marker pen to mark the positions for the 4 holes. Remove the nuts from the bolts and
securely install the bolts⑥ into the ground.
c. Place the gate opener onto the bolts protruding from the ground. Attach the metal plates⑤ to
the two sides of the opener, and tighten the nuts to secure the opener base.
d. Reattach the "L" plate covers to the two sides of the opener.
Important Notice for Main Engine Installation
• Before installing the main engine, remove the cover and store the relevant fasteners securely.
• Prepare a power supply cable with a minimum of 3 cores to connect the mounting plate to the
main engine. Adjust the cable length as needed for installation.
• Unlock the main engine before installation by inserting the manual key and opening the clutch
until it rotates 90° clockwise (Fig.2). Then, turn the output gear to ensure smooth rotation.
3. Rack Installation (Fig.6)
a. Put the rack on the gear of the machine to ensure the gear teeth and rack are fully engaged.
b. Confirm the position of the rack on the gate using a level and ensure it is horizontally aligned.
The space between the rack and gear should be approximately 1-2mm for proper alignment.
c. Manually move the gate to check if the rack is correctly resting on the gear teeth.
d. Once aligned, weld the first mounting nut⑫ onto the gate at the appropriate position.
e. Double-check the alignment again before welding the second nut onto the gate.
f. Position the next rack element adjacent to the previous one and repeat the process for
alignment and welding of the nuts.
g. Continue this process until the entire gate is fully covered with the racks.