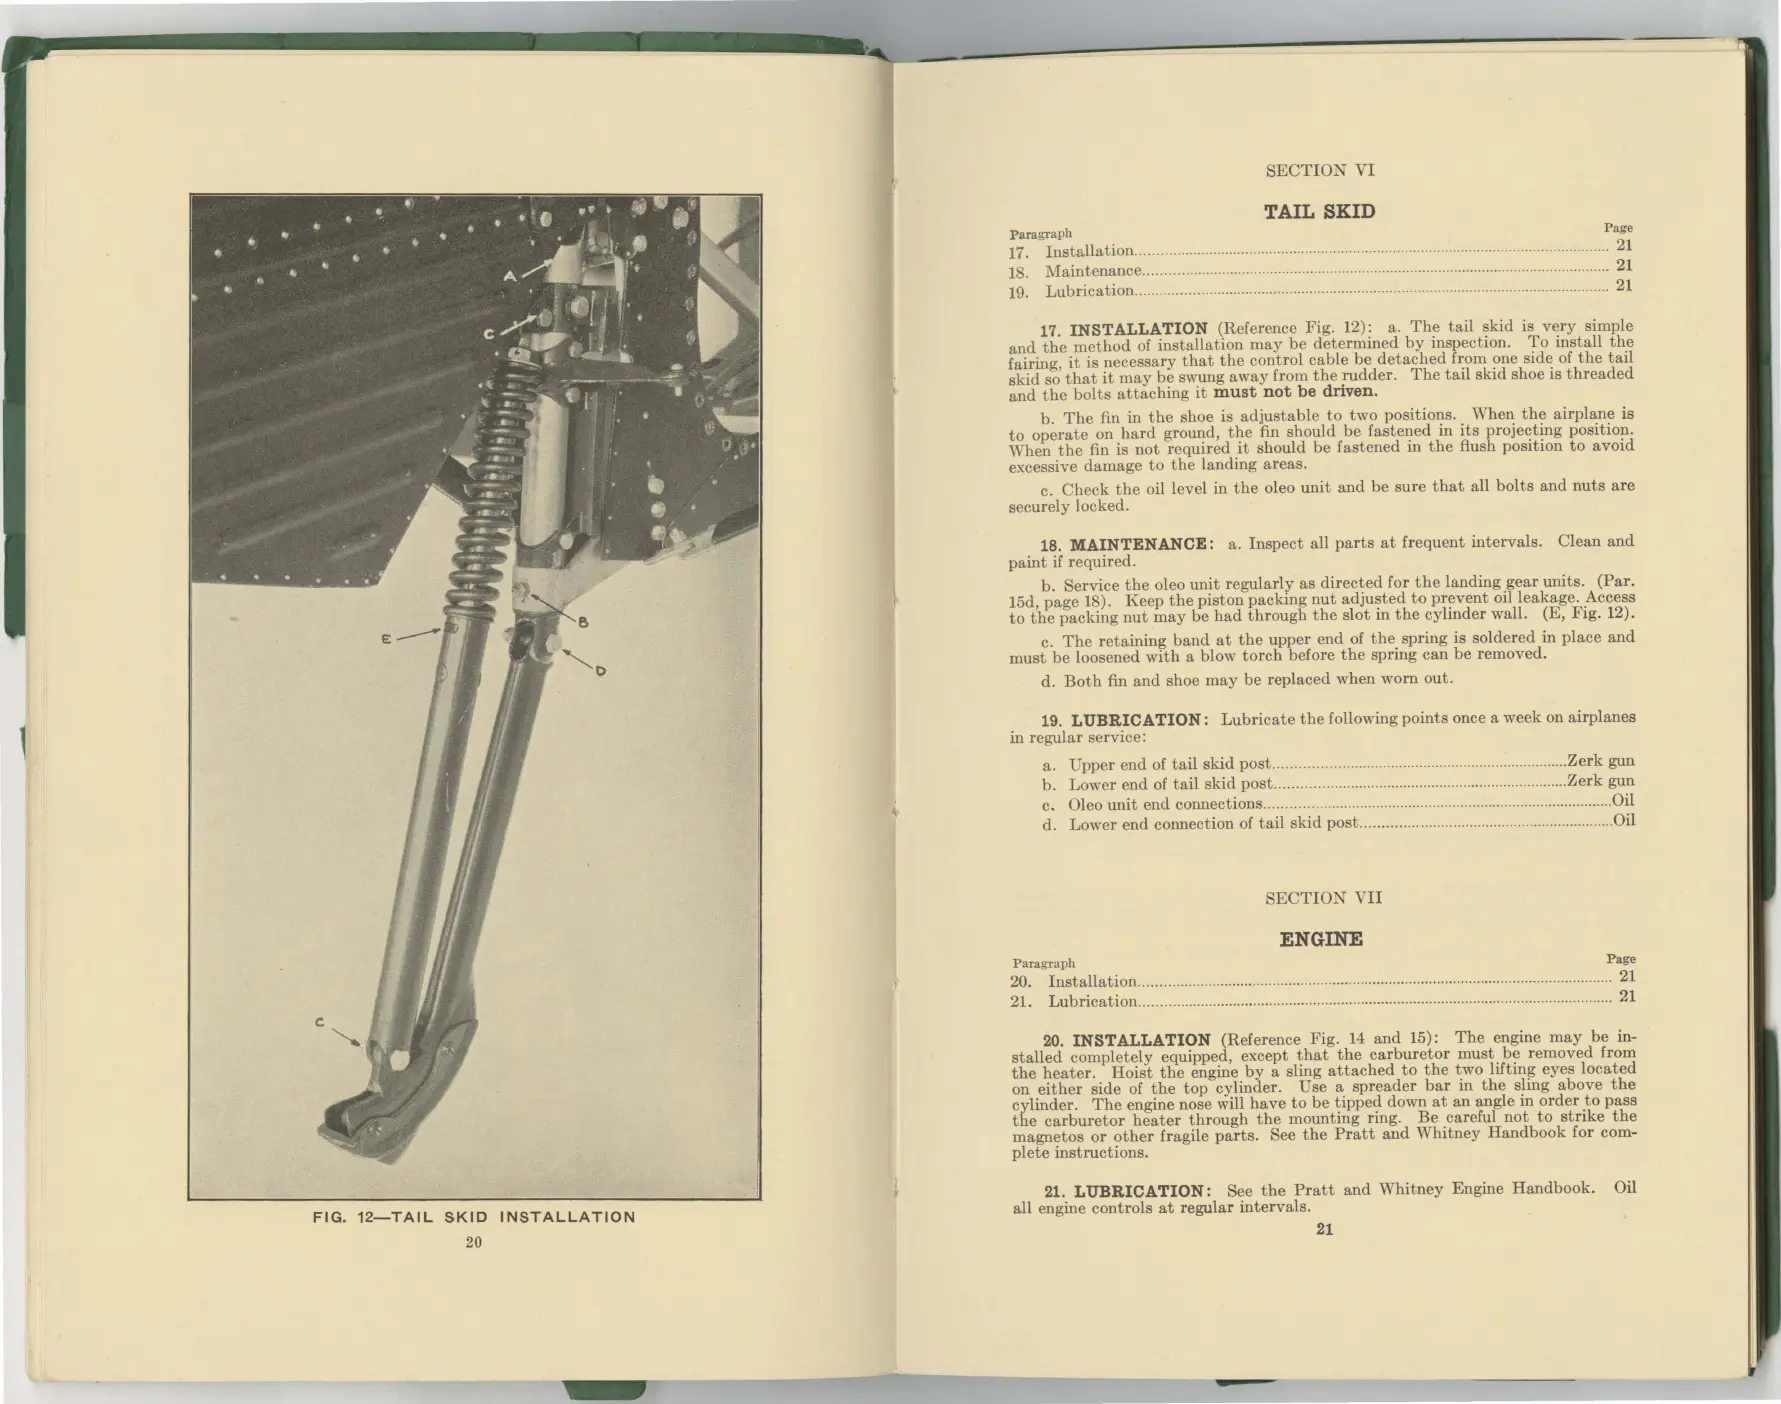
FIG.
12-TAIL
S•
KID
INSTALLATION
20
SECTION
VI
TAIL SKID
Paragraph
Page
17. Installation.............. ..........
..
......
..................... ................. .
..
21
18. Maintenance............................................ . . . . . . .
..
. . . . . . . . . . .
..
. . . . .
..
.
.......
..
. . . . . .
..
.
..
21
19. Lubrication.............................................. ............................. . .........
.....
..
.. ....
...
.....
21
17. INSTALLATION (Reference
Fig.
12): a.
The
tail
skid
is
very
simple
and
the
method
of
installation
may
be
determined
by
inspection.
To
install
the
fairing,
it
is
necessary
that
the
control
cable
be
detached
from one
side
of
the
tail
skid
so
that
it
may
be
swung
away
from
the
rudder.
The
tail
skid
shoe
is
threaded
and
the
bolts
attaching
it
must
not
be driven.
b.
The
fin
in
the
shoe is
adjustable
to
two
positions.
When
the
airplane
is
to
operate
on
hard
ground,
the
fin
should
be
fastened
in
its
projecting
position.
When
the
fin is
not
required
it
should
be
fastened
in
the
flush
position
to
avoid
excessive
damage
to
the
landing
areas.
c.
Check
the
oil level
in
the
oleo
unit
and
be
sure
that
all
bolts
and
nuts
are
securely
locked.
18. MAINTENANCE:
a.
Inspect
all
parts
at
frequent
intervals.
Clean
and
paint
if
required.
b.
Service
the
oleo
unit
regularly
as
directed
for
the
landing
gear
units.
(Par.
15d,
page
18).
Keep
the
piston
packing
nut
adjusted
to
prevent
oil
leakage.
Access
to
the
packing
nut
may
be
had
through
the
slot
in
the
cylinder
wall. (E,
Fig.
12).
c.
The
retaining
band
at
the
upper
end
of
the
spring is
soldered
in
place
and
must
be
loosened
with
a
blow
torch
before
the
spring
can
be
removed.
d.
Both
fin
and
shoe
may
be
replaced
when
worn
out.
19. LUBRICATION:
Lubricate
the
following
points
once a
week
on
airplanes
in
regular
service:
a.
Upper
end
of
tail
skid
post
..............................
....
......................................
Zerk
gun
b.
Lower
end of
tail
skid
post
...
..
..
.........
..
..
.....................
..
...........
...
...............
Zerk
gun
c. Oleo
unit
end
connections ...................................................................................... Oil
d.
Lower
end
connection of
tail
skid
post
............................................................. Oil
SECTION
VII
ENGINE
Paragraph
Page
20.
Installation
......................................................................................................................
21
21.
Lubrication
...........................................................................................
....
...
.................... 21
20. INSTALLATION (Reference Fig. 14
and
15):
The
engine
may
be
in-
stalled
completely
equipped, except
that
the
carburetor
must
be
removed
from
the
heater.
Hoist
the
engine
by
a sling
attached
to
the
two
lifting
eyes
located
on
either
side
of
the
top
cylinder.
Use a
spreader
bar
in
the
sling
above
the
cylinder.
The
engine nose will
have
to
be
tipped
down
at
an
angle
in
order
to
pass
the
carburetor
heater
through
the
mounting
ring.
Be
careful
not
to
strike
the
magnetos
or
other
fragile
parts.
See
the
Pratt
and
Whitney
Handbook
for com-
plete
instructions.
21. LUBRICATION: See
the
Pratt
and
Whitney
Engine
Handbook.
Oil
all engine
controls
at
regular
intervals.
21