seconds. The main LED will flash once at 8 seconds, and again at 15 seconds. Release the button after
the second flash.
Wireless Communication
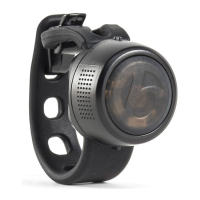
The light is shipped with ANT+ and Bluetooth wireless connectivity enabled. To disable, with the light
off, press and hold the power button for 15 seconds. The main LED will flash once at 8 seconds, and
again at 15 seconds. Release the button after the second flash.
NOTE: The status LED flashes blue every 15 seconds when wireless is enabled.
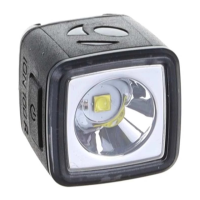
Pairing to the Transmitr Remote, Bontrager Garmin Edge® GPS computer or
select Garmin Edge® computers
The Transmitr Remote (or select Garmin Edge computers, sold separately) allows remote control of
the light. This feature is only available on the Ion Pro RT, Ion 200 RT, and the Flare RT as well as other
compatible Transmitr lights.
For more complete instructions, refer to the Transmitr manual at trekbikes.com. For Garmin related
instruction and a complete listing of compatible Edge devices visit support. garmin.com.
Before starting, place the remote and all lights within a small area. Move 15 feet from other Transmitr
/ ANT+ compatible lights to prevent unintentional pairing. If a light is unintentionally paired, restart
the pairing process at the beginning.
NOTE: All pairings must be done in a single session. After pairing is finished, pairing any additional
lights will require that you repeat the entire pairing procedure.
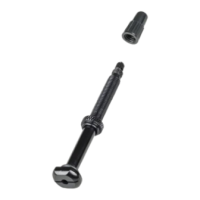
Place the light close to the Transmitr Remote (within 15cm / 6in).
Quick-press the power button on the light to turn it on, then quick-press to turn it off again.
NOTE: After completing this step, do not press the power button on the light again until pairing is
complete.
Press-and-hold the center button on the Transmitr Remote for at least 8 seconds. When the
corner buttons flash, release the center button.
While the remote searches for a light, its center button flashes red. When the Transmitr Remote
finds a light, the center button on the remote will change from red to green, and the found light
will flash.
While the found light is still flashing, quick-press the button on the Transmitr Remote to which you
would like to pair the light. The selected button will glow, and the found (paired) light will stop
flashing and turn off. NOTE: After the pairing, the
center button on the remote will flash red until the Transmitr Remote finds another available light.
Repeat Step 4 and Step 5 for each additional light to be paired.
To exit pairing
When all lights are paired, quick-press the center button on the remote. The
button will stop flashing and turn off.
To verify pairing
1. Quick-press the center button on the remote to turn on all paired lights.
2. Press-and-hold the center button to turn off all of them.
3. Turn on each light individually. Quick-press each paired corner button on the
remote to turn on the individual light(s).
4. Press-and-hold the same corner button to turn off the light.
Using the Transmitr Remote