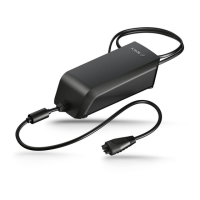
1 689 975 288 2017-06-30| Robert Bosch GmbH
22 | BAT 690 | Assembly / disassemblyen
4. Assembly / disassembly
DANGER - Risk of electric shock from live
parts!
¶ Unplug the mains plug or disconnect the
BAT 690 from the mains before opening.
¶ Work on electrical systems or equipment
must only be performed by qualified
electricians or trained personnel under
the guidance and supervision of an
electrician.
¶ Observe the electrical engineering safety
regulations.
4.1 Replacing the housing caps
1. Remove Torx screws from the housing caps.
2. Replace housing caps (Fig. 4, item 1).
3. Secure new housing caps with the Torx screws
supplied to BAT 690.
! Use only the Torx screws provided. Other screws
can damage the BAT 690.
4510027-10_shd
1
1
Fig. 4: Replacing the housing caps
1 Housing caps
4.2 Replacing the top part of housing
4.2.1 Removing the top part of housing
1. Remove housing caps (see sec. 4.1).
2. Remove Torx screws from housing.
4510027-11_shd
Fig. 5: Remove the Torx screws
i The top part of housing is connected to the lower
part of housing by a PE cable (Fig. 6, item 1). The
M1 circuit board is connected to power module 1
(Fig. 6, item 3) by a connecting cable (Fig. 6, item 2)
(see sec. 6).
3. Carefully lift off top part of housing.
1
2
4510027-12_shd
3
4
Fig. 6: Remove top part of housing
1 PE cable
2 Connecting cable M1 to power module 1
3 Power module 1
4 Power module 2
4. Disconnect PE cable from lower part of housing.
5. Remove connecting cable from circuit board M1 on
power module 1.
 Loading...