EasyManua.ls Logo

Bosch BDU450 CX User Manual

Bosch BDU450 CX
8 pages
To Next Page IconTo Next Page
Page #1 background imageLoading...
Page #1 background image
156 | DriveUnit DriveUnit | 157
Work steps
X Allenkeysize8
X Allenkeysize5
X Torquewrench
X SpidertoolforBDU3xx,
availablefromtheBosch
eBikeB2Bonlinestore
X Bearinggreaseandbrush
Tools
X Lockring: 30 Nm
Tightening torques
Installing Drive Unit (BDU310 /
350 / 365)
Fit the spider to the
Drive Unit
1. Mounttheleft-sidecrankarm.
Todothis,greasethebottom
bracketshaftandthentighten
crankboltM10x1.Usea
torquewrenchtotightenitas
speciedbythecrankmanu-
facturer
Makesurenottomix
uptheleftandright
cranks!Pedalscan
comelooseifassem-
bledincorrectly
2. Whenchangingthechainring:
Fitanewchainring
tothe
spider
using4chainring
screws
3. Presschainring alongwith
themountedspider
onto
thecleanedandlightlygreased
interlock
.Thespidermust
beonthesidefacingaway
fromthebike
Donotplaceany
spacers,sealsorspacer
ringsbetweenthemotor
andthespider/chain-
ring
4. SlidetheO-ring
onasfaras
thespider.OnlyuseO-ringsif
theyareintact
5. Greasethecleanedlockring
threadsandpushonthelock
ring
.Theletteringonthe
lockringmustbevisible
Thelockringhasa
left-handthread,so
tightenittotheleftwith
thespidertool.
Holditbackwiththe
leftcrank
6. Greasetheright-sidebottom
bracketshaftandmountthe
crankarmwiththecrankbolt
M10x1.Useatorquewrench
totightenitasspeciedbythe
crankmanufacturer
Removing Drive Unit
(BDU450 CX / 490P)
X Allenkeysize8
X Standardcrank-puller
X SpidertoolforBDU4xx,
availablefromtheBosch
eBikeB2Bonlinestore
Work steps Tools
Detach the spider from
the Drive Unit
1. Removethecrankarms
2. Blocktherearwheel,e.g.
securethebrakeleverwitha
cabletieorsimilar
3. UsetheSpidertooltounscrew
thelockring
Asithasaleft-hand
thread,turnittothe
right
4. Loosenthebrakeleveragain
5. Removethechain
6. RemovetheO-ring
and
carefullycheckitfordamage.
OnlyreuseO-ringsiftheyare
intact
7. Removethechainring
with
themountedspider
Retrot / replacement of
bearing protection ring
BDU4xx / 374y
X Assembly instructions:
bosch-ebike.net
Service Technical
Information →Assembly
Instructions
Handling BenetsServiceOverview
Overview
Components
Components
Diagnostics
Diagnostics
Removal /
Installation
Removal /
Installation
Bosch eBike
Introduction
The eBike System 2
The smart system
Aids

Other manuals for Bosch BDU450 CX

Question and Answer IconNeed help?

Do you have a question about the Bosch BDU450 CX and is the answer not in the manual?

Bosch BDU450 CX Specifications

General IconGeneral
BrandBosch
ModelBDU450 CX
CategoryDC Drives
LanguageEnglish

Summary

Detach the spider from the Drive Unit

Remove crank arms and secure rear wheel

Remove crank arms and secure the brake lever with a cable tie or similar.

Unscrew lock ring and remove chain

Use spider tool to unscrew lock ring (left-hand thread) and remove chain.

Remove O-ring and chainring

Remove O-ring, check for damage, and remove chainring with mounted spider.

Retrofit Bearing Protection Ring

Assembly instructions reference

Refer to bosch-ebike.net for detailed assembly instructions.

Remove chain guard or adapter

Remove M6 screws and adapter

Remove M6 x 10 screws and the chain guard/chain guide adapter.

Manufacturer-specific mounts

Note on manufacturer-specific mounts, chain guide, and guard solutions.

Remove the design cover

Remove Torx screws and cover

Remove two pan head Torx screws M4 x 12 and the design cover.

Remove chainring side design cover

Remove chainring side cover screws

Remove two pan head Torx screws M4 x 12 from the chainring side cover.

Disconnect cable connections

Remove cable ties and detach cables

Remove cable ties and carefully detach all cables using flat nose pliers.

Battery connector latch handling

Use screwdriver to pry up battery connector latch (1-2 mm) to prevent damage.

Remove the Drive Unit from the frame

Check and disconnect cables

Ensure all cables are disconnected and pull them out from the frame interface.

Loosen and remove mounting screws

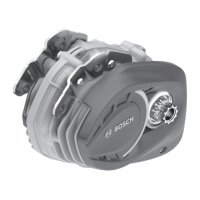
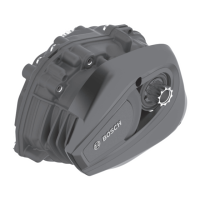
Loosen six M8 x 16 Torx Plus screws in specified order to remove the Drive Unit.

Secure Drive Unit during removal

Ensure Drive Unit is secured and cannot fall during removal, possibly in an inverted position.

Secure mounting plates (CCP)

Check and tighten connections

Check and tighten loose screw connections between the Drive Unit and mounting plates.

Warranty warning on mounting plates

Warning: Never loosen mounting plates in motor housing to avoid corrosion/warranty loss.

Install the Drive Unit

Place Drive Unit on frame interface

Place Drive Unit onto the frame interface, ensuring cables are not pinched.

Screw in and tighten mounting bolts

Loosely screw in M8 x 16 Torx Plus screws, then tighten in specified order.

Prepare used Drive Unit screws

For used units, remove old adhesive and use medium-strength adhesive on screws.

Connect the cable connections

Secure excess cable lengths

Secure excess cable lengths using cable ties.

Engage color-coded plugs

Engage plugs with latching lugs, ensuring correct direction and mechanical coding.

Electrical connections overview

Connection table

Table detailing connection position, color, and voltage for various components.

Warning on incorrect plug connection

The Drive Unit can be damaged if a plug is connected incorrectly.

Connect bicycle lighting

DC headlamp connection

Connect only DC headlamps without a parking light function.

Observe current rating

Observe current rating: max. 18 W for lighting, max. 1.5 A output current.

Activate light switch function

Activate light switch function via Diagnostic Tool and adjust lighting system output.

Lighting regulations compliance

Lighting must provide light for 2 hours without eBike support per StVZO.

Use blanking plugs for unused connections

Close unused connections with blanking plugs to prevent corrosion.

Connection to Power Port (12 V)

Powering 12 V consumers

Used for 12 V consumers like Bosch eBike ABS, eSuspension. Max output 12V, 1A.

ABS connection limitation

When Bosch eBike ABS is connected, no other consumers can use the Power Port.

Distinguish Power Port from Display Port

Take care not to confuse the Power Port (12V) with the display port.

Attach the design cover on chainring side

Attach cover to mounting plate

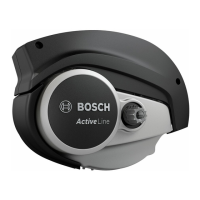
Attach cover A to the mounting plate of the Drive Unit.

Tighten self-tapping screw

Tighten pan head Torx screw M4 x 12 (self-tapping on first assembly).

Attach the logo cover

Prepare adhesive surfaces

Remove protective foil from motor head and logo cover adhesive surfaces.

Position and press logo cover

Position logo cover horizontally and press firmly for at least 10 seconds.

Attach the design cover (front section)

Remove motor head protective foil

In case of initial assembly, remove the protective foil from the motor head.

Route cables and attach cover

Route cables to prevent pinching, then attach design cover to front and rear sections.

Tighten cover Torx screws

Tighten two pan head Torx screws M4 x 12.

Fit chain guard or chain guide adapter

Optional fitting

Optional fitting if intended by the bicycle manufacturer.

Screw adapter to points

Screw the adapter to the provided screw-on points (ISCG 5-compatible).

Use manufacturer-specific screws

Use manufacturer-specific screws with shallow heads; note max screw-in depth.

Fit the spider to the Drive Unit

Mount left-side crank arm

Grease bottom bracket shaft and tighten bolt M15 x 1 with torque wrench.

Clean and grease spider interlock

Clean and grease the internal interlock of the spider.

Mount chainring onto interlock

Press chainring with spider onto the cleaned, greased interlock.

Slide on O-ring

Slide the O-ring on as far as the spider. Only use intact O-rings.

Grease and push on lock ring

Grease lock ring threads, push on, and tighten to the left with spider tool.

Mount right-side crank arm

Grease right-side bottom bracket shaft and mount crank arm with bolt M15 x 1.

Related product manuals