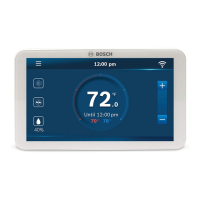
Configuration to the wired room controller
61
Climate Room Control – 6721841498 (2022/04)
3.3 Electrical connection
WARNING
Risk to life from electric shock!
Touching live electrical parts can cause an electric shock.
▶ Before working on electrical parts, disconnect all phases of
the power supply (fuse/circuit breaker) and lock the
isolator switch to prevent unintentional reconnection.
3.3.1 Connect the the wired room controller
NOTICE
Damage to the wired room controller or wiring
▶ Do not jam wires during installation.
▶ To avoid water entering the wired room controller when
attaching the cabling ( Fig. 6), use trap [2] and putty [1]
to seal the plug-in connector.
▶ Cables must be securely attached and must not be under
tension.
NOTICE
Damage due to overvoltage
The wired room controller is designed for low voltage.
▶ Never bring the communication cable into contact with high
voltages.
Use the cable provided.
▶ If necessary, route an extension cable between the indoor
unit and installation location of the wired room controller.
▶ Connect the communication cable to the indoor unit or
connection module.
▶ Where applicable, connect the communication cable with
the wired room controller via an extension cable.
▶Fit the magnet ring.
▶ If possible, connect the earthing terminal lug.
▶ Insert the button battery into the holder [1].
4 Configuration to the wired room
controller
Call up the configuration menu and make the settings:
▶ Switch off the air conditioning system.
▶Keep theCOPY key pressed until a parameter appears in
the display.
If several indoor units are detected, the address (e.g. 00)
appears initially.
▶With the / or . key, select an indoor unit (00... 16) and
confirm with the key.
▶ Select a parameter with the / or . key and confirm with
the key.
▶ Press the / or . key to set the parameter and confirm it
with the key, or press the d key to cancel the setting.
To exit the configuration menu:
▶ Press the d key or wait for 15 seconds.
Make the settings in the configuration menu:
▶ Call up the configuration menu.
▶ Select a parameter with the / or . key and confirm with
the key.
The factory settings are highlighted in bold in the following
table.
Parameters Description
Tn (n=1,2,
...)
Check the temperature at the indoor unit.
CF Check the status of the fan.
SP Set the statistic pressure for the channel wall
unit.
• SP1: low
• SP2: middle 1
• SP3: middle 2
• SP4: high
AF Function test for three to six minutes.
tF Offset temperature for the Follow me
function.
• −5...0...5 °C
tyPE Restrict the control to specific operating
modes:
• CH: do not restrict available operating
modes.
• CC: no heating and automatic mode
• HH: only heating and Fan Mode
• NA: no automatic mode
tHI Maximum value of adjustable temperature
• 25...30 °C
 Loading...