21
Initial Start-Up
- Use only the chargers listed in the technical data. Only
these battery chargers are matched to the lithium-ion battery
of your measuring tool.
- The use of chargers from other manufacturers can lead
to defects on the measuring tool; a higher voltage (e.g.
12 V) from a vehicle charger is not suitable for charging
this measuring tool. The warranty is rendered void if
these instructions are not followed.
- Observe the mains voltage! The voltage of the power
source must correspond with the data on the type plate of
the battery charger.
Note: The battery is supplied partially charged. To ensure full
battery capacity, completely charge the battery before using
for the first time.
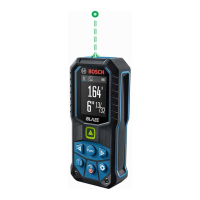
Note:5IFNJDSP64#QPSU16GPSDPOOFDUJOHUIFNJDSP64#
cable 22 is located under the cover of the measuring pin 8.
Press the release button 7 to open the cover.
The lithium-ion battery can be charged at any time without
reducing its service life. Interrupting the charging procedure
does not damage the battery. When the bottom segment
of the battery charge-control indicator g flashes, only a few
more measurements can be carried out. Charge the battery.
If the frame around the segments of the battery charge
indicator g flashes, no more measurements are possible.
The measuring tool can only be used for a short time (e.g.
to check entries in the measured value list). Charge the
battery. Connect the measuring tool to the charger 23 using
UIF NJDSP 64# DBCMF 22 provided. Plug the charger 23 into
the socket. The charging process begins. The battery charge-
control indicator g indicates the charging progress. During the
charging procedure, the segments flash one after the other.
When all segments of battery charge-control indicator g are
displayed, the battery is completely charged.
Disconnect the battery charger from the mains supply when
not using it for longer periods. The battery can also be charged
BUB64#QPSU5PEPTPDPOOFDUUIFNFBTVSJOHUPPMUPB64#
QPSUVTJOHUIFNJDSP64#DBCMF
w ww . . co m
information@itm.com1.800.561.8187