Do you have a question about the Bosch NDC-265-P and is the answer not in the manual?
Explains safety precautions, including DANGER, WARNING, and CAUTION levels.
Provides essential safety instructions for operation, maintenance, and installation.
Details compliance with FCC and ICES regulations for US and Canadian models.
States disclaimer regarding UL testing for performance and reliability aspects.
Provides disposal information and contact details for more information.
Details copyright information for firmware fonts and software components.
Highlights key features of the HD 720p IP camera, including streaming and connectivity.
Provides instructions on carefully unpacking the camera and its accessories, and handling precautions.
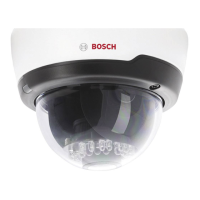
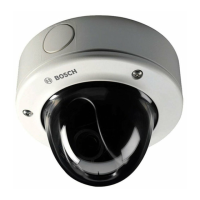
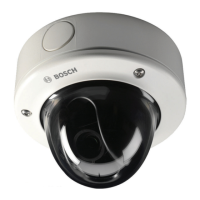
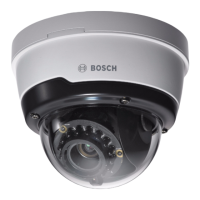
Details the parts of the camera unit and the steps for disassembly.
Provides instructions for inserting a microSDHC card into the camera slot.
Explains the network connection using RJ45 and PoE for data and power.
Describes how to connect power via DC12V or Ethernet, including DC power connection details.
Details the I/O connector pinout and specifications for relay and alarm input.
Explains the connection of audio devices to the Line In and Line Out ports.
Provides instructions and diagrams for mounting the camera to a wall or ceiling.
Guides on connecting a monitor for setup, initial camera positioning, and adjustments.
Details the procedure for adjusting focal length and focus using the focus aid.
Explains how to reset the camera to factory default values using the reset button.
Describes the final steps to close the camera unit after adjustments.
Lists the system requirements for connecting to the camera via a web browser.
Details how to establish a connection by entering the camera's IP address.
Explains configuration for RADIUS server authentication and network access control.
Details the initial display after connection, including Livepage, Recordings, and Settings.
Presents the menu structure for basic camera configuration parameters.
Covers camera naming and password protection for service, user, and live levels.
Explains how to set device date, time, and synchronize with PC for correct recording.
Details network settings for integrating the device, including IP address and DHCP.
Allows selection of encoding profiles and operation environment settings.
Covers enabling or disabling the camera microphone.
Instructions for recording images to a storage medium, including selecting storage media.
Provides general information on hardware and firmware for troubleshooting.
Presents the complete configuration parameter menu for advanced settings.
Covers identification, password settings, and date/time configuration for advanced setup.
Details date format, device date/time, and time zone settings, including DST.
Configures overlays like camera name and time/date for video images.
Customizes web interface appearance, language, company logo, and device logo.
Configures functions displayed on the Livepage, such as audio, alarm inputs, and logs.
Options to save event and system logs to text files on the local computer.
Adjusts picture settings like contrast, saturation, brightness, and white balance.
Sets up pre-programmed profiles for video streams to match network conditions.
Configures H.264 and M-JPEG streams, including codecs, profiles, and frame rates.
Configures audio input, output, and recording formats like G.711 and L16.
Provides settings for camera LED, image flip, and exposure/frame rate control.
Manages storage media, recording profiles, retention times, and schedules.
Defines and assigns up to ten recording profiles for different days or times.
Specifies how long recordings are kept before being overwritten.
Links recording profiles to specific days and times, including weekdays and holidays.
Displays current recording activity and status for information.
Manages alarm connections, VCA, audio alarms, and email notifications.
Enables VCA to detect and analyze changes, with default Silent MOTION+ configuration.
Allows configuring, saving, loading, and renaming VCA profiles.
Links VCA profiles to specific days and times for scheduled activation.
Activates VCA based on physical or virtual triggers, with delay options.
Creates alarms based on audio signals, configuring signal ranges and thresholds.
Configures email notifications for alarms, including server settings and JPEG attachments.
Configures alarm input types (NC/NO) and relay output behavior and triggers.
Manages network access, IP assignment, subnet mask, DNS, and various network protocols.
Configures SNMP, authentication (802.1x), RTSP, UPnP, and TCP metadata input.
Sets up multicast streaming for multiple receivers, requiring a multicast-enabled network.
Configures saving JPEG images to an FTP server, including file naming and posting intervals.
Manages firmware updates, maintenance logs, and system overview for service.
Provides system information for technical support purposes.
Displays live video, processor load, and network information, with configuration options.
Allows viewing images in full screen and selecting streams (1, 2, M-JPEG).
Shows alarm input status and allows operation of relay output devices.
Displays system and event logs, with options to save and delete entries.
Enables saving individual images from the video sequence in JPEG format.
Allows saving sections of the video sequence to the computer's hard drive.
Indicates if an automatic recording is running via a hard drive icon.
Facilitates sending and receiving audio signals via the Livepage.
Accesses saved video sequences, displays track info, and allows playback.
Explains playback controls, time bar navigation, and bookmark usage.
Explains the meaning of different LED states for power and video connection.
Provides a table to identify causes and solutions for common malfunctions.
Guides users on contacting customer service if faults cannot be resolved.
Caution against opening the casing; emphasizes qualified personnel for maintenance.
Advises on proper transfer of the unit and disposal of hazardous materials.
Lists technical specifications of the camera, including voltage, resolution, and compression.
Provides information on available accessories and where to find them.
| Maximum resolution | 1280 x 800 pixels |
|---|---|
| Supported video modes | 720p |
| Video formats supported | H.264, M-JPEG |
| Supported graphics resolutions | 1280 x 720 (HD 720), 320 x 288 (QVGA), 640 x 480 (VGA) |
| Minimum illumination | 1 lx |
| Sensor type | CMOS |
| Optical sensor size | 1/4 \ |
| Optical zoom | - x |
| Lens diameter | 9 mm |
| Fixed focal length | 1.2 mm |
| Focal length range | 2.7 - 9 mm |
| Built-in HDD | - |
| Card reader integrated | Yes |
| Compatible memory cards | SD, SDHC |
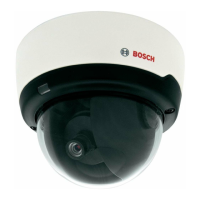
| Form factor | Dome |
| Product color | Black, White |
| Type | IP security camera |
| Placement supported | Indoor |
| Connectivity technology | Wired |
| Ethernet LAN (RJ-45) ports | 1 |
| Audio system | 2-way |
| Wi-Fi | No |
| Cabling technology | 10/100Base-T(X) |
| AC input voltage | 24 V |
| DC output current | 1 A |
| DC output voltage | +12V |
| Power source type | PoE |
| Power consumption (typical) | 4.2 W |
| Storage temperature (T-T) | -20 - 70 °C |
| Operating temperature (T-T) | -10 - 50 °C |
| Operating relative humidity (H-H) | 10 - 80 % |
| Height | 102 mm |
|---|---|
| Weight | 568 g |
| Diameter | 135 mm |