www.pivotcycles.com info@pivotcycles.com
1.877.857.4868
1
QUICK START GUIDE
Suspension/Tire Set-up
This "Quick Start Guide" provides the essential information to set up your bike.
COMPONENT QUICK START SETTING
Shock Air Pressure
(by Body Weight)
! Always Check Sag
see page 3 !
Body Weight in [kg] to [bar] 0.15 × Body Weight [kg] + 2 [bar]
Body Weight in [kg] to [psi] 2.2 × Body Weight [kg] + 30 [psi]
Body Weight in [lbs] to [bar] 0.07 × Body Weight [lbs] + 2 [bar]
Body Weight in [lbs] to [psi] Body Weight [lbs] + 30 [psi]
Shock Compression Damping 8 clicks in from OPEN*
Shock Rebound Damping
6 clicks in from OPEN
Fork Air Pressure
80 [psi] / 5.52 [bar]
Fork Compression Damping
HSC: 2 clicks in from OPEN*; LSC: 5 clicks in from OPEN
Fork Rebound Damping
HSR: 3 clicks in from OPEN*; LSR: 7 clicks in from OPEN
Front Tire Pressure
23 [psi] / 1.58 [bar]
Rear Tire Pressure
28 [psi] / 1.93 [bar]
* These Adjustments are not available on all builds.
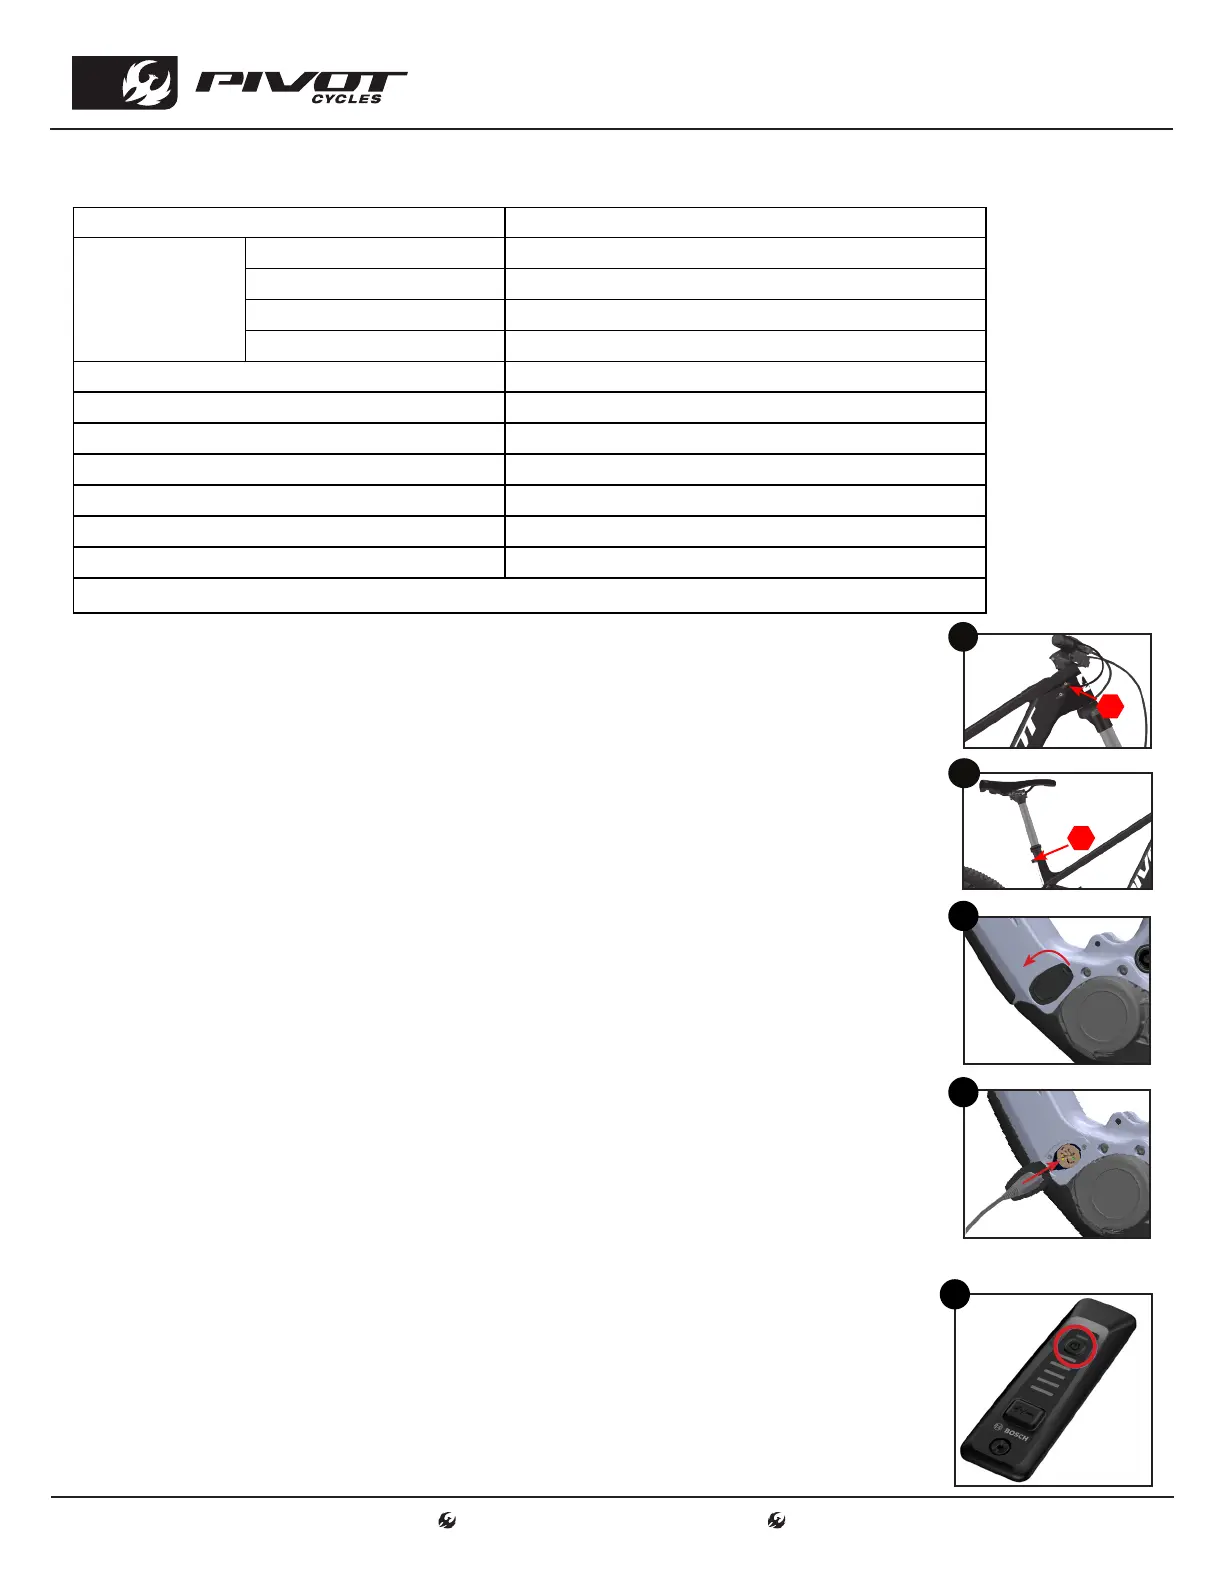
Adjusting Saddle Height
1. Use a 2mm hex wrench, loosen the drive side cable port cap securing the dropper
post housing. (fig. 1)
2. Using a 4mm hex wrench, loosen the seat post clamp bolt and raise/lower the
saddle to the preferred height. (fig. 2)
3. Using a 4mm hex wrench, tighten the seat post clamp bolt to 5 Nm.
4. Tighten the cable port cap screw with a 2mm hex wrench to secure the dropper
post housing.
Charging the Battery
NOTE: The battery does not come fully charged and must be charged com-
pletely before the first use.
1. Locate the rubber charging port cover on the non-drive side of the frame. (fig.3)
2. Pull back the sealing cover to access the charging terminal.
3. Insert the charging cable into the charging terminal, ensuring the cable and
terminal are properly aligned. (fig. 4)
4. The system controller will illuminate and display the charging status.
5. When done charging, remove the cable from the terminal and close the sealing
cover.
6. The LED bars on the System Controller indicate the state of the battery's charge.
Powering the System ON and OFF
1. The power button is located in the system controller on the top tube. (fig. 5)
2. Power the system on or off with a quick press and release on the power symbol
near the top of the controller. The System Controller will power up and power
down with an animation of the five LED bars.
3. If the bike has not moved for 10 minutes, the power will shut off automatically.
*The battery is fixed in the frame and should only be removed by an authorized
dealer.
3
5
1
2mm
2
4mm
4