6 7
3. Mounng
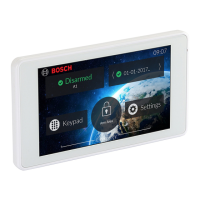
The TouchOne can be mounted in two orientaons, either
portrait or landscape. The Wall Mount should be screwed onto
the wall rst using the included 6G x 20mm pan head screws in
the intended orientaon. In either orientaon, the circle screw
hole is always on the boom and the oval adjustment screw hole
should be on top. Plug the Wire Harness into the TouchOne.
Aligning the TouchOne to the Wall Mount’s hooks, it should
move closer to the wall when aligned correctly. Slide the TouchOne in the opposite
direcon of the camera unl you feel it clip. Ensure all wires are fed into the wall.
Removing
The TouchOne can be removed by pressing the clip
that is located on the back at the opposite side of the
camera. Using a nger or small screwdriver, push the clip
towards you and slide the TouchOne in the direcon of
the camera.
4. Addressing
The Bosch Soluon 2000 and 3000 control panel requires each codepad on the system to
have a unique address between 1 and 4. When the TouchOne is powered on for the rst
me, it defaults to address 1. This seng is changed in the TouchOne soware interface,
therefore, you must ensure that any other codepad on the system is either not addressed
to address 1 or disconnected unl you have completed the setup wizard and have changed
the TouchOne’s address.
Changing the address
You can change the TouchOne address on the soware interface aer the inital setup
wizard by touching the Sengs buon from the home screen and then the Change Address
buon.
Should the TouchOne detect there is another device on the bus that shares its address
or there are communicaon problems, a screen will automacally appear allowing you to
select another address.

 Loading...