119
TEST PROCEDURES
4. Input Signal Clip Level Test
4.1 Apply a -36dBV +/- 3.5dBV, 1kHz sine wave to the RCA input jacks.
4.2 Verify that the Input Signal / Clip LED on the front panel is lit GREEN.
4.3 Apply a +10dBV +/- 2dBV, 1kHz sine wave to the RCA input jacks.
4.4 Verify that the Input Signal / Clip LED on the front panel is lit RED.
5. Output Signal Clip Level Test
5.1 Apply a -33dBV +/- 2.5dBV, 1kHz sine wave to the RCA input jacks.
5.2 Verify that the Output Signal / Clip LED on the front panel is lit GREEN.
5.3 Apply a +14.8dBV +/- 2.5dBV, 1kHz sine wave to the RCA input jacks.
5.4 Verify that the Output Signal / Clip LED on the front panel is lit RED.
6. Remote Control Test
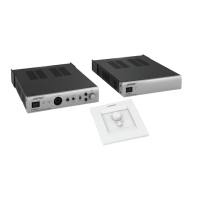
6.1 Connect a volume control with A/B Select User Interface (Bose
®
PC 041967) to the Remote
Control input jack located on the rear panel. Set the A/B Select dip switch to the REMOTE
position.
6.2 Apply two different audio inputs to the Input A and Input B Euro block connectors.
6.3 Verify that you can control the volume level as well as switch between the audio from Input A
and Input B using the remote volume control with A/B switch, and that it overrides these controls
on the amplifier chassis.
6.4 Remove the audio inputs. Move the A/B Select dip switch to the
FRONT position. Re-apply the audio inputs. Verify that the remote control is now inactive and
that the controls on the amplifier chassis are now working again.
7. Mute Control Test
7.1 Connect a SPST toggle switch, or similar, to the MUTE input jack located on the rear panel.
7.2 Set the Input A / Input B switch on the front panel to Input A. Apply an audio input to the Input A
RCA jacks.
7.3 While audio is playing, close the toggle switch. Verify that the audio output is now muted.
Open the toggle switch.
7.4 Remove the audio input to the Input A RCA jacks.
12.5 Apply an audio input to the Aux Input jack located on the front panel. Close the toggle switch.
Verify that the audio output is now muted.

 Loading...