32
ASSEMBLY KEY POINTS
5. FFC Replacement
5.1 Figure 36. Feed the FFC with grommet
through the slot in the cabinet. Ensure both
sides of the grommet nub is fully seated in
the slot. Then, make sure the FFC black line
marking is aligned with the grommet prior to
closing the enclosure.
Note: A new FFC grommet should be used
to avoid a potential air leak. Grommet part
361348-0010.
Note: FFC replacement should be completed
before closing the enclosure. This will ease
the assembly process.
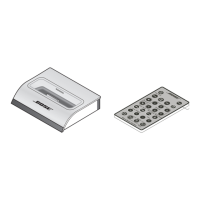
6. Keypad Assembly
6.1 Figure 37. Align the keypad assembly with
the cabinet and then press down on the center
of the keypad rubber. A roller can be used to
ensure the keypad rubber seats properly. See
Figure 37, for assembly tolerances.
Note: Failure to properly install the keypad
may result dull key response or no response
when pressing.
Note:
Press Force: Min 11 lbs
Press Duration: 7 sec
Keypad part 734172-0010 Black
Keypad part 734172-0020 White
7. Enclosure Gaps Specication
7.1 Figure 38. When assembling the enclo-
sure, apply pressure to the rear or front panel
of the cabinet to tighten the screws. Failure to
properly seat the rear panel will result in an air
leak. See Figure 38, for assembly tolerances.
! Important: The rear panel is considering a
safety device and must be properly installed.
Gap, Rear Grille to Cabinet
0.50 ±0.20mm
Gap, Trim Ring to Cabinet
0.50 ±0.15mm
Gap, Front Grille to Cabinet
0.50 ±0.20mm
Figure 36. FFC, Mark Line
Gap, Front Grille to Cabinet
0.50 ±0.20mm
Gap, Rear Grille to Cabinet
0.50 ±0.20mm
Figure 37. Enclosure, Gaps Spec Top View
Figure 38. Enclosure, Gaps Spec Side View

 Loading...