55
Panel Descriptions
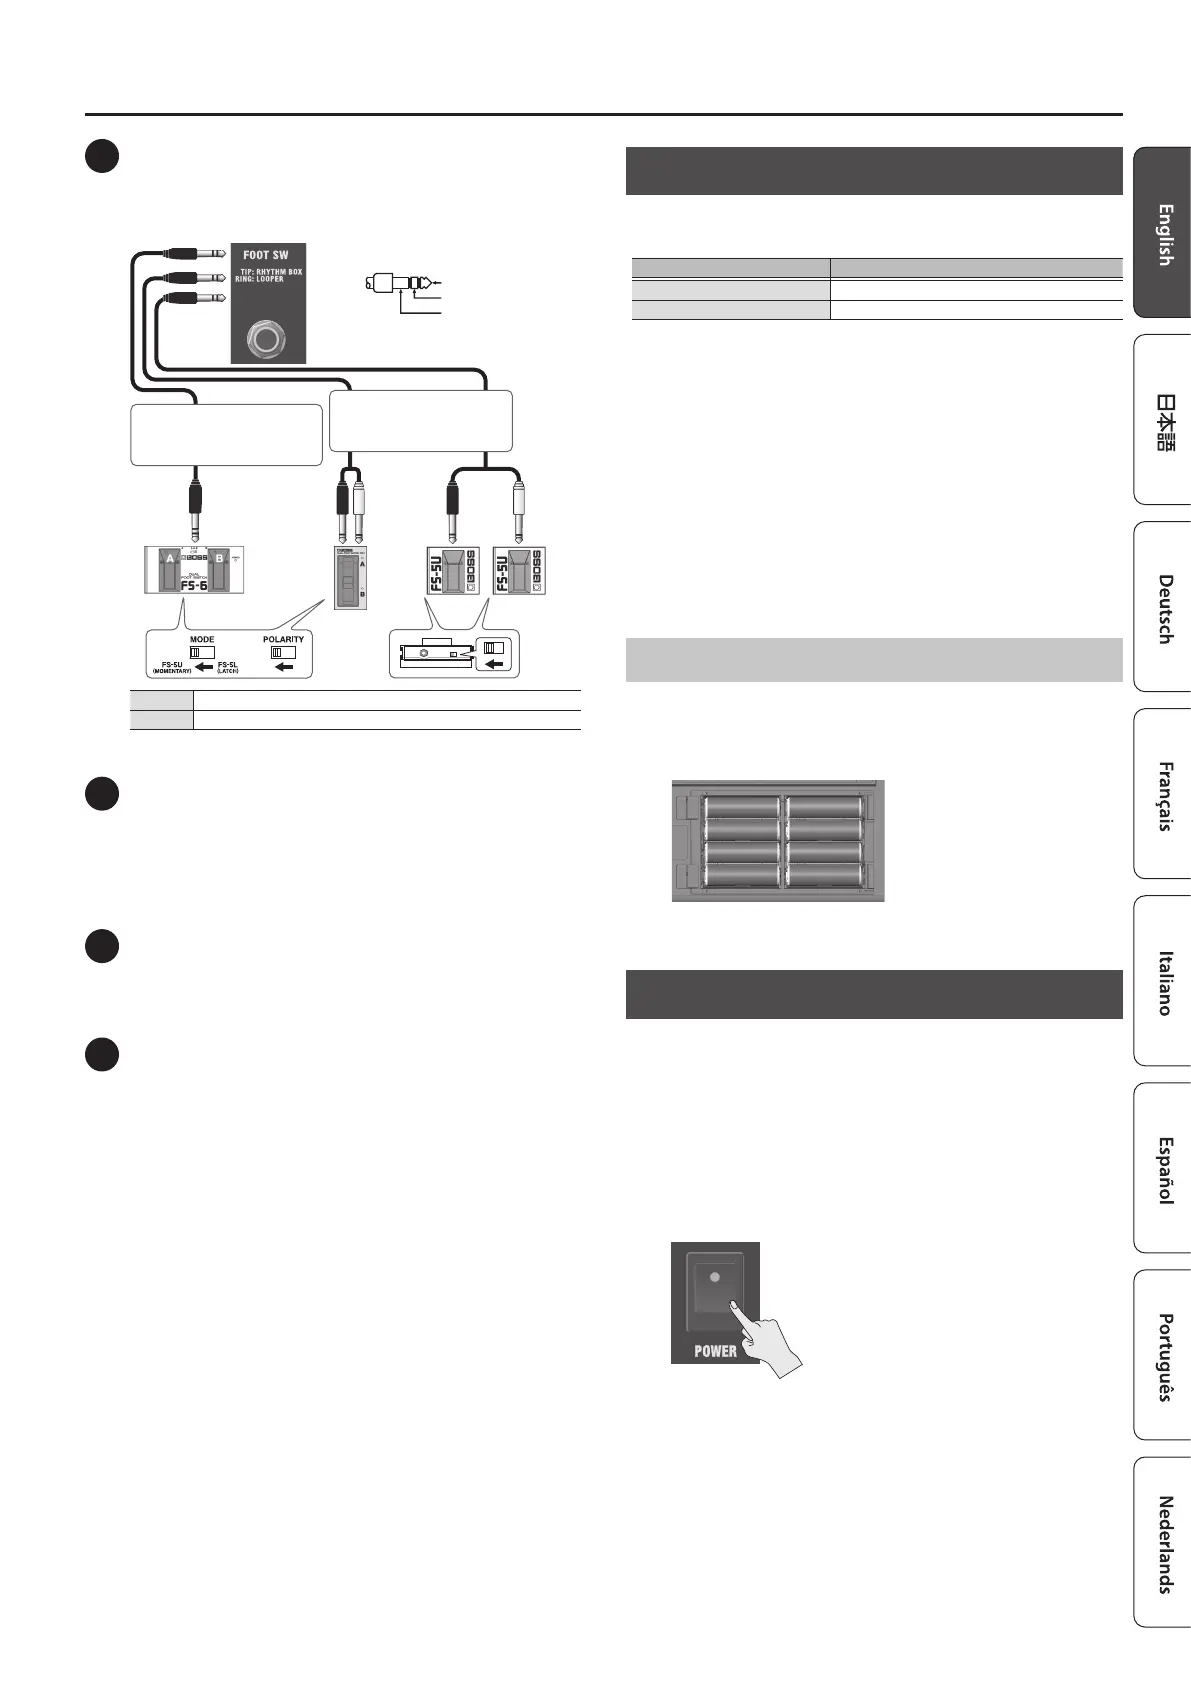
4 FOOT SW jack
You can start/stop the rhythm box (p. 6) and control the looper
(p. 7) using your foot by connecting a footswitch (BOSS FS-6, FS-7 or
FS-5U; sold separately).
Stereo 1/4” phone typeÐ
Stereo 1/4” phone type
or
FS-5U
RING
TIP
TIP
RING
RING TIP
FS-6 FS-7
Stereo 1/4” phone typeÐ
1/4” phone type x 2
or
TIP Starts/stops the rhythm box.
RING Operates the looper.
5 LINE OUT jacks
You can connect an audio interface or recorder to record your
playing, or output the sound to a mixer.
You can also use dedicated app (p. 4) or an app on your mobile
device (p. 9) to adjust the output volume.
If you’re outputting in mono, connect to the L/MONO jack.
6 AUX IN jack
Use a stereo miniature phone type cable to connect your mobile
device or other device to this jack, which lets you output its sound
from the speakers of this unit.
7 Ground terminal
Connect this to an external earth or ground. This should be
connected when necessary.
If you hear noise when connecting an acoustic instrument or
another external device, connect the ground terminal to reduce the
noise.
Operating on Battery Power
This unit can be used with alkaline batteries or rechargeable Ni-MH
batteries.
Type of battery Operating time
Alkaline batteries Approx. 8 hr.
Rechargeable Ni-MH batteries Approx. 10 hr. *1
*1 When using rechargeable Ni-MH batteries with a capacity of 2,500 mAh.
* Times are approximate, and dier depending on the conditions of use.
* If you handle batteries improperly, you risk explosion and uid
leakage. Make sure that you carefully observe all of the items related to
batteries that are listed in “USING THE UNIT SAFELY” and “IMPORTANT
NOTES” (the leaet “USING THE UNIT SAFELY” and the Owner’s Manual
p. 12).
* When operating on battery power only, the indicator blinks when
battery power gets too low. Replace the battery as soon as possible.
* Sounds may distort easily or cut o when played at high volume as the
battery power is nearly depleted, but this is not a malfunction. In such
instances, replace the batteries or use the AC adaptor included with
the unit.
Installing the Batteries
1. Remove the rear panel battery cover.
2. Insert the batteries, making sure they face the right way.
+
+
+
+
+
+
+
+
Turning the Power On/O
Before turning the unit on/o, always be sure to turn the volume down.
Even with the volume turned down, you might hear some sound when
switching the unit on/o. However, this is normal and does not indicate a
malfunction.
1. Make sure that the [MASTER] knob of this unit as well as
the volume of any connected devices are turned down all
the way.
2. Turn on the power of this unit.
3. Turn on the power of the devices connected to the LINE
OUT and PHONES/REC OUT jacks.
4. Adjust the volume levels of the devices.
* Before switching o the power, lower the volume on each of the
devices in your system and then turn o the power of this unit (the
reverse of when you switch this unit on).
* Pin assignment of FOOT SW jack
1: GND2: HOT
3: COLD
※ 入力端子の場合
1: GND 2: HOT
3: COLD
※ 出力端子の場合
TIP: HOT
RING: COLD
SLEEVE: GND