OPERATING INSTRUCTIONS
OPERATING TECHNIQUES
SKID STEER TRENCHERS
G
G
5792
2-26-92
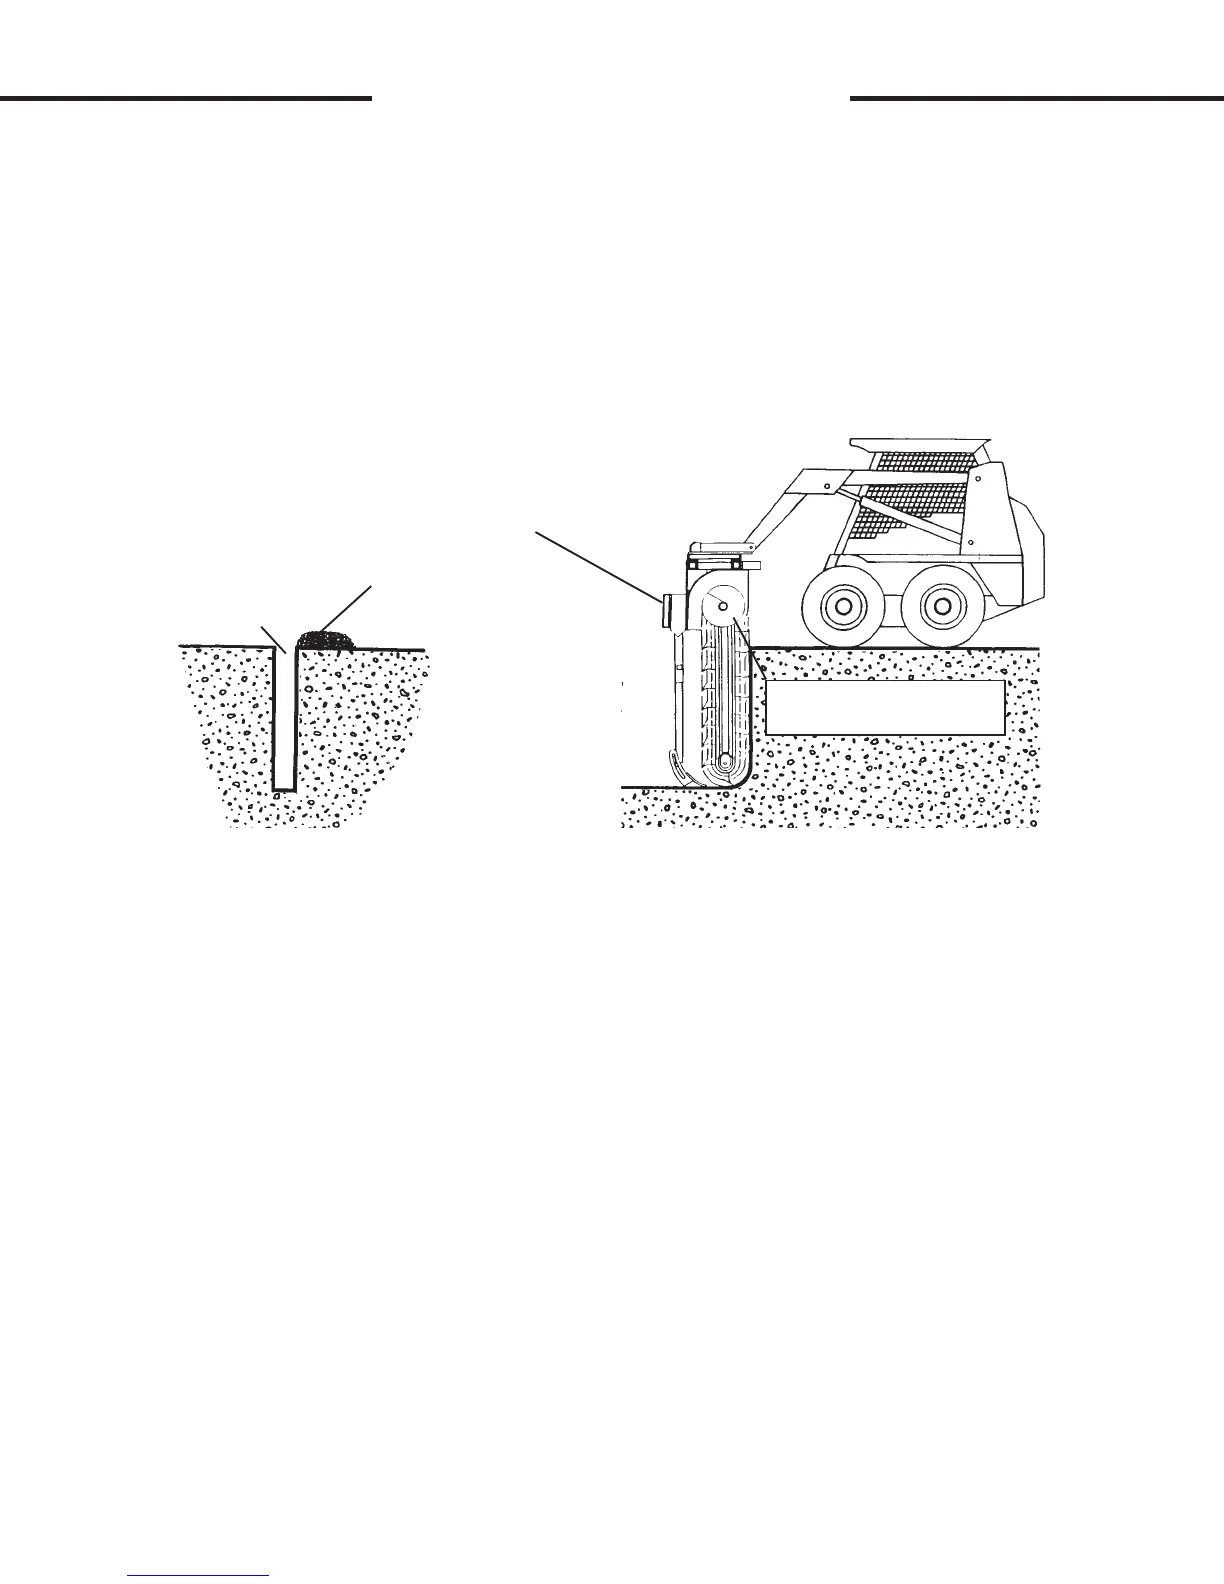
Raise the trencher so that the auger rides above the ground level to
leave the spoil beside the trench. The higher the auger, the closer to the
trench the spoil will be placed. You may find that it generally takes less
power to run the digging chain if the auger runs 3" - 6" (inches) off the
ground, and thus increasing the potential footage of trench produced per
hour. The higher you want the auger, the more vertical you will have to tilt
the trencher to achieve the same trench depth. (See Figure #10)
With the desired trench depth reached, advance the skid steer throttle
to the desired engine RPM (we suggest full throttle for maximum digging
power). Continue creeping the skid steer in reverse. Monitor the skid steer
hydraulic oil pressure and temperature gauges as you trench. If hydraulic
oil temperature or pressure gets too high, reduce skid steer creeping speed
to reduce the load on the auxiliary hydraulic system.
IMPORTANT: Trying to trench at a speed faster than the auxiliary hydraulic
system can handle could cause the trencher to stall. Continued stalling in a
short period of time can cause excessive oil temperature which can lead to
pump failure. Do not try to trench too much too quickly. If oil temperature
becomes too hot, stop the trencher and allow the oil to cool.
STALLING THE TRENCHER
If the trencher stalls while digging, move the skid steer forward
slightly to free the trencher. You may be able to free up the digging chain
by changing its direction of travel with the auxiliary hydraulic controls.
Repeated stalling of the trencher will cause oil to overheat rapidly and
should be avoided.
TRENCH
AUGER RAISED ABOVE
GROUND LEVEL
INCREASED DIGGING ANGLE TO
ACHIEVE THE SAME TRENCH DEPTH
WITH AUGER RAISED AS IN FIGURE #9
SPOIL PILE
FIGURE #10