2
Install your new Braeburn thermostat in 5 basic steps:
1 InstalltheSub-Base
2 ProvidePower
3 ConnectYourWires
4 SetInstallerSwitches
5 AttachThermostattoSub-Base
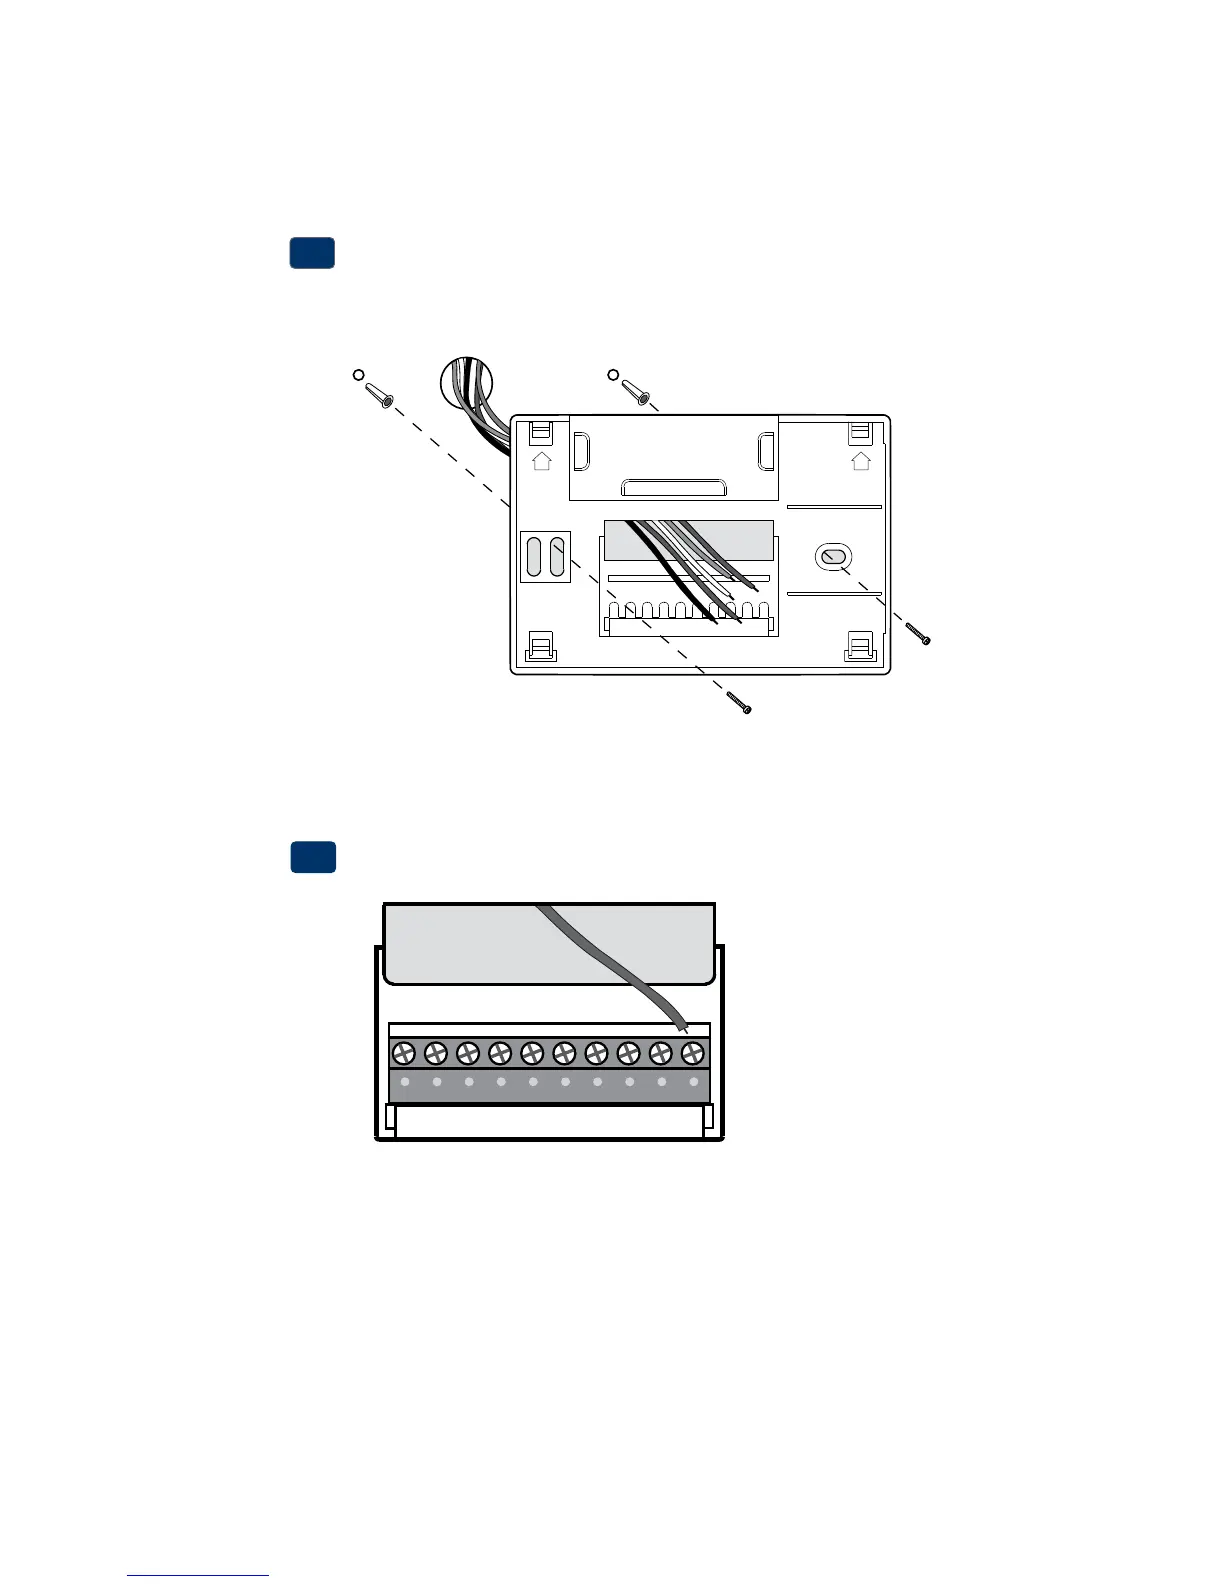
Install the Sub-Base:
•Removethesub-basefromthebodyofthethermostat.
•Mountthesub-baseasshownbelow:
1
Drill 3/16” pilot holes in
your desired location.
Use supplied anchors for
drywall or plaster.
NOTE: After sub-base installation, you may insert the quick reference card
into the slot on the top of the base.
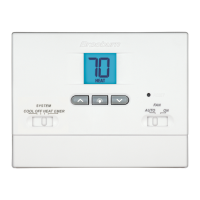
Provide Power
•For 24 Volt AC power,youmustconnectthecommonsideofthetrans-
formertotheCterminalonthethermostatsub-base.
•For primary or back-up power,insertthe2supplied“AA”typealkaline
batteriesintothebatterycompartmentlocatedintherearhousingofthe
thermostat.MakesuretopositionthePositive(+)andNegative(-)sides
ofthebatteriescorrectlywiththe+/-symbolsinthebatterycompartment.
24VAC Power
Terminal (C)
2
UP UP
C