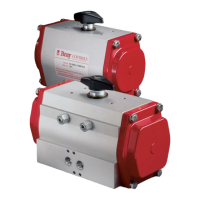
Series 98 & 98H Scotch Yoke Actuator
Installation, Operation and Maintenance Manual
© 2020 BRAY INTERNATIONAL, INC. ALL RIGHTS RESERVED. BRAY.COM The Information contained herein shall not be copied, transferred,
conveyed, or displayed in any manner that would violate its proprietary nature without the express written permission of Bray International, Inc.
7 of 84
fail safe position of the actuator. If a sandwich gearbox
manual override is used, then make sure it is also aligned
with the valve and actuator position.
3. Secure the valve, bolt the mounting bracket to the valve
and fit the coupler shaft on the valve stem (when using
mounting kit). Ensure the actuator's bore and seating
face are clean and coat the valve stem/adaptor with a
suitable oil/grease. Position the actuator to align the
valve stem (or coupler shaft) with the yoke bore and slide
the actuator on until the actuator seats on the bracket
mounting surface (or on the valve top flange, in case of
direct mounting).
4. When using a manual override sandwich gearbox
between the actuator and valve, first couple and fix the
gearbox on the valve following the gearbox installation
procedure. Back off the gearbox travel stop bolts. Mount
the actuator on the gearbox with the coupler shaft and
bolt up the actuator on the gearbox flange.
5. In order to align the bolt holes, it may be necessary to
loosen the valve-bracket bolting slightly. The actuator
mounting bolts should easily thread into the actuator
base without side loading on the bracket (or the valve
top flange). If needed, turn the actuator a bit and/or
adjust the actuator travel stops. Bolt up the actuator
to the bracket / gearbox flange / valve as the case may
be. Refer to the Bolting Torque table for recommended
torque values.
6. Before operating the actuator, disengage the manual
override, if present. The travel stops of the actuator shall
limit the stroke and not those on the gearbox/valve, if
present.
7. Adjust the travel stop bolts of the actuator for the proper
open and closed valve positions, per valve manufacturer’s
recommendations. Refer to the Series 98 specifications
for the travel adjustment range for different models.
8. Tighten the travel stop bolts lock nuts after adjusting the
stop bolts. Ensure the travel stops on gearbox or valve, if
provided, are now adjusted and locked to fractionally lag
the actuator’s stop position.
NOTE: When used for actuating torque seated valves
or swing disc type of valves, ensure that the stop bolt is
sufficiently backed off to permit the valve disc to seat.
9. Ensure the manual overrides are set for the normal
pneumatic operation before putting the actuator to test
in power operation mode. Refer to Sec. 15 through 17.
10. Stroke the actuator a few times at not more than MOP to
check for proper and smooth operation. If the actuator
is equipped with a switchbox or other accessories, adjust
them at this time.
NOTICE
It is recommended to ground the actuator assembly
against any buildup of static electricity.
4.0 OPERATION GUIDELINES
Series 98 actuators operate well in both on-off and
modulating applications. The accessories, control elements,
tubing and fittings shall be chosen for adequate flow rates so
as not to constrict flow or cause high pressure drop affecting
the performance of the actuator.
Maximum Operating Pressure (MOP) of the actuator is
mentioned on the nameplate and shall not be exceeded.
Suitable pressure regulator and safety valve shall be
incorporated in the supply line, if the line pressure is higher
than this.
CAUTION
Do not pressurize from the cap end port of the spring
return actuator. On the pneumatic actuator, this port is
normally fitted with a breather filter. If there is a possibility
of the actuator being submerged temporarily in water
due to flooding, then this port must be provided with an
extension pipe with the breather filter on the pipe end,
at a safe height above the water level. On the hydraulic
SR actuators, tube this port directly to the oil reservoir to
vent it above oil level. To avoid any back pressure, do not
connect it to other return lines.
Spring Return actuators work on pressure stroke or spring
stroke by pressurizing or venting respectively, the adaptor
side port (rod end side). A 3/2 way valve is typically used.
DA models require alternate ports to be pressurized and
vented for stroking. A 5/2 or 5/3 way direction control valve
or two 3/2 way valves may be used.
DD models have adaptor ports of the cylinders tubed in
parallel with the end cap ports of the other side cylinder. The
two cylinders work simultaneously with cap end of one and
rod end of the other pressurized, at a time.
Actuator & Mouting Kit Bolting Torques
Bolt Size
Torque
Nm Lb-in
M8 30 265
M12 110 975
M16 260 2300
M20 510 4515
M30 1550 13720
M36 2500 22125


 To Next Page