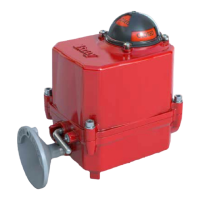
The Bray Series 71 Modulating Controller Electric Actuator is a device designed for comprehensive modulating control and monitoring of Bray Series 71 Electric Actuators. Its primary function is to position the S71 Actuator in response to a command signal from a process controller. This allows the actuator to change position, moving an associated control valve to modify a process variable, such as flow rate or tank level. The process controller continuously calculates and transmits the appropriate command signal to the S71 Servo to maintain the desired set point.
Function Description:
The S71 Servo provides complete modulating control and monitoring. It receives various DC voltage ranges (0-5V, 0-10V, 2-10V) or a 4-20mA current source as command signals. Simultaneously, it provides a feedback output signal representing the current actuator position, which can also be various DC voltage ranges (0-5V, 0-10V) or a 4-20mA current source. These settings, along with specific operating modes, are configured via three simple pushbuttons.
Important Technical Specifications:
- Input Signal Types: Configurable for Analog Current Range (4-20mA, default) with a minimum of 3mA and maximum of 21mA, or Analog Voltage Range (0-10V, 0-5V, 2-10V).
- 0-10V: Minimum 0V, Maximum 12V.
- 0-5V: Minimum 0V, Maximum 6V.
- 2-10V: Minimum 1.5V, Maximum 12V.
- Output Signal Types: Configurable for Analog Current Range (4-20mA, default) with a minimum of 4mA and maximum of 20mA, or Analog Voltage Range (0-10V, 0-5V).
- 0-10V: Minimum 0V, Maximum 10V.
- 0-5V: Minimum 0V, Maximum 5V.
- Auxiliary Switches: Voltage-free contacts, rated for 3A at 125/250VAC. These indicate when an end of travel set point has been reached.
- Power Connection: Energizes the S71 Servo and the actuator motor. The voltage supplied should match the actuator nameplate voltage and the S71 Servo label.
- Protective Fuse: Onboard 5A protective fuse in line with the input power connection.
- Heater: If the actuator has an internal heater, its wires are terminated at a dedicated connection and powered by the input power connection. Only Bray-supplied heaters should be used.
- Feedback Potentiometer: The S71 Servo monitors the voltage returned on the wiper connection to determine valve position. It is programmed to monitor within a specific range of feedback voltage (0.15V-3V).
- Internal Temperature Monitoring: The S71 Servo monitors its internal temperature. If it rises above 120°F (50°C), the 5W anti-condensation heater automatically turns off.
- Dead Band Control: Configurable as a percentage of the full input range, it defines an acceptable offset between the input command and the current actuator position, creating an inactive area around the desired set point. For a 0-10V input, a 3% Dead Band allows an offset of up to 0.15V in either direction, creating a 0.3V span.
Usage Features:
- User Interface: Features a rich, LED-based menu for displaying configurable settings, operational status, and valve status. Indicators are grouped by function, with individual labels.
- Configurable Settings: Settings can be changed locally using push-buttons associated with each product setting. Pressing a button illuminates the next LED in the sequence to indicate the new setting.
- Operating Modes:
- Remote Operation: Default mode where the valve is positioned based on input signals.
- Manual Operation: Performed via a declutchable handwheel. The S71 Servo operates as if in remote mode but cannot actuate to a new setpoint until manual mode is disengaged.
- Command Signal Calibration: A routine to increase accuracy by accounting for small static defaults in the input circuitry. It is recommended to perform this once at commissioning, especially if the input signal type is changed.
- Autocalibration: Entered by pressing and holding the "Cal" button for at least 1 second. This sequence involves a series of commands to determine operating points. The calibration LED flashes slowly during this process and turns off upon successful completion.
- Status Indication:
- Direction Indicators (Open/Green LED, Close/Red LED): Show the current direction of travel. Flashing indicates travel, solid indicates reaching a travel limit.
- Fault Status (Fault LED): Illuminates during a fault condition, providing diagnostic information. Specific fault conditions are indicated by the Fault LED flashing in conjunction with other LEDs (e.g., Input LED flashing for command signal fault, Output LED flashing for feedback potentiometer fault, Open & Close LEDs flashing for limit switch fault).
- Calibration Status (CAL STATUS LED): Indicates the status of the autocalibration routine (OFF for successful completion, slowly flashing for default factory settings, quickly flashing for routine in progress).
- Heartbeat Indicator: Located at the top right, it should continuously flash on and off during any operation, indicating the S71 Servo's status.
- Failure Position: Determines how the S71 Servo positions the valve upon loss of input signal. It will position the valve at the last valid commanded position before signal loss.
Maintenance Features:
- Troubleshooting Guide: Provides a comprehensive guide for resolving issues, including possible causes and solutions for common problems such as the S71 Servo not turning on, hunting, or not responding to command signals.
- Clearing Fault Conditions: Specific solutions are provided for various fault conditions, including command signal faults, limit switch faults, feedback potentiometer faults, and calibration faults. These solutions often involve adjusting input settings, verifying wiring, adjusting actuator cams, or recalibrating.
- Potentiometer Adjustment: A routine is provided to adjust the feedback potentiometer back into its proper range if a fault occurs. This involves placing the unit in manual mode, actuating to the fully closed position, loosening the potentiometer gear set screw, adjusting the potentiometer, and then tightening the set screw. The actuator should then be recalibrated.
- Safety Precautions: Emphasizes the importance of qualified personnel for installation, commissioning, operation, and repair, strict adherence to codes and standards, and proper use of PPE. Warnings are provided for potential hazards, such as large mechanical forces and the need to turn off power before wiring.
- Wiring Diagrams: Detailed wiring diagrams are provided for 24V and 120/230V S71 Servos, illustrating terminal connections for input, output, auxiliary signals, power, and motor. These diagrams are crucial for correct installation and troubleshooting.
- Wire Specifications: Specifies wire gauge, temperature limits, and stripping lengths for field terminals to ensure proper and safe connections.