29
Chapter 6: Installing the handles, leg support and mattress.
Chapter 6:Installing the handles, leg
support and mattress.
REQUIRED TOOLS
• Cordless Drill w/ bit holder
• #2 Phillips bit
• 7/16” Socket
• 1/2” Socket
Using the handles and provided screws from hardware
package #9, attach the handles to the Bed Face Panel at the
location of the pre-drilled holes. It may be easiest to have one
person hold the handle on the Bed Face Panel while another
person tightens the screws from the backside with a drill.
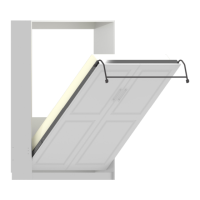
STEP 1
FIG. 6A - LEG ASSEMBLY, RIGHT SIDE
Referring to
Fig. 6A and
using the
washers
and 5/16”
Nylock
nuts from
hardware card #4, install legs
with the washers in order as
shown.
Tighten Nylock nut with a 1/2”
socket to have a small amount
of friction when the leg
assembly is rotated between
the up and down positions.
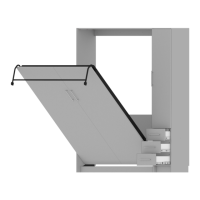
STEP 2
If the 5/16” Nylock nut is not in hardware card #4,
it may already be threaded onto the leg
REQUIRED HARDWARE
• Hardware Card #4
• Hardware Card #5 (Optional)
• Hardware Package #9