22
Chapter 4: Assembling the Bed Face Panel unit.
Chapter 4:Assembling the Bed Face
Panel unit.
REQUIRED TOOLS
• Cordless Drill and/or Impact Driver
• 5/16” Socket
• Phillips Screwdriver
• #2 Square Drive Bit
• Tape Measure
• Masking Tape (Optional)
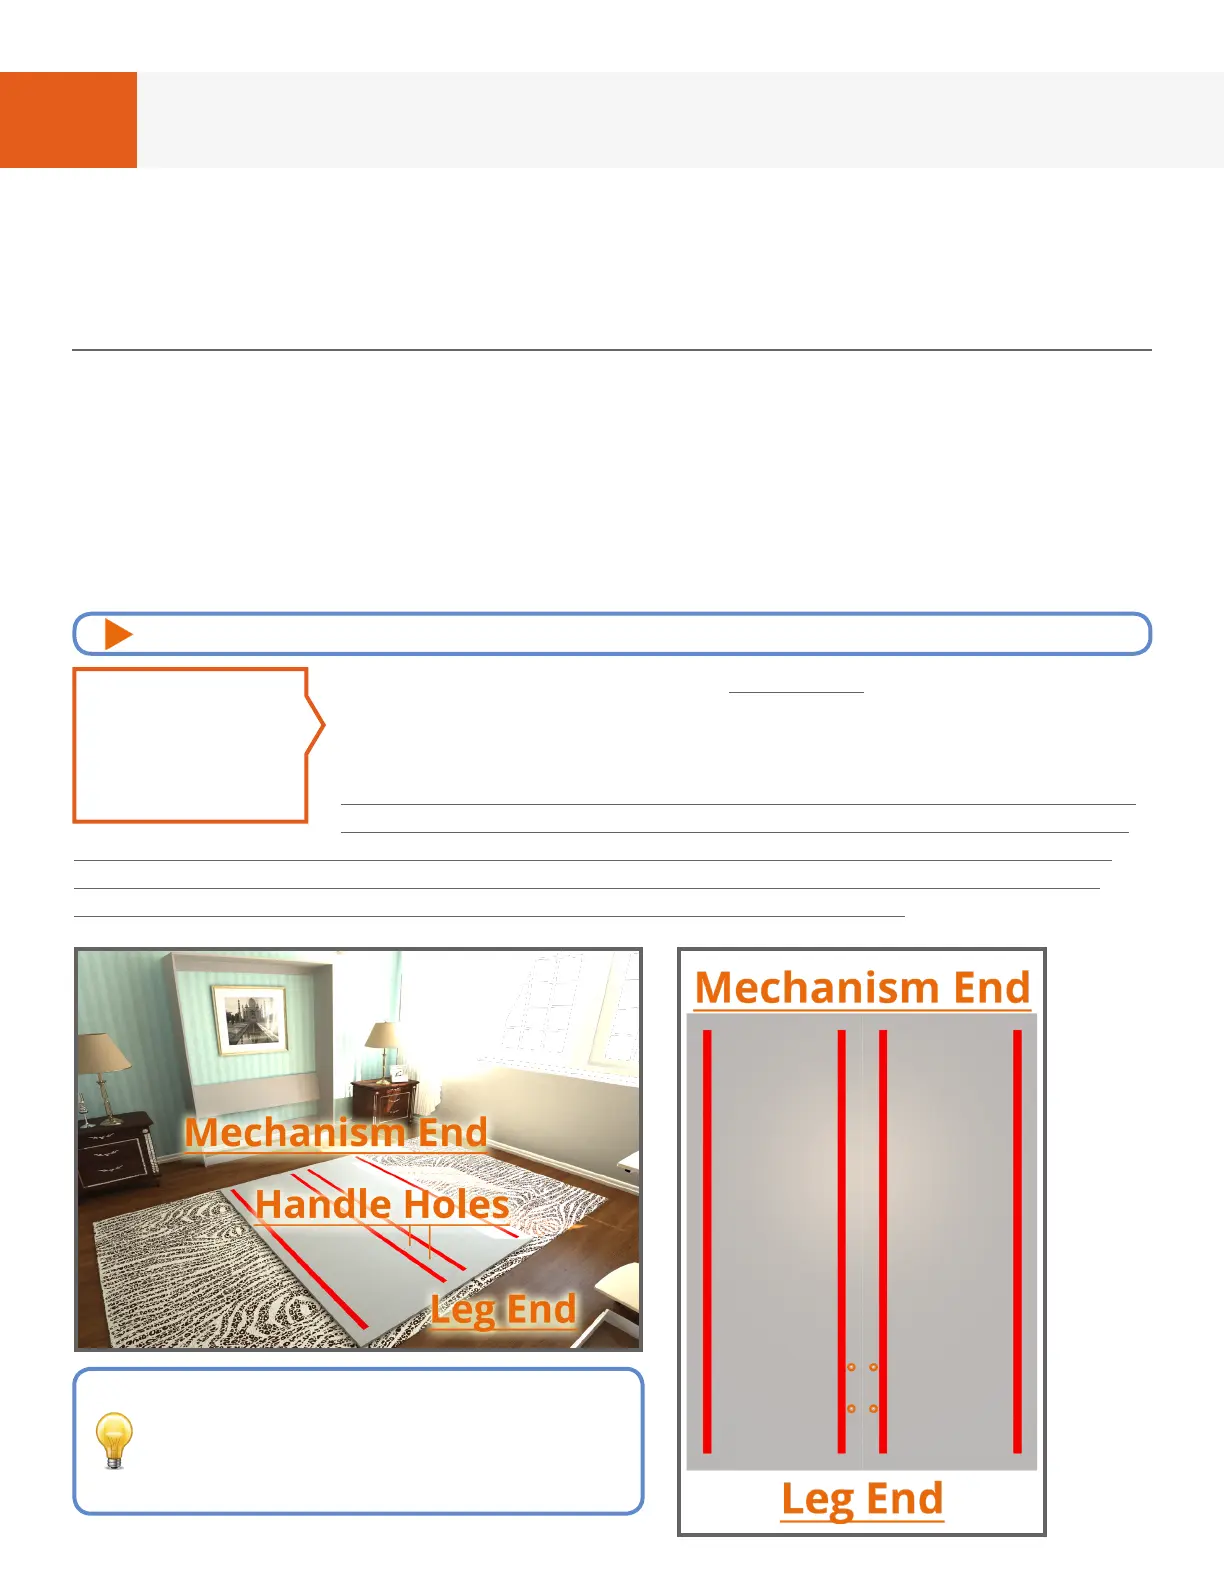
Referring to Fig. 4A, lay doors face down in front of the bed
on a soft surface, such as a carpet, rug or blanket. Pre-drilled
“Handle Holes” should be furthest away from bed cabinet.
METROPOLITAN MURPHY BEDS: Measure 4” and to 6” from
each edge of each door and mark these areas (shown in Fig.
4A and Fig. 4B as red lines) with tape or permanent marker. This 2” wide area is
a screw-free zone, which matches the recessed area on the face of the door to
prevent screws from penetrating through the front of the door.
STEP 1
FIG. 4A FIG. 4B - DOORS, OVERHEAD VIEW
The “Mechanism End” is the end of
the bed where your head will be as
you lay in the bed and the “Leg End”
is the end that your feet will be.
REQUIRED HARDWARE
• Hardware Card #3
• Hardware Card #7
For video instructions of this specic chapter, visit: breda.us/frame