8
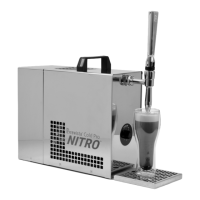
• Ensure that your coee was ltered with a neness of
at least 100 μm (microns). Coarser ltraon sizes lead to
clogging of the lter in the intake line or in the jet-nozzle
outlet-spout of the tap.
• Make sure the lter adapter (19) is installed in the intake
line. The dispenser comes with a DMT lter adapter
which can easily be integrated into a 3/8” intake hose.
WARNING: By not using the appropriate intake lter, the
internal dispenser pump could be damaged or destroyed
from coee parcles and will void the warranty.
Decommissioning
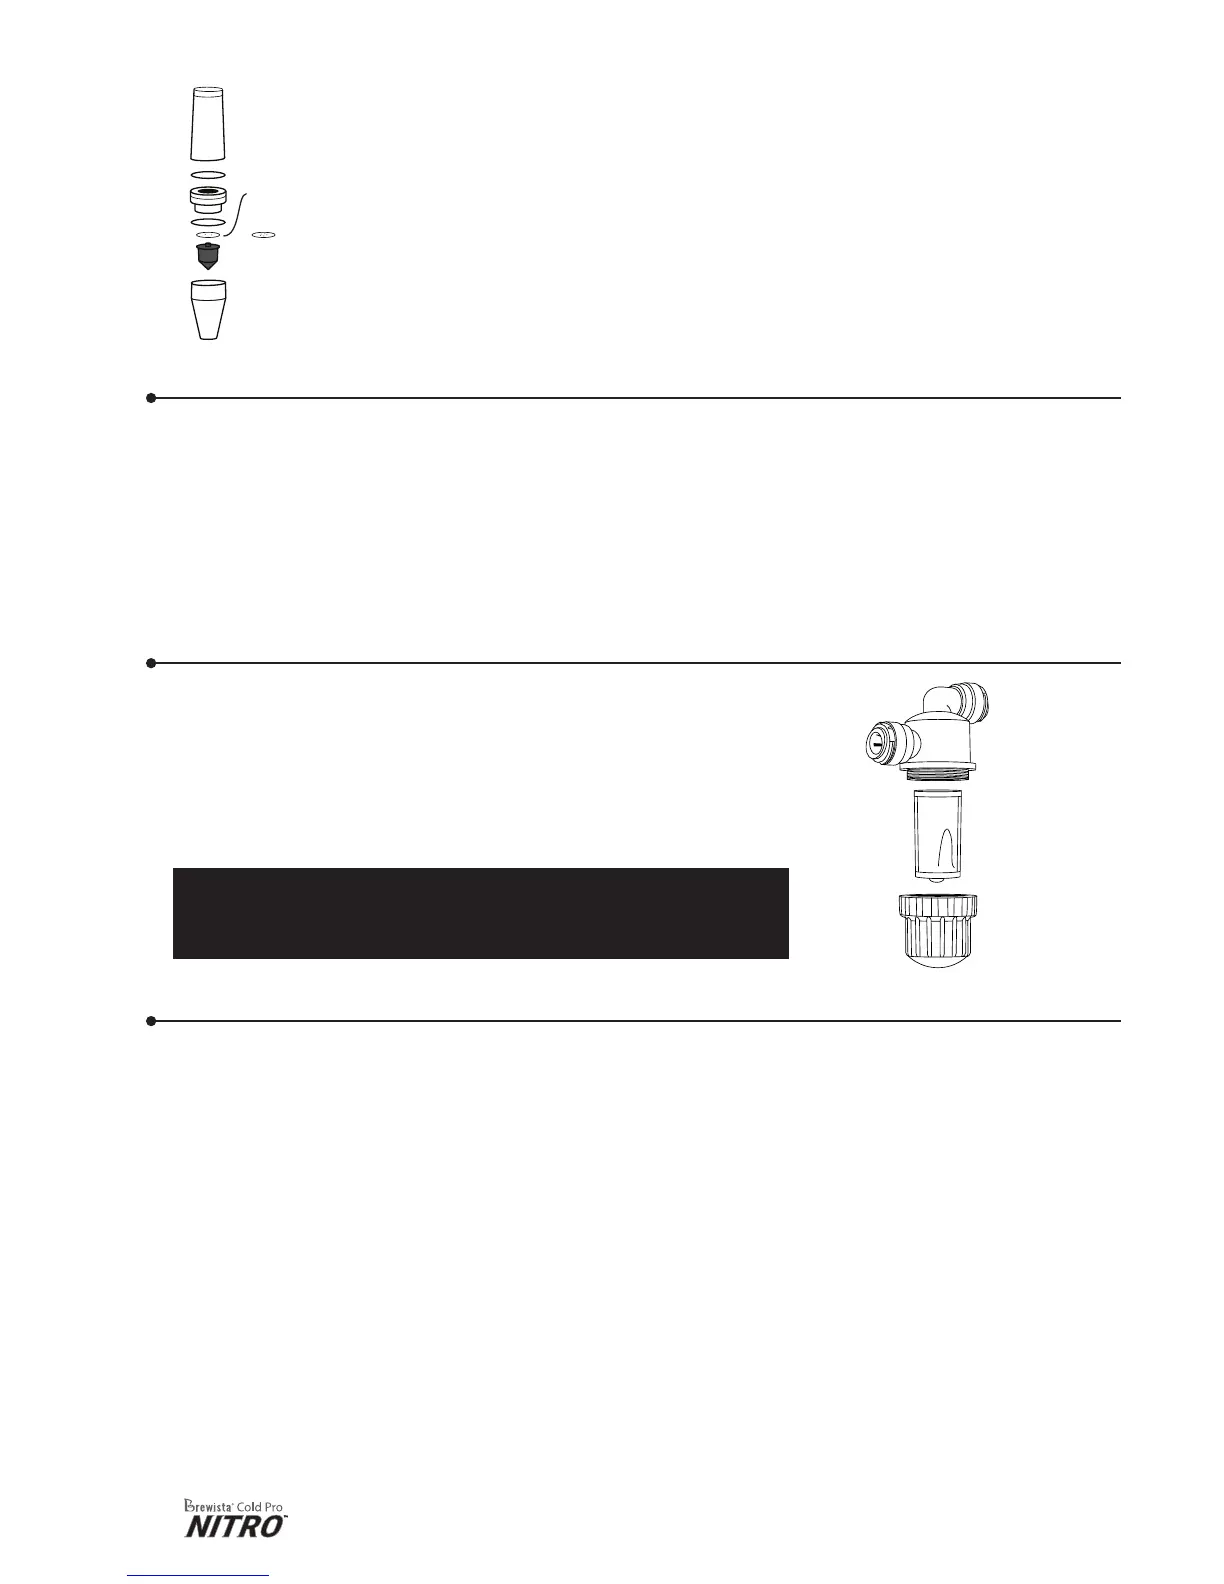
• Flowrate
◦ The 2-hole disc (10) is installed in the dispenser by default. This provides a
owrate of 0.6 L/min.
◦ A 5-hole disc (9) is included in your accessories. The owrate with the
5-disc is 1.2 L/min.
◦ If you change the owrate you might have to re-adjust your desired gas
level as described above.
◦ Desired temperature sengs may need to be adjusted as well if owrate
is changed.
Higher Cooling Power for High Volume Dispensing
If you need increased cooling power for peak demand situaons like high trac events, you
have the opons listed below:
• Pre-cool the coee in the refrigerator before connecng container to the dispenser.
• Use the Cold Pro Nitro™ dispenser in combinaon with a refrigerator, under counter
refrigeraon, or a cooling box. In this scenario, the coee remains cool and does not
warm up aer connecng to the dispenser.
• Place an addional cooler along the intake line of the dispenser. The coee is
passed through the addional cooler rst on its way to the dispenser.
Filtraon
5-hole
disc
2-hole
disc
Filter Adapter Parts
• Before pung the dispenser out of service for an extended period of me, we
recommend cleaning the system rst.
• Aer cleaning, ush the dispenser with clean water.
• Let the dispenser suck air to empty the internal liquid buer (around 17 oz /
500 ml) is emped. Do NOT disconnect the intake line from the dispenser in order
to suck air. The coupler system has a check valve that prevents air sucon so the
internal liquid buer cannot be emped.
• Disconnect the intake line (11) and unplug the power cord (17).
• Pull tap handle (1) to release internal pressure.
• Protect the dispenser against rain, dust, and temperatures lower than 32° F (0° C) or
higher than 140° F (60° C).