EasyManua.ls Logo

Brinkmann 810-4535-S - User Manual

Brinkmann 810-4535-S
67 pages
Print Icon
To Next Page IconTo Next Page
Loading...
OWNER’S MANUAL / MANUAL DEL PROPIETARIO
ASSEMBLY AND OPERATING IN STRUC TIONS
INSTRUCCIONES DE ARMADO Y OPERACIÓN
WARNING/ADVERTENCIA
HAZARDOUS EXPLOSION MAY RESULT IF THESE WARNINGS
AND INSTRUCTIONS ARE IGNORED. READ AND FOLLOW ALL
WARNINGS AND INSTRUCTIONS IN THIS MANUAL TO AVOID
PERSONAL INJURY, INCLUDING DEATH OR PROPERTY DAMAGE.
SE PUEDE PRODUCIR UNA EXPLOSIÓN PELIGROSA SI SE HACE
CASO OMISO A ESTAS ADVERTENCIAS E INSTRUCCIONES. LEA
Y SIGA TODAS LAS ADVERTENCIAS E INSTRUCCIONES EN ESTE
MANUAL PARA EVITAR LESIONES PERSONALES, INCLUSO LA
MUERTE, O LOS DAÑOS MATERIALES.
NOTICE TO INSTALLER:
LEAVE THESE INSTRUCTIONS WITH
THE GRILL OWNER FOR FUTURE
REFERENCE .
AVISO PARA EL INSTALADOR:
ENTREGUE ESTAS INSTRUCCIONES AL
PROPIETARIO DE LA PARRILLA PARA
REFERENCIA FUTURA.
5 Burner Gas Grill
Parrilla a Gas de 5 Quemadores
SAVE THIS MANUAL FOR FUTURE REFERENCE
GUARDE ESTE MANUAL PARA REFERENCIA FUTURA
Models/Modelos 810-4535-S
Question and Answer IconNeed help?

Do you have a question about the Brinkmann 810-4535-S and is the answer not in the manual?

Overview

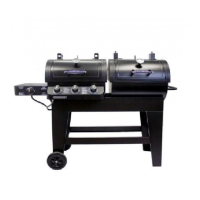
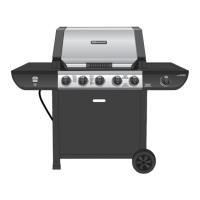
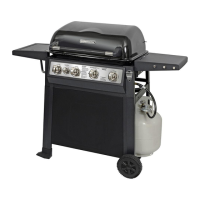
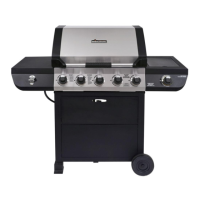
This document is a user manual for the Brinkmann 5 Burner Gas Grill, models 810-4535-S. It provides instructions for assembly, operation, maintenance, and troubleshooting.

Function Description:

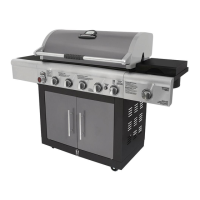
The Brinkmann 5 Burner Gas Grill is designed for outdoor cooking using LP (Liquid Propane) gas. It features multiple main burners and a sear burner for versatile cooking options, including direct and indirect grilling. The grill is equipped with an igniter for easy starting and a grease management system to collect drippings. It is intended for residential use and should not be used for commercial purposes.

Important Technical Specifications:

  • LP Gas Cylinder (Tank) Specifications:
    • Designed for a 20 lb. (9.1 kg) LP gas cylinder.
    • Cylinder dimensions: 12" (30.5 cm) diameter x 18" (45.7 cm) tall.
    • Must incorporate a Type 1 cylinder valve and an over-filling protection device (OPD).
    • Compatible with Worthington, Manchester, or SMPC brand 20 lb. (9.1 kg) cylinders.
    • Cylinder must be constructed and marked in accordance with U.S. Department of Transportation (DOT) or National Standard of Canada, CAN/CSA-B339 Cylinders, Spheres and Tubes for Transportation of Dangerous Goods.
    • Cylinder must be equipped with: a shut-off valve terminating in a Type 1 gas cylinder valve outlet, a Type 1 valve that prevents gas flow until a positive seal is obtained, an arrangement for vapor withdrawal, a collar to protect the cylinder shut-off valve, a safety relief device with direct communication to the vapor space, and a listed over-filling prevention device (OPD).
    • Cylinder should never be filled beyond 80% capacity.
  • Regulator Specifications:
    • Designed to operate at a maximum output pressure of 11 inches of water column (2.74 kPa).
    • Replacement pressure regulator/hose assembly must be part No 155-4535-0.
  • Side Burner Weight Limit:
    • Never place more than 15 pounds on the side burner.
  • Clearance from Combustible Materials:
    • Position grill on a non-combustible level surface in a well-ventilated location, a safe distance of 10 ft. (3.1 m) from combustible materials, buildings, and overhangs.
    • Maintain a minimum distance of 36" (91 cm) from all sides of the grill to wooden deck railings, walls, or other combustible materials.
  • Electrical Grounding (for AC current rotisserie, if used):
    • In the US: National Electrical Code - ANSI-NFPA No. 70 - Latest Edition.
    • In Canada: Canadian Electrical Code – CSA C22.1.
    • Rotisserie plug is a three-pronged plug for electrical shock protection and should be plugged directly into a properly grounded 3-prong receptacle.

Usage Features:

  • Assembly: Requires two people for assembly and a Phillips Head Screwdriver. The manual includes a detailed parts list and step-by-step instructions for assembling the cart, attaching side tables, installing the grill body, and connecting the sear burner components.
  • LP Gas Cylinder Installation: Instructions for inspecting the rubber seal, placing the cylinder in the tank holder, and orienting it correctly.
  • Hose and Regulator Connection: Detailed steps for connecting the Type 1 regulator to the LP gas cylinder, ensuring proper sealing and no kinks in the hose.
  • Leak Testing: Critical procedure to be performed after assembly, cylinder refill/exchange, grill relocation, or if unused for over 60 days. Involves applying a soapy water mixture to all gas connections and checking for bubbles.
  • Lighting Instructions:
    • Main Burners: Open lid, ensure control knobs are OFF, slowly turn IGNITION BURNER control knob to HIGH (2-3 seconds) until igniter clicks. If no ignition in 5 seconds, turn OFF, wait 5 minutes, and repeat. Other burners can be lit sequentially from right to left.
    • Match Lighting Main Burners: Open lid, ensure control knobs are OFF, place a lit paper match on the matchlighter through the lighting hole, turn FAR LEFT burner control knob to HIGH.
    • Sear Burner: Open lid, ensure control knob is OFF, push and hold side burner control knob and SLOWLY turn to HIGH (2-3 seconds) until igniter clicks.
    • Match Lighting Sear Burner: Open lid, ensure control knob is OFF, strike a match and place it near the burner, turn side burner control knob to HIGH.
  • Turning Off the Grill: Turn off the cylinder valve first, then turn all burner control knobs to the OFF position.
  • Preheating: Recommended to preheat for 5-10 minutes on HIGH with the lid closed to ensure proper grilling temperatures.
  • Controlling Flare-ups/Grease Fires: Trim excess fat, cook high-fat meats on Low or indirectly, ensure grill is level for proper grease drainage, and clean frequently. Do NOT use water on grease fires; use a type BC dry chemical fire extinguisher, dirt, sand, or baking soda.
  • Indirect Cooking: Cook food without direct heat source, searing on one side and slow cooking on the unlit side.
  • Rotisserie Cooking: Grill is pre-drilled for a rotisserie (sold separately). Instructions emphasize using a specifically manufactured rotisserie and proper electrical grounding. Side burner should not be used when rotisserie is in use.
  • Side Burner Usage: Can be used for side dishes. Use a 10" diameter pot or smaller, centered over the burner, with no extended handle. Do not deep fry food in oil.

Maintenance Features:

  • Cleaning Interior of Grill: Scrub grates with a wire bristle brush after cooking, then turn burners to HIGH for 5 minutes. After cooling, remove grates and heat tents, brush out ash and grease from the firebox, and clean the grease cup. Wash grates and heat tents with mild detergent periodically.
  • Cleaning Interior of Grill Lid: Clean smoke residue with a scrub brush and baking soda/water solution.
  • Maintaining Exterior of Grill: Keep clean and covered when not in use to prevent rust.
    • Painted Surfaces: Wash with mild detergent or non-abrasive cleaner and warm soapy water.
    • Stainless Steel Surfaces: Wash with mild detergent and warm soapy water, wipe dry with a soft cloth. Use abrasive plastic cleaning pad for baked-on grease, always in the direction of the brushed finish. Car wax can help protect the finish.
    • Porcelain Surfaces: Clean with baking soda/water solution or specially formulated cleaner. Use non-abrasive scouring powder for stubborn stains.
    • Plastic and Rubber Parts: Wash with warm soapy water and wipe dry. Avoid citrisol, abrasive cleaners, degreasers, or concentrated grill cleaner.
  • Rust Prevention: Discoloration and rust can occur due to high temperatures, marinades, grease fires, and coastal climates. Rust spots can be buffed, cleaned, and lightly coated with vegetable oil. Do not use chlorine-containing cleaners or store pool supplies/chemicals in the cart.
  • Burner Cleaning and Maintenance:
    • Keep appliance free of combustible materials and clear ventilation openings.
    • Visually check burner flames for proper operation.
    • Perform checks at least twice a year or after extended storage.
    • Remove cooking grills, heat distribution plates, and burners. Use a narrow bottle brush or stiff wire to clean burner tubes and flame ports. Use a wire brush to clean the outer surface of the burner.
    • Inspect burners for cracks, abnormal holes, or corrosion damage and replace if found.
    • Ensure burner opening slides over the valve nozzle correctly.
  • Troubleshooting: A dedicated section provides solutions for common issues like burner not lighting, irregular flame patterns, or grill not heating sufficiently. It covers causes such as low LP gas, clogged burner ports, faulty igniter, and flow-limiting device activation.

Warranty Information:

The Brinkmann Corporation offers a warranty to the original purchaser:

  • Five-year: on stainless steel tube burners.
  • Three-year: on all other stainless steel parts.
  • One-year: on valves, frame, housing, cart, igniter, cooking grates, and other related parts. The warranty does not cover normal wear, rust, abuse, improper maintenance, surface scratches, or heat damage to the finish. Proof of purchase (sales receipt or invoice) is required for warranty claims.

Brinkmann 810-4535-S Specifications

General IconGeneral
BrandBrinkmann
Model810-4535-S
CategoryGrill
LanguageEnglish

Related product manuals