c.
a.
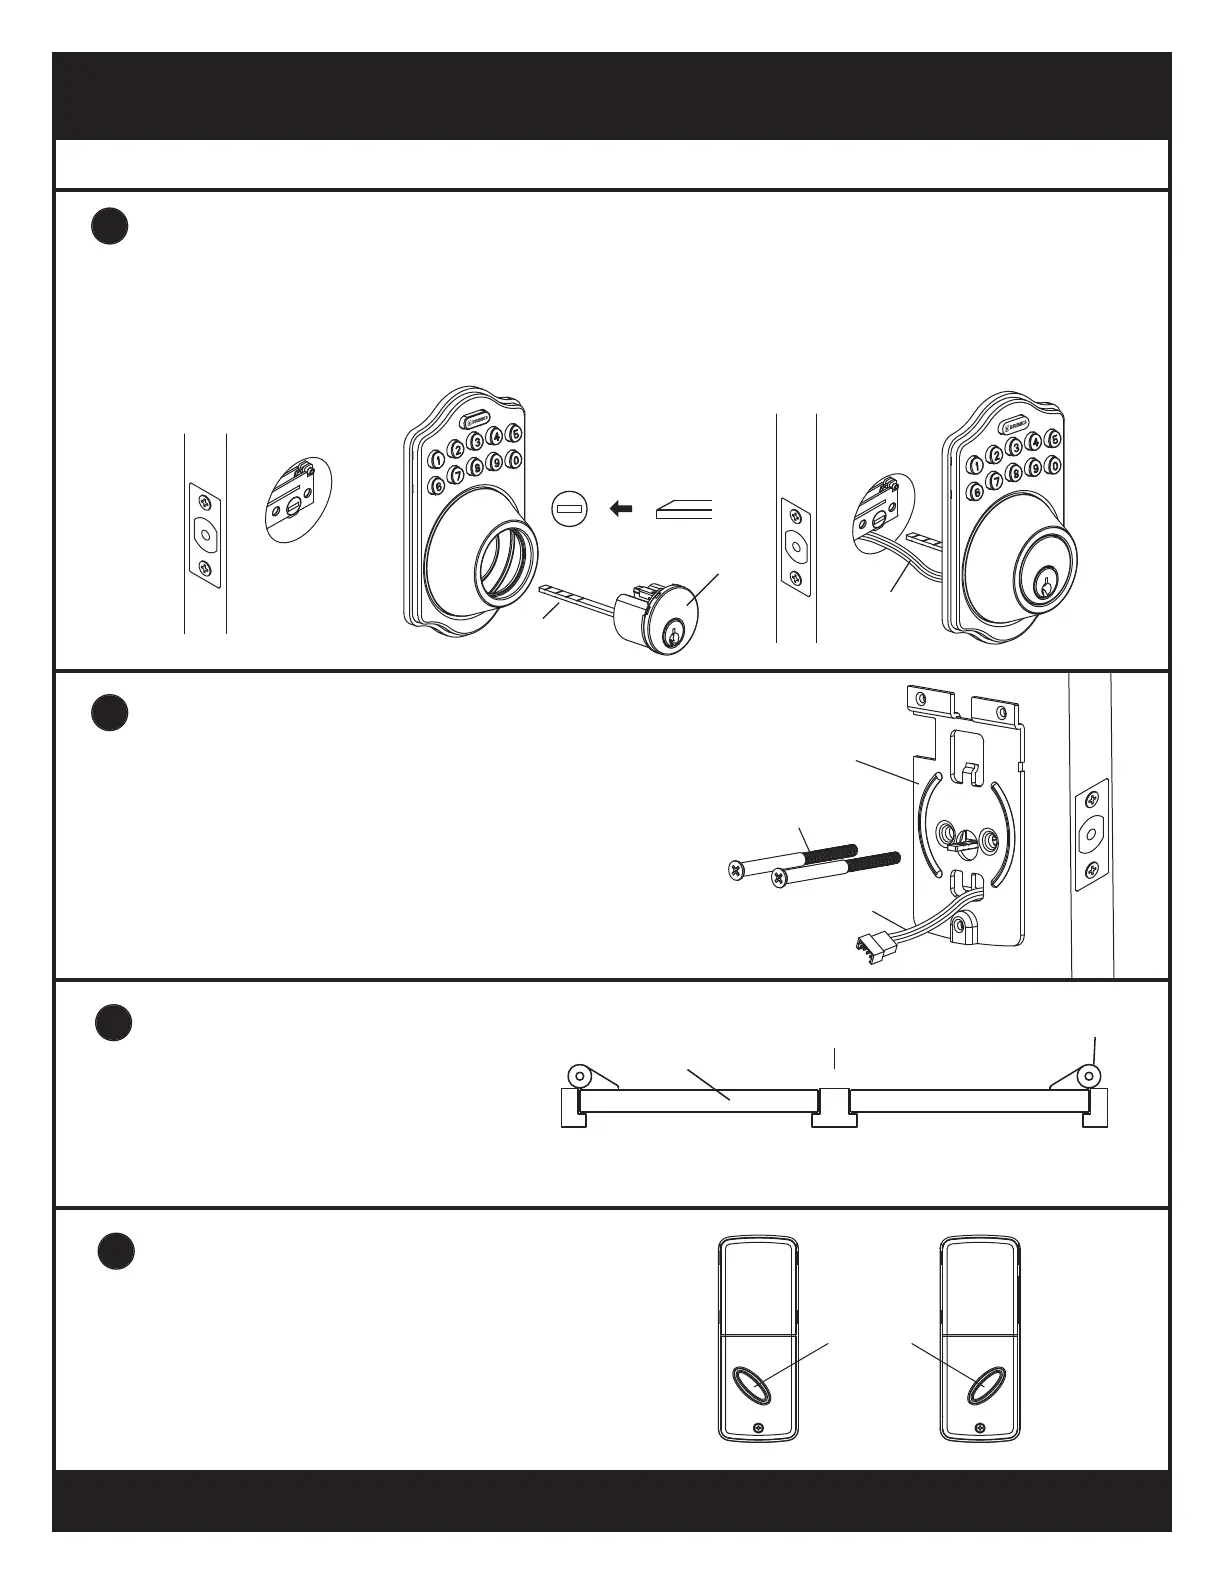
Pass the IC Wire through the opening in the Mounting
Plate as shown.
b.
Insert 2 (S2) Mounting Plate Screws through the holes
in the plate and thread into the cylinder. Tighten rmly.
If the Mounting Plate or Keypad Deadbolt Assembly is
not straight, loosen the screws and adjust its position
and tighten the screws again.
Install Inside Mounting Plate
a.
Turn the Turnpiece left (Counterclockwise)
for installation on a right-handed door.
b.
Turn the Turnpiece right (Clockwise) for
installation on a left-handed door.
Adjust The Turnpiece
Face the door from outside. The door is
left-handed if the hinges are on the left
hand side of the door, whereas, the door is
right-handed if the hinges are on the right
hand side of the door.
Identify Door Handing
c.
a.
Make sure that the latch bolt is retracted (unlocked).
b.
Insert the Cylinder into the Keypad Assembly and orient the Tailpiece in a horizontal position.
Pass the IC Wire under the deadbolt and insert the Tailpiece through the slotted cam of the latch and place the
Keypad Assembly against the door.
Install Keypad Assembly
Note: Work with the door open until the lock is installed and tested to avoid an accidental lockout.
Cylinder
Tailpiece
IC Wire
a
b
c
Mounting Plate
Screws(S2)
IC Wire
Interior
Exterior
Door
Hinge
(Left Handed) (Right Handed)
Turnpiece
For
Right-Handed
Door
For
Left-Handed
Door
6
8
7
5
INSTALLATION INSTRUCTIONS
(
Continued
)
4