OJ
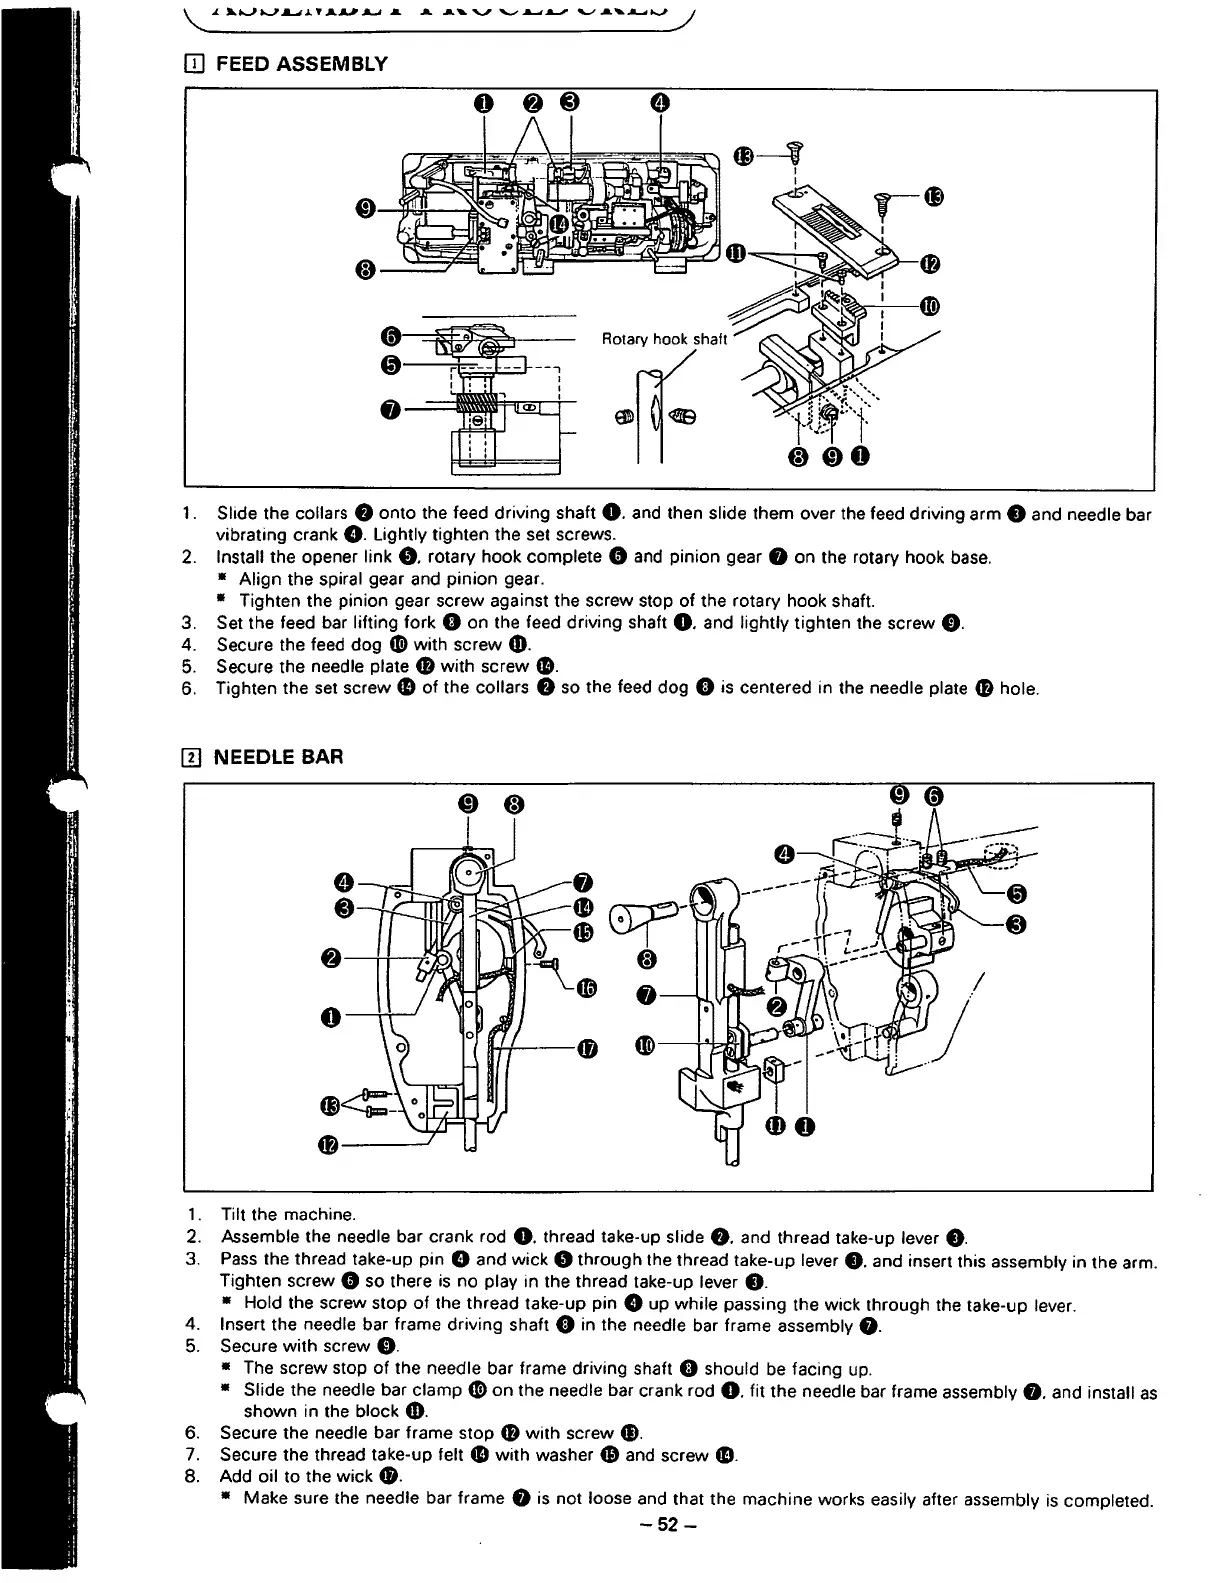
FEED ASSEMBLY
Q)---i
•
~~~:;;]
0
--==-tlti9l~r-
I
I
1.
Slide the collars 8 onto the feed driving shaft
0.
and then slide them over the feed driving arm 8 and needle bar
vibrating crank
0.
Lightly tighten the set screws.
2.
Install the opener link
0.
rotary hook complete 0 and pinion gear 8 on the rotary hook base.
• Align the spiral gear and pinion gear.
• Tighten the pinion gear screw against the screw stop of the rotary hook shaft.
3.
Set the feed bar lifting fork 0 on the feed driving shaft
0.
and lightly tighten the screw
0.
4. Secure the feed dog
di)
with screw
CD.
5.
Secure the needle plate
48
with screw
G).
6. Tighten the set screw
I)
of
the collars 8 so the feed dog 0
is
centered in the needle plate
48
hole.
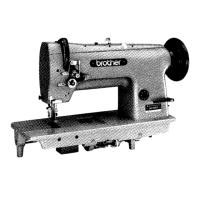
m NEEDLE BAR
1.
Tilt the machine.
2.
Assemble the needle bar crank rod
0.
thread take-up slide
8.
and thread take-up lever
8.
3.
Pass
the thread take-up pin 0 and wick 0 through the thread take-up lever
8.
and insert this assembly in the arm.
Tighten screw
0 so there
is
no play in the thread take-up lever
8.
• Hold the screw stop
of
the thread take-up pin 0 up while passing the wick through the take-up lever.
4. Insert the needle bar frame driving shaft 0 in the needle bar frame assembly
8.
5.
Secure
with
screw
0.
• The screw stop
of
the needle bar frame driving shaft 0 should be facing
up.
• Slide the needle bar clamp
G)
on the needle bar crank rod
0.
fit the needle bar frame assembly
8.
and install
as
shown in the block
G).
6.
Secure the needle bar frame stop
48
with
screw
G).
7.
Secure the thread take-up felt
G)
with
washer
4'1
and screw
G).
8. Add oil to the wick
41.
• Make sure the needle bar frame 8
is
not loose and that the machine works easily after assembly
is
completed.
-52-
From the library of: Superior Sewing Machine & Supply LLC