[I) FEED
DOG
ADJUSTMENT
IN
BACK
AND
FORTH
DIRECTIONS
0
15
mm
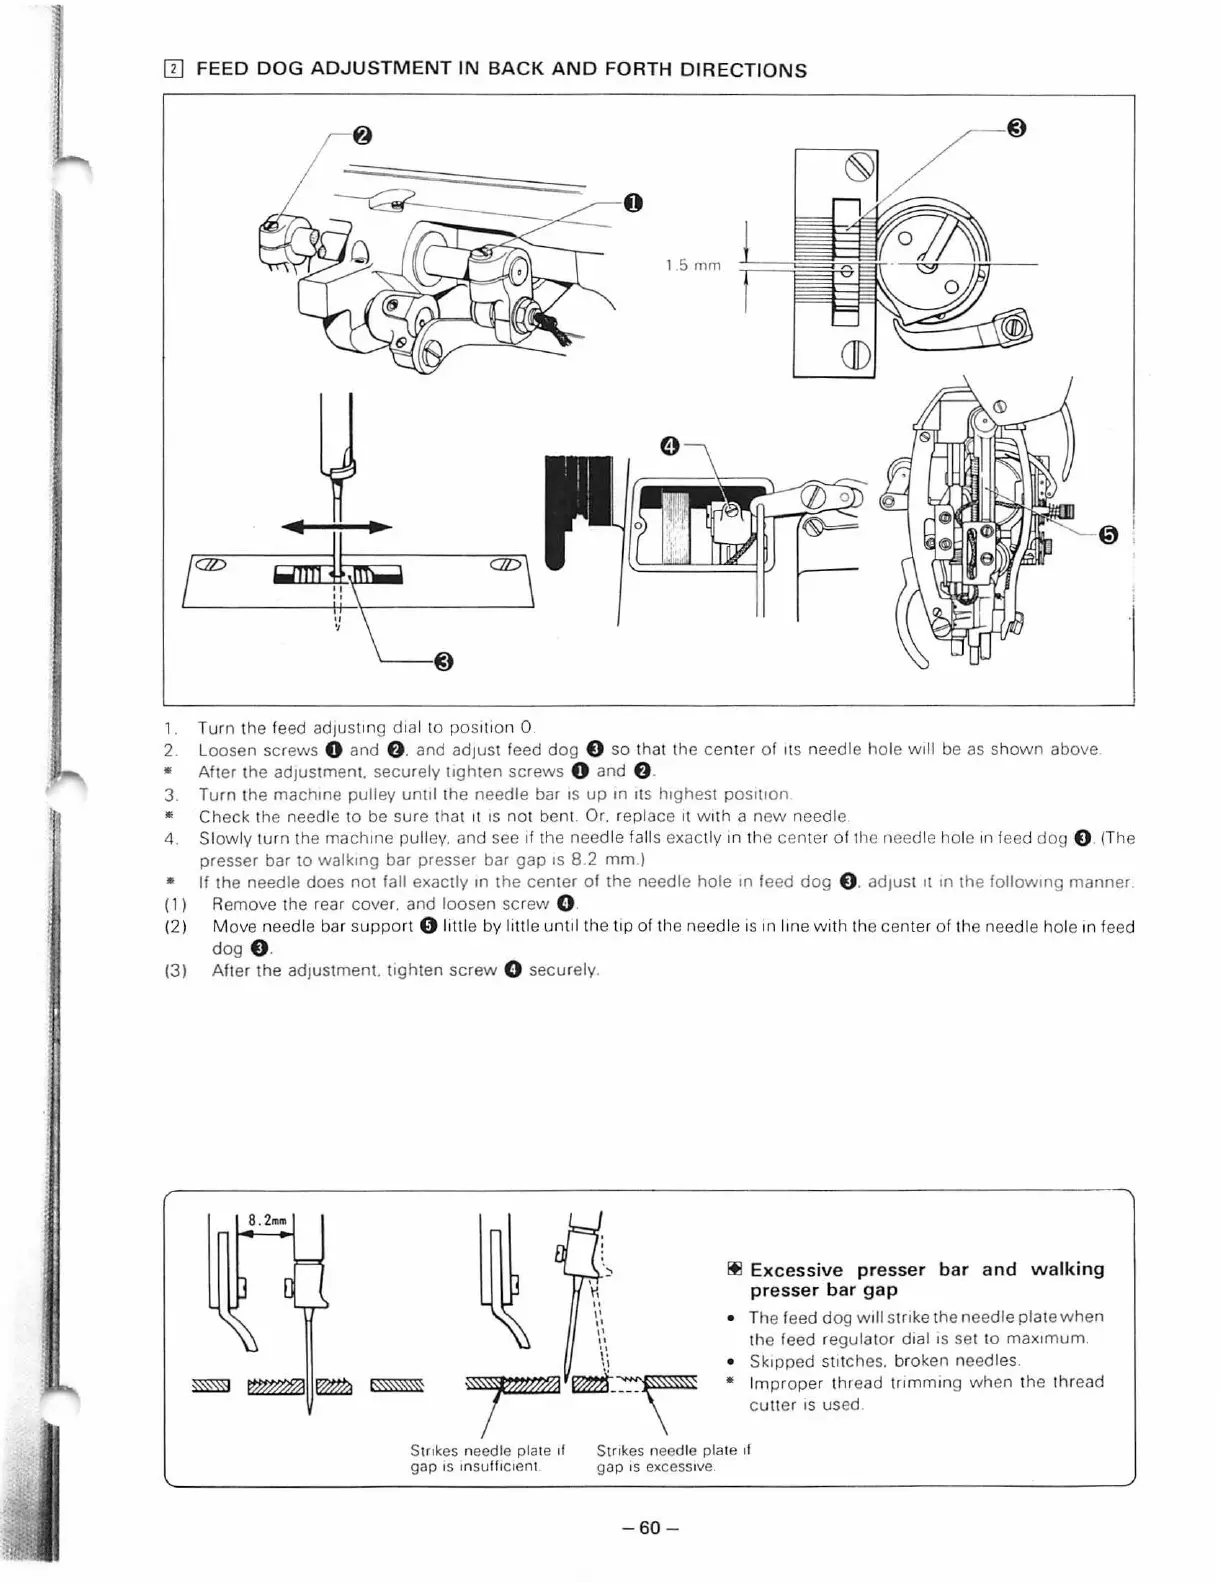
1. Turn the feed
ad1us
t1
ng
d1al
to
pos1t1on
0.
2. Loosen screws 0 and
f)
. and
adjust
feed
dog
f)
so that the
center
of
1ts
needle hole will
be
as
shown
above.
• After the adjustment. securely
lighten
screws 0 and
f)
.
3. Turn the mach1ne pulley
until
the needle bar
IS
up
m Its h1ghest poSitiOn
• Check
the needle to be sure that
1t
IS
not
bent. Or. replace
1t
with
a
new
needle
4.
Slowly
turn the machme pulley. and see If the needle falls exactly m the
cente
r
of
th
e needle
ho
le
1n
feed
dog
f)
. (The
presser bar to
walkmg
bar presser bar
gap
1s
8.2
mm
.)
• If the needle does
not
fall exactly m the center
of
the needle hole m feed
dog
f)
. adjuSt
11
1n
the follow1ng
manner
( 1) Remove the rear cover. and loosen
screw
0 .
(2)
Move
needle bar
suppo
rt 0 little
by
litt
le
unt
il the
tip
of
the needle IS 1n l
1ne
with the cen
te
r of the needle hole
1n
feed
dog
f)
.
(3)
After the adjustment.
tighten
screw
0 securely.
8.2
mm
"
,.
..
,,
"
,,
!tl
Excessive presser bar and
walking
presser bar
gap
• The feed
dog
will
stnke the needle plate
when
the feed regulator
d1al
IS
set to
max
1mum.
!~\
• Sk1pped stitches. broken needles.
• I
mprop
er thread tn
mmmg
when
t
he
thread
cutter
1s
used
Stnkes needle plate
''
gap
IS
lllSUffi
Cie
nl
Strikes needle plate ''
gap
1s
excess1ve.
-
60-
From the library of: Superior Sewing Machine & Supply LLC
 Loading...