EasyManua.ls Logo

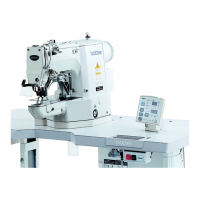
Brother BE-438C User Manual

Brother BE-438C
67 pages
To Next Page IconTo Next Page
Page #1 background imageLoading...
Page #1 background image
BE-438C
Please read this manual before using the machine.
Please keep this manual within easy reach for quick reference.
ELECTRONIC LOCKSTITCH BUTTON SEWER
INSTRUCTION MANUAL

Table of Contents

Other manuals for Brother BE-438C

Questions and Answers:

Brother BE-438C Specifications

General IconGeneral
BrandBrother
ModelBE-438C
CategorySewing Machine
LanguageEnglish

Summary

SAFETY INSTRUCTIONS

Safety Indications and Meanings

Explains safety indications and symbols used in the manual and on the machine.

NOTES ON SAFETY

Environmental Requirements

Specifies environmental conditions for machine operation.

Installation Guidelines

General guidance for installing the sewing machine and its components.

SEWING OPERATIONS

Cleaning Procedures

Step-by-step instructions for cleaning sewing machine parts.

Maintenance and Inspection

Procedures for carrying out regular maintenance and inspections.

WARNING LABELS

High Temperature Warning Display

Explains the high temperature warning symbol on the machine.

Direction of Operation and Parts Identification

Illustrates the direction of operation and identifies key machine parts.

NAME OF EACH PART

Safety Devices Identification

Lists and labels the safety devices attached to the machine.

SPECIFICATIONS

Machine Specifications

Detailed technical specifications of the BE-438C sewing machine.

Program List

List of pre-set sewing programs with parameters like stitches and dimensions.

INSTALLATION

Power Table Setup

Instructions for setting up the power table, including dimensions and requirements.

Control Box Installation

Step-by-step guide to mounting the control box onto the machine.

Cushion and Oil Pan Installation

Procedures for installing rubber cushions and the oil pan.

Switching Plate and Machine Head Mounting

Steps for mounting the switching plate and machine head.

Head Rest and Cooling Tank Installation

Instructions for installing the head rest and optional cooling tank.

Operation Panel and Ground Wire Connection

How to install the operation panel and connect the ground wire.

Cord Connections Procedure

Detailed instructions for connecting various machine cords to the control box.

Belt Cover and Foot Switch Installation

Steps for installing the belt cover and the foot switch.

Spool Stand and Button Tray Installation

Procedures for installing the spool stand and button tray.

Eye Guard Installation

How to attach the eye guard assembly to the face plate.

LUBRICATION

Lubrication Points

Identifies key points requiring lubrication on the sewing machine.

OPERATION

Operation Panel Functions

Explains the purpose of each button and indicator on the operation panel.

Operating Procedure Overview

Step-by-step guide to operating the sewing machine.

Setting Program Number

How to select and set a specific sewing program number.

Setting X and Y Scales

Adjusting the X and Y scale settings for pattern dimensions.

Setting Sewing Speed

How to adjust and set the sewing speed in RPM.

CHECKING THE SEWING PATTERN

Safety Measures for Pattern Check

Safety precautions to prevent accidental changes during pattern checking.

CORRECT USE

Needle and Thread Selection

Guidelines for selecting appropriate needles and threads based on material.

Needle Installation and Threading

Procedures for correctly installing the needle and threading the upper thread.

Lower Thread Winding

Detailed steps for winding the bobbin thread onto the bobbin.

Bobbin Case Replacement and Threading

How to replace the bobbin case and thread it correctly.

Thread Tension Guide

Reference guide for setting and adjusting thread tension.

Thread Tension Adjustments

Detailed instructions for adjusting lower, upper, and take-up spring tensions.

Thread Take-up Adjustments

How to adjust thread take-up amount and guide R.

Button Insertion and Holder Adjustment

Procedures for inserting buttons and adjusting the button holder.

PROM Replacement Procedure

Steps for replacing the Programmable Read-Only Memory (PROM).

SEWING

Preparation for Sewing

Steps to take before starting the sewing process, including checks.

MAINTENANCE AND INSPECTION

Needle Check and Rotary Hook Cleaning

How to check the needle and clean the rotary hook.

Lubrication Procedures

Detailed instructions for lubricating various parts of the machine.

Oil Draining and Air Hole Cleaning

Procedures for draining oil and cleaning air inlets/holes.

STANDARD ADJUSTMENTS

Needle Bar Height and Lift Adjustment

How to adjust the needle bar height and lift amount.

Driver Needle Guard and Needle Clearance Adjustment

Adjusting the driver needle guard and needle-to-hook clearance.

Shuttle Race Thread Guide Adjustment

How to adjust the shuttle race thread guide position.

Thread Take-up Amount Adjustment

How to adjust the amount of thread taken up by the lever.

Movable Knife Adjustment

Steps for adjusting the movable knife for thread trimming.

Movable and Fixed Knife Replacement

How to replace the movable and fixed knives.

Knife Engagement and Button Clamp Lift Adjustment

Adjusting knife engagement and button clamp lift.

Holding Pressure and Button Holder Position

Adjusting holding pressure and button holder position.

Needle Stop Position and Thread Wiper Adjustment

Adjusting needle stop position and thread wiper.

Input Sensor and DIP Switch Checking

How to check input sensors and DIP switch configurations.

Input Voltage Check and Memory Clearing

Checking input voltage and clearing memory settings.

Moving Stitch Patterns

How to move recorded stitch patterns to different positions.

USING THE COUNTERS

Bobbin Thread Counter Usage

How to set and use the bobbin thread counter.

Production Counter Usage

How to display and use the production counter.

CHANGING FUNCTIONS USING DIP SWITCHES

Operation Panel DIP Switches

Explains the functions of DIP switches on the operation panel.

Presser Mode Settings

How to set the presser mode using DIP switch combinations.

Control Box DIP Switches

Explains the functions of DIP switches located inside the control box.

User Program Management

How to record, use, and clear user programs.

CHANGING SPECIAL FUNCTIONS USING MEMORY SWITCHES

Memory Switches 00-0F Functions

Describes functions controlled by memory switches 00 through 0F.

Memory Switches 10-1F Functions

Describes functions controlled by memory switches 10 through 1F.

Memory Switches 30-4F Functions

Describes functions controlled by memory switches 30 through 4F.

Cycle Sewing Function Usage

How to record and use the cycle sewing function for patterns.

TABLE OF ERROR CODES

General Error Codes (E-13, E-17)

Explains common error codes related to machine setup and operation.

Specific Error Codes (E-A0 to E-F2)

Explains specific error codes for circuit and data issues.

Optional Equipment Errors (E-10 to E-14)

Lists error codes related to optional equipment malfunctions.

GAUGE PARTS LIST

Feed Plates

Lists and illustrates various feed plates for different sewing needs.

Button Clamp Spacers

Lists different button clamp spacers.

Needle Hole Plates

Lists and illustrates various needle hole plates.

TROUBLESHOOTING

Button Clamp and Thread Wiper Issues

Troubleshooting steps for button clamp and thread wiper malfunctions.

Thread Breakage and Skipped Stitches

Solutions for thread breakage and skipped stitches.

Needle Breakage and Trimming Issues

Troubleshooting for needle breakage and trimming problems.

Seam Finish and Threading Problems

Solutions for poor seam finish and threading issues.

Machine Operation and Tightness Issues

Troubleshooting for machine operation and stitch tightness problems.

OPTIONAL PARTS

Foot Switches

Describes the two-pedal and two-step foot switches.

Cooling Tank and Thread Wiper

Describes the liquid cooling tank and solenoid thread wiper.

Emergency Stop Switch

Describes the function of the emergency stop switch.

Related product manuals