EasyManua.ls Logo

Brother BE-1201B-AC - User Manual

Brother BE-1201B-AC
246 pages
Print Icon
To Next Page IconTo Next Page
Loading...
BE-0901E-AC-PC
BE-1201B-AC-PC
PC Control type
Please read this manual before using the machine.
Please keep this manual within easy reach for quick reference.
NINE NEEDLE ONE HEAD EMBROIDERY MACHINE
TWELVE NEEDLE ONE HEAD EMBROIDERY MACHINE
INSTRUCTION MANUAL

Table of Contents

Other manuals for Brother BE-1201B-AC

Questions and Answers

  • V
    vrobinsonAug 17, 2025
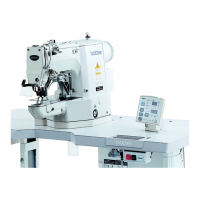
    What to do if my Brother BE-1201B-AC Sewing Machine does not operate even if the power is turned on?
    • A
      Angela GardnerAug 17, 2025
      If your machine isn't operating even when powered on, first ensure the power cord is properly plugged in. Next, check that the connector in the control box is correctly connected, paying attention to the types and colors of the connectors. Finally, inspect fuse F1 or F5 on the power PCB in the control box; if blown, replace it. If the fuse blows again, there may be a fault requiring a check of the wiring or replacement of the control box.
  • T
    Tim WilcoxAug 20, 2025
    What to do if my Brother Sewing Machine is not embroidered properly?
    • S
      Sandra NguyenAug 20, 2025
      If your embroidery isn't coming out properly, check if the material edge is caught in the machine and ensure the embroidery hoop and related parts are operating correctly. Verify that the material is stretched properly and that the thread tension is correct. Also, ensure that the lower thread comes out smoothly.
  • A
    adamsjohnathanAug 25, 2025
    What to do if my Brother BE-1201B-AC Sewing Machine displays 'Release stop SW to operate!'?
    • K
      Kelly OliverAug 25, 2025
      If the message "Release stop SW to operate!" is displayed, it indicates that the stop switch (an optional feature) is turned on. Reset the stop switch to resolve this issue.
  • J
    joshua22Aug 27, 2025
    What causes an overtravel error on my Brother BE-1201B-AC Sewing Machine?
    • D
      deniserodriguezAug 27, 2025
      An overtravel error can occur if the frame is not within the cap frame area. To resolve this, move the frame within the cap frame area and turn on the power. Also, check if the signal of the X area sensor turns ON and OFF in PORT test mode. If the signal does not change, check the connection from the X cap sensor to the main PCB, referring to the cable connections diagram. If necessary, replace the X cap sensor.
  • A
    Amy TranSep 3, 2025
    Why does the needle stop position error occur on my Brother BE-1201B-AC Sewing Machine?
    • R
      Robert BanksSep 3, 2025
      A needle stop position error can occur if the pulley is manually turned and out of the stop angle; turn the pulley to adjust the needle at the stop position and reset the error. Check the signal of the stop position sensor in the encoder test mode. Refer to the adjustment or cable connection block diagram and check the connection from the needle position detention sensor to the main PCB. If necessary, replace the needle position detection sensor. Also, verify if the main shaft brake solenoid is operating, checking the cable connections from the brake solenoid to the power PCB and from connector P27 of the power PCB to connector P1 of the main PCB.
  • C
    christopherroseSep 6, 2025
    What causes the E-A8 error on my Brother Sewing Machine?
    • P
      pattonmadisonSep 6, 2025
      If the E-A8 error occurs frequently, manually turn the main shaft pulley in the encoder signal test mode and check that the stop position signal is correct. If the signal does not change, refer to the cable connection block diagram and check the connection from the stop position sensor to the main PCB.
  • A
    Alex JohnsonSep 9, 2025
    Why don't all the solenoids of the head operate on my Brother Sewing Machine?
    • C
      Cynthia ChapmanSep 9, 2025
      If all solenoids of the head do not operate, refer to the block diagram showing cable connections and check fuse F2 on the power supply PCB. If it is blown, replace it. If the fuse is blown immediately after turning on the power even after replacing the fuse, the 60v circuit is faulty.
  • J
    Jacob ZimmermanNov 13, 2025
    Why is my Brother Sewing Machine thread breaking?
    • M
      Mr. Douglas SmithNov 13, 2025
      Thread breakage can occur due to several reasons. Ensure the machine is properly threaded, the thread tension isn't too high, and the rotary hook assembly isn't clogged. Also, check if there's thread in the bobbin, if the needle is bent, or if there's a rough edge on the needle plate, rotary hook, or bobbin case. Verify the needle is installed correctly, the presser foot is in contact with the material, and the thread thickness and needle size are appropriate. Using a thread with a right-hand twist can also cause breakage; replace it with a left-hand twist thread. Other potential causes include adhesive on the needle, weak material tension, excessive play between the rotary hooks, a non-smooth outer rotary hook, incorrect clearance between the rotary hook stopper and hook, or thread not co...
  • L
    Larry SanchezDec 1, 2025
    What causes the main shaft motor lock error on my Brother BE-1201B-AC?
    • S
      Stephen MortonDec 1, 2025
      If the INDEX motor is not rotating, check the connection from the INDEX motor to the main PCB, referring to the cable connections diagram. Check the resistance values of pins 1 and 2 and pins 3 and 4 at the connector section of the INDEX motor (normal resistance is approximately 10 ohms); if not normal, replace the INDEX motor and the main PCB. If the main shaft motor doesn't rotate at all when the error occurs, check fuses F1 and F5 on the power supply PCB in the control box. Also, check the connection from the main shaft motor to the main PCB, connectors P15 and P16 of the main PCB, connectors P1 and P2 on the power PCB, and connector P14 of the main PCB to the 14v terminal of the power transformer. Manually turn the main shaft pulley in the encoder signal test mode and check to see if t...

Summary

SAFETY INSTRUCTIONS

Safety Indications and Their Meanings

Explains safety indications and symbols used on the machine and in the manual for safe operation.

Notes on Safety

Provides essential safety notes regarding environmental requirements, installation, and operation of the sewing machine.

Warning Labels

Details the warning labels found on the sewing machine and instructs users to follow their instructions.

Before Starting Operation

Floppy Disk Handling Precautions

Provides essential precautions for handling floppy disks to prevent damage and ensure proper operation.

Protecting Data in Floppy Disks

Explains how to use write-protection for floppy disks to prevent data deletion or overwriting.

Procedure of Reading This Manual

Guides the user on how to read the manual, including model explanation and manual configuration.

Chapter 1 An Introduction of Embroidery Machine

Specifications

Details the technical specifications of the embroidery machine models BE-0901E-AC-PC and BE-1201B-AC-PC.

Software Requirements

Lists the necessary systems and hardware components required for installing the embroidery software.

Software Configuration and Functions

Describes the composition of the software, including its four main programs and their functions.

Basic Operation of Software

Explains the basic usage of the software, focusing on mouse operations like clicking, double-clicking, and dragging.

Chapter 2 Preparation of Embroidery Machine

Machine Components Identification

Illustrates and labels the key components of both BE-0901E-AC-PC and BE-1201B-AC-PC embroidery machines.

Machine Installation Procedures

Details the steps for installing the machine, including transportation, leveling, and securing.

Operation Panel and Guard Bar Installation

Guides on installing the operation panel and mounting the guard bar for proper machine setup.

Cotton Stand and Lubrication

Explains how to mount the cotton stand and provides instructions for lubricating the needle bar case.

PC and Power Supply Connection

Details the process of connecting a personal computer to multiple machines and connecting the power supply.

Software Installation Process

Provides step-by-step instructions for installing the embroidery software from the CD-ROM.

Preparation for Embroidering

Covers essential preparation steps before embroidering, including upper threading and bobbin replacement.

Needle Replacement and Tension Adjustment

Explains how to replace needles, select appropriate needles, and adjust thread tension for optimal sewing.

Machine Operation Preparation

Details checks to perform before turning on the power and procedures for handling machine startup errors.

Chapter 3 Embroidering Procedures

Operation Panel Functions

Explains the functions of each button on the operation panel for controlling the embroidery process.

Preparation Flowchart

Provides a visual flowchart outlining the necessary steps for preparing the machine for embroidering.

Starting the Embroidering Process

Details the steps to run the software, turn on the machine, and initiate the embroidering process.

Chapter 4 Selecting and Transferring Embroidery Data

Functions Overview

Lists and describes the commands available in the embroidery data selection and transfer software.

Screen Components Description

Identifies and explains the major components of the embroidery data explorer screen.

Directory Management

Explains how to create new directories for organizing embroidery data files.

Data Transfer Operations

Details how to transfer embroidery data, including DST/DSB formats and network transfer.

Data Management: Copy, Move, Delete

Provides instructions for copying, moving, and deleting embroidery data files using the software.

Data Handling: Recreate Icon, Select All, Rename

Explains how to recreate icons, select all data, and rename embroidery data files.

Finding and Adjusting Screen Display

Guides on finding data, adjusting screen display settings like toolbars and file formats.

Reading Embroidery Data

Details how to read embroidery data from floppy disks and paper tapes into the system.

Chapter 5 Editing Embroidery Data

Editing Functions Overview

Lists and describes functions for editing embroidery data, categorized by File, Edit, Change, and View menus.

Screen Description and Basic Operations

Explains the embroidery data editor screen components and basic operations like opening and setting display.

Display Settings and Zooming

Covers display settings such as centering, zooming, and viewing needle penetration positions.

Pattern Editing Operations

Details editing operations like rotating, flipping, repeating, resizing, and inserting codes.

Data Saving and Printing

Explains how to save edited embroidery data (Save, Save As) and print the data.

Chapter 6 Embroidering

PC Control and Machine Settings

Describes PC control functions and settings available when the machine power is on or off.

Machine Operation Settings

Details settings available before turning on the machine, including toolbars, status bars, and ports.

Post-Power On Settings and Display

Explains settings after turning on power, such as zoom, grid, hoop display, and color changes.

Machine Configuration and Setup

Covers configuration, data copying, and upgrading machine programs for optimal performance.

Machine Setting Details

Explains detailed machine settings like needle bar, speed range, hoop position, and thread trimming.

Embroidering Operations

Provides guidance on starting embroidery, pausing, canceling, and moving the machine home position.

Step-forward;Step-back and Saving Data

Details step-forward/back operations, specifying values, and saving embroidered data.

Chapter 7 Operation of Machine

Operating Procedures and Power Source

Covers powering on the machine, preparation for embroidering, and selecting data.

Machine Stop Functions

Explains how to stop the machine using the stop switch or emergency stop switch.

Hoop Movement and Area Check

Details permission for hoop movement, jog switches, and area check procedures.

Thread Breakage Measures and Inching Mode

Provides remedies for thread breakage and explains inching mode operations.

Chapter 8 Creating Production Report

Production Report Functions

Lists commands for creating and managing production reports, including file operations and display settings.

Displaying and Analyzing Reports

Guides on displaying various reports like details, thread breakage, and output information.

Report Item Settings

Explains how to set display items for each production report, including general and detailed data.

Saving and Printing Reports

Details how to save production reports in CSV format and print them using page setup.

Chapter 9 Maintenance

Safety Precautions for Maintenance

Highlights critical safety precautions to be followed before starting any maintenance work.

Cleaning Procedures

Provides instructions for cleaning the machine, including the rotary hook and needle plate.

Oiling Procedures

Details the locations and methods for oiling the machine's head and other components.

Chapter 10 Adjustment

Safety Precautions for Adjustment

Emphasizes safety measures, including turning off the power, before performing any adjustments.

Needle Bar Height Adjustment

Provides detailed steps for adjusting the needle bar height using specific tools and indicators.

Needle and Rotary Hook Timing

Explains the procedure for adjusting the timing between the needle and the rotary hook for correct operation.

Presser Foot and Thread Trimmer Adjustment

Guides on adjusting the presser foot height and the thread trimmer mechanism.

Thread Wiper and Belt Tension Adjustment

Details the adjustment procedures for the thread wiper and the machine's belt tension.

Chapter 11 Error code list

Error Codes E-00 to E-1 F and Measures

Lists error codes from E-00 to E-1F and provides corresponding measures for troubleshooting.

Error Codes E-21 to E-CA and Measures

Lists error codes from E-21 to E-CA and provides corresponding measures for troubleshooting.

Error Codes E-CB to E-FF and Measures

Lists error codes from E-CB to E-FF and provides corresponding measures for troubleshooting.

Chapter 12 Troubleshooting

Mechanical Troubleshooting Guide

Provides a checklist of potential mechanical problems and their corresponding check points for resolution.

Electrical Troubleshooting Guide

Details troubleshooting steps for electrical issues, including power, sensor, and motor errors.

Chapter 13 Connection and Installation of Optional Equipment

Attaching the Bobbin Winder

Provides instructions for mounting the bobbin winder assembly and its components.

Brother BE-1201B-AC Specifications

General IconGeneral
TypeEmbroidery Machine
Number of Needles1
Max Stitch Length5 mm
Max Stitch Width7 mm
Needle ThreaderAutomatic
DisplayLCD
Voltage120V

Related product manuals