EasyManua.ls Logo

Brother CM100DM - User Manual

Brother CM100DM
72 pages
Print Icon
To Next Page IconTo Next Page
Loading...
Be sure to read this document before using the machine.
We recommend that you keep this document nearby for future reference.
Operation Manual
Cutting Machine
Product Code: 891-Z01

Table of Contents

Questions and Answers

  • E
    Eric BerryAug 20, 2025
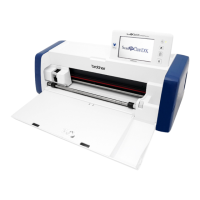
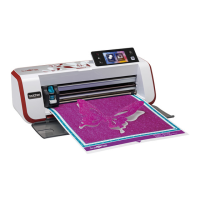
    Why does the material being cut catch on the tip of the cutting blade of my Brother CM100DM?
    • J
      Jacob KingAug 20, 2025
      If the material being cut catches on the tip of the cutting blade on your Brother Cutter, it could be due to a few reasons. First, dust or lint may have accumulated in the holder, so try cleaning it. Alternatively, the blade may be worn and need replacing. Finally, the material you're cutting might not be compatible with the machine; consider using a different material.
  • R
    Rachel MartinAug 22, 2025
    What to do if the Brother CM100DM Cutter mat cannot be fed out?
    • S
      Scott WilsonAug 22, 2025
      If the Brother Cutter mat cannot be fed out, it is likely that the material to be cut/drawn or original to be scanned is jammed in the feeding mechanism in the machine. To resolve this, press the “Feed” button while the mat is being inserted to feed it out. If the mat still doesn’t feed out, turn off the machine and carefully pull out the mat.
  • A
    Aaron HornAug 25, 2025
    Why is my Brother CM100DM Cutter not cutting all the way through the material?
    • D
      David StevensAug 25, 2025
      If not all of the material to be cut is cut and some areas remain uncut with your Brother Cutter, several factors could be the cause. You may not be using a blade appropriate for the material, or the blade extension from the blade holder may be too little. Check if the mat’s adhesive strength has decreased, or the blade is worn. The material itself might be incompatible with the machine. The cutting pressure (“Cut Pressure”) could be incorrect, or dust or lint has accumulated in the holder. The spacing between arranged patterns might be too small. If cutting fabric, ensure you are using a high tack adhesive fabric support sheet or iron-on fabric appliqué contact sheet, and that the fabric is firmly attached to the mat.
  • N
    norrismakaylaAug 26, 2025
    What to do if the material won't stick to the Brother CM100DM Cutter mat?
    • H
      henryseanAug 26, 2025
      If the material to be cut/ drawn or original to be scanned cannot be attached to the Brother Cutter mat, it may be because the material extends from the adhesive area of the mat. Attach the material while keeping it within the adhesive area of the mat. It could also be that the mat’s adhesive strength has decreased, in which case you should replace the mat with a new one.
  • F
    Felicia DanielsAug 27, 2025
    Why does the Brother CM100DM Cutter mat catch during cutting/drawing?
    • T
      twongAug 28, 2025
      If the Brother Cutter mat or the material catches on a feed roller during cutting/drawing, it could be due to decreased adhesive strength of the mat, or the material is not secured. Press the “Start/Stop” button to stop the operation, follow the instructions on the screen, and press the “Feed” button to feed out the mat. If the mat does not feed out, turn off the machine, remove the holder, and then manually feed out the mat. Another reason could be that the material extends from the adhesive area of the mat. After feeding out the mat, replace it with a new one or attach the material while keeping it within the adhesive area of the mat.
  • P
    Patricia JohnsonAug 30, 2025
    What to do if the Brother CM100DM mat cannot be fed?
    • R
      Rebecca ThomasAug 30, 2025
      If the Brother Cutter mat cannot be fed, ensure there is space around the slot at the back of the machine so that the mat can be fed out. Also, ensure the machine is placed on a flat, even surface.
  • B
    Brittany WallerAug 31, 2025
    Why can't I insert the mat into my Brother CM100DM?
    • Y
      yramirezAug 31, 2025
      If the Brother Cutter mat cannot be inserted, ensure that when the mat was inserted, it was placed under the feed rollers on the left and right sides of the feed slot. Also, make sure the mat was loaded using the “Feed” button: lightly insert the mat into the feed slot, and then press the “Feed” button.
  • M
    mary36Sep 2, 2025
    Why does the Brother CM100DM mat catch when being inserted?
    • W
      Wendy Yang MDSep 2, 2025
      If the Brother Cutter mat or the material catches on a feed roller when the mat is being inserted, it may be because the mat’s adhesive strength has decreased, or the material is not secured. Press the “Feed” button to feed out the mat, and then replace the mat with a new one. Alternatively, the material may extend from the adhesive area of the mat. Press the “Feed” button to feed out the mat, and then attach the material while keeping it within the adhesive area of the mat.
  • A
    Ashley TylerSep 4, 2025
    Why is the Brother CM100DM Cutter mat feeding in crooked?
    • I
      ilopezSep 4, 2025
      If the Brother Cutter mat is fed in at an angle, it may be because the mat was inserted into the feed slot at an angle. Press the “Feed” button to feed out the mat, and then re-insert it straight in. Another reason could be that the corners of the mat are deformed (bent), in which case you should replace the mat with a new one.
  • R
    Rebecca JordanSep 6, 2025
    What to do if the Brother Cutter mat cannot be recognized?
    • B
      Brittney WilsonSep 6, 2025
      If the Brother Cutter mat cannot be recognized, the dotted marks on the part of the mat that is inserted may be dirty, so clean the dotted marks on the mat and their surrounding area. Another reason could be that the dotted marks on the part of the mat that is inserted are hidden by material that was attached, so attach the material while keeping it within the adhesive area of the mat. Also, ensure that the mat was inserted so that the side with the material attached is facing up.

Summary

TRADEMARKS

IMPORTANT

Important notice regarding usage and licensing.

INTRODUCTION

IMPORTANT NOTICE

Key notices and disclaimers about the machine and its usage.

IMPORTANT SAFETY INSTRUCTIONS

Essential safety guidelines for operating the machine.

IMPORTANT SAFETY INSTRUCTIONS

Power Supply and AC Adapter

Safety precautions related to power supply, AC adapter, and cords.

Installation Location

Guidelines for setting up the machine in a suitable environment.

Safe Operation Precautions

Cautions for safe operation, handling moving parts, and child safety.

Mat Handling and General Cautions

Cautions regarding mat handling, blades, and general machine operation.

Precautions for Scanning

REGULATION

Regulatory compliance information.

FEATURES

Patterns and Scanning Modes

Overview of built-in patterns and scanning features.

Chapter 1 GETTING STARTED

PARTS AND FUNCTIONS

Description of the machine's components and their functions.

FIRST STEPS

Steps for unpacking, setup, and initial power-on.

FIRST STEPS

Mat and Cutting Blade Combinations

Chart for selecting compatible mats and cutting blades.

Material Attachment Guidelines

Instructions for attaching various materials to the mat.

FIRST STEPS

Test Pattern and Mat Loading

Selecting a test pattern and loading the mat for cutting.

FIRST STEPS

Cutting and Unloading

Procedure for cutting material and unloading it from the machine.

Trial Cutting

Performing trial cuts to ensure correct settings.

FIRST STEPS

Checking Trial Cutting Results

Evaluating trial cuts and adjusting blade extension.

MACHINE SETTINGS

Settings Screen Overview

Detailed configuration options for machine operation.

MACHINE SETTINGS

Specific Settings

Configuration of seam allowance, pattern spacing, and auto shutdown.

Chapter 2 BASIC OPERATIONS

PATTERN CUTTING

Guides for cutting patterns using the machine.

Chapter 2 BASIC OPERATIONS

Tutorial 2: Cutting Advanced Patterns

Step-by-step guide to cutting advanced patterns.

PATTERN SELECTION

Selecting Patterns

Methods for selecting single or multiple patterns for editing.

Chapter 3 ADVANCED OPERATIONS

CUTTING AND EDITING FUNCTIONS

Functions for editing and manipulating patterns.

Chapter 3 ADVANCED OPERATIONS

Advanced Pattern Editing

Advanced functions for pattern sizing and piece editing.

Pattern Layout Screen

Layout Editing Functions

Tools for arranging, selecting, deleting, and moving patterns.

Chapter 3 ADVANCED OPERATIONS

Pattern Manipulation

Detailed pattern manipulation: editing, grouping, and merging outlines.

Chapter 3 ADVANCED OPERATIONS

Auto Layout Functions

Arranging patterns automatically for material efficiency.

Chapter 3 ADVANCED OPERATIONS

Scanning a Background Image

Using scanned images as a background for pattern placement.

DRAWING FUNCTIONS

Drawing Setup and Procedure

Preparing and executing drawing operations with pens.

DRAWING FUNCTIONS

Cutting Around Drawings

Drawing patterns and cutting outlines with seam allowances.

Chapter 4 SCANNING FUNCTIONS

SCANNING FOR CUTTING (Direct Cut)

Scanning images for direct cutting without conversion.

Advanced Cutting Functions

Outline and Frame Settings

Adjusting outline distance and applying frames to scanned images.

CREATING CUTTING DATA (Scan to Cut Data)

Tutorial 4: Creating Cutting Data

Step-by-step guide to creating cutting data from an illustration.

CREATING CUTTING DATA

Saving and Recalling Cutting Data

Managing created cutting data: saving and loading.

SCANNING IMAGES (Scan to USB)

Scanning Notes and Material Compatibility

Scanning specifications and compatible materials.

Tutorial 5: Scanning to USB

Step-by-step guide to scanning an illustration to a USB flash drive.

SCANNING IMAGES

Scanning and Saving Process

Procedure for scanning images and saving them to USB.

Chapter 5 APPENDIX

CONSUMABLES

Guidelines for replacing mats, blades, and support sheets.

Replacing the Blade

Steps for removing and installing the cutting blade.

CARE AND MAINTENANCE

Cleaning Procedures

Instructions for cleaning the mat, holder, and internal components.

CARE AND MAINTENANCE

Cleaning Machine Components

Cleaning internal parts and scanner glass.

CARE AND MAINTENANCE

Adjusting the Screen

Calibrating the touch screen for accurate input.

TROUBLESHOOTING

Power Supply, Mat, and Jam Issues

Solutions for power, mat loading, and paper/fabric jam problems.

TROUBLESHOOTING

Cutting and Drawing Issues

Troubleshooting problems encountered during cutting and drawing operations.

TROUBLESHOOTING

Scanning Issues

Solutions for problems encountered during scanning operations.

ERROR MESSAGES

Error Message Guide

List of error messages and their corresponding solutions.

UPGRADING THE SOFTWARE

OPTIONAL ACCESSORIES

List of available optional accessories for purchase.

Brother CM100DM Specifications

General IconGeneral
BrandBrother
ModelCM100DM
CategoryCutter
LanguageEnglish

Related product manuals