W
wclarkAug 18, 2025
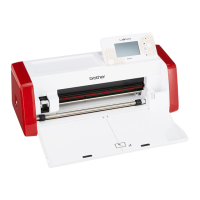
Why the scanned image from Brother SDX900 is red?
- JJonathan ThomasAug 18, 2025
Peel off the blue tape from the optional scanning mat before scanning.
Why the scanned image from Brother SDX900 is red?
Peel off the blue tape from the optional scanning mat before scanning.
Why the scan image from Brother SDX900 is out of focus?
Set the scanner lever position to '1'.
What to do if the Brother Cutter mat cannot be fed out?
If the material to be cut/drawn or the original to be scanned is jammed in the feeding mechanism, press the “Feed” button while inserting the mat to feed it out. If that doesn't work, turn off the Brother Cutter and carefully pull out the mat.
Why my Brother Cutter mat cannot be fed?
Ensure space around the slot at the back of the Brother Cutter so that the mat can be fed out. Also, place the machine on a flat, even surface.
What to do if the Brother Cutter mat or material catches on a feed roller?
To resolve this, press the “Feed” button to feed out the Brother Cutter mat, and then: * Replace the mat with a new one if its adhesive strength has decreased, or the material is not secured. * Attach the material while keeping it within the adhesive area of the mat. * Raise the scanner lever if the thickness of the material exceeds the maximum limit, and then correctly insert the mat.
Why is the Brother SDX900 mat fed in at an angle?
To resolve the issue of the Brother Cutter mat being fed in at an angle: * Press the “Feed” button to feed out the mat, and then re-insert it straight in if it was inserted at an angle. * Replace the mat with a new one if the corners are deformed (bent). * Pull out the rear tray if it is not pulled out. * Adjust the position of the feed roller, if it is not positioned correctly.
Why material cannot be attached to Brother SDX900 mat?
The material may extend from the adhesive area of the Brother Cutter mat, so attach the material while keeping it within the adhesive area of the mat. Alternatively, the mat’s adhesive strength may have decreased, so replace the mat with a new one.
What to do if Brother SDX900 Cutter mat cannot be recognized?
Here's how to fix it: * Clean the dotted marks on the Brother Cutter mat and their surrounding area if they are dirty. * Ensure the dotted marks are not hidden by material or tape; attach materials within the adhesive area. * Insert the mat with the material facing up. * Ensure the mat is inserted in the correct direction. * Clean the scanner glass inside the machine if it's dirty. * Use a mat specifically designed for the Brother Cutter.
Why does the material being cut catches on the tip of the Brother SDX900 Cutter cutting blade?
If the material being cut catches on the tip of the cutting blade of your Brother Cutter, try cleaning the holder to remove any accumulated dust or lint. If the issue persists, the blade may be worn and needs replacement with a new one. Also, ensure the material is compatible with the machine.
Why not all of the material to be cut is cut with Brother Cutter?
To address uncut areas on the Brother Cutter, ensure you're using a blade appropriate for the material. If cutting is difficult even with high pressure, the blade might be chipped and needs replacement. Also, replace the mat if its adhesive is weak. Check that the material is compatible and adjust the “Cut Pressure” setting. Clean the holder if dust is present. Increase spacing between patterns via the “Pattern Interval” setting. Ensure materials are within the mat's adhesive area, and use appropriate fabric cutting sheets when cutting fabric, firmly attaching fabrics and iron-on sheets.
Details essential safety warnings, including symbols for fatal or serious injuries.
Describes the various parts and components of the cutting machine and their locations.
Covers initial setup steps like removing packing materials and powering on the machine.
Explains how to configure machine settings such as language, units, and auto shutdown.
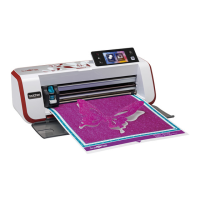
Guides through initial operations like selecting mats, attaching materials, and performing test cuts.
Details procedures for cutting built-in patterns, including tutorials for basic and advanced patterns.
Explains how to select single or multiple patterns for cutting or editing.
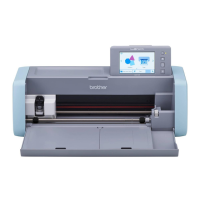
| Model | SDX900 |
|---|---|
| Built-in Designs | 682 |
| Wireless Connectivity | Yes |
| Auto Blade Technology | Yes |
| Connectivity | USB |
| Blade Adjustment | Automatic |
| Display | LCD |
| Scanning Capability | 600 DPI |
| Software Compatibility | CanvasWorkspace |
| Power Supply | AC 100-240V, 50/60Hz |
| Weight | 3.6 kg |