5
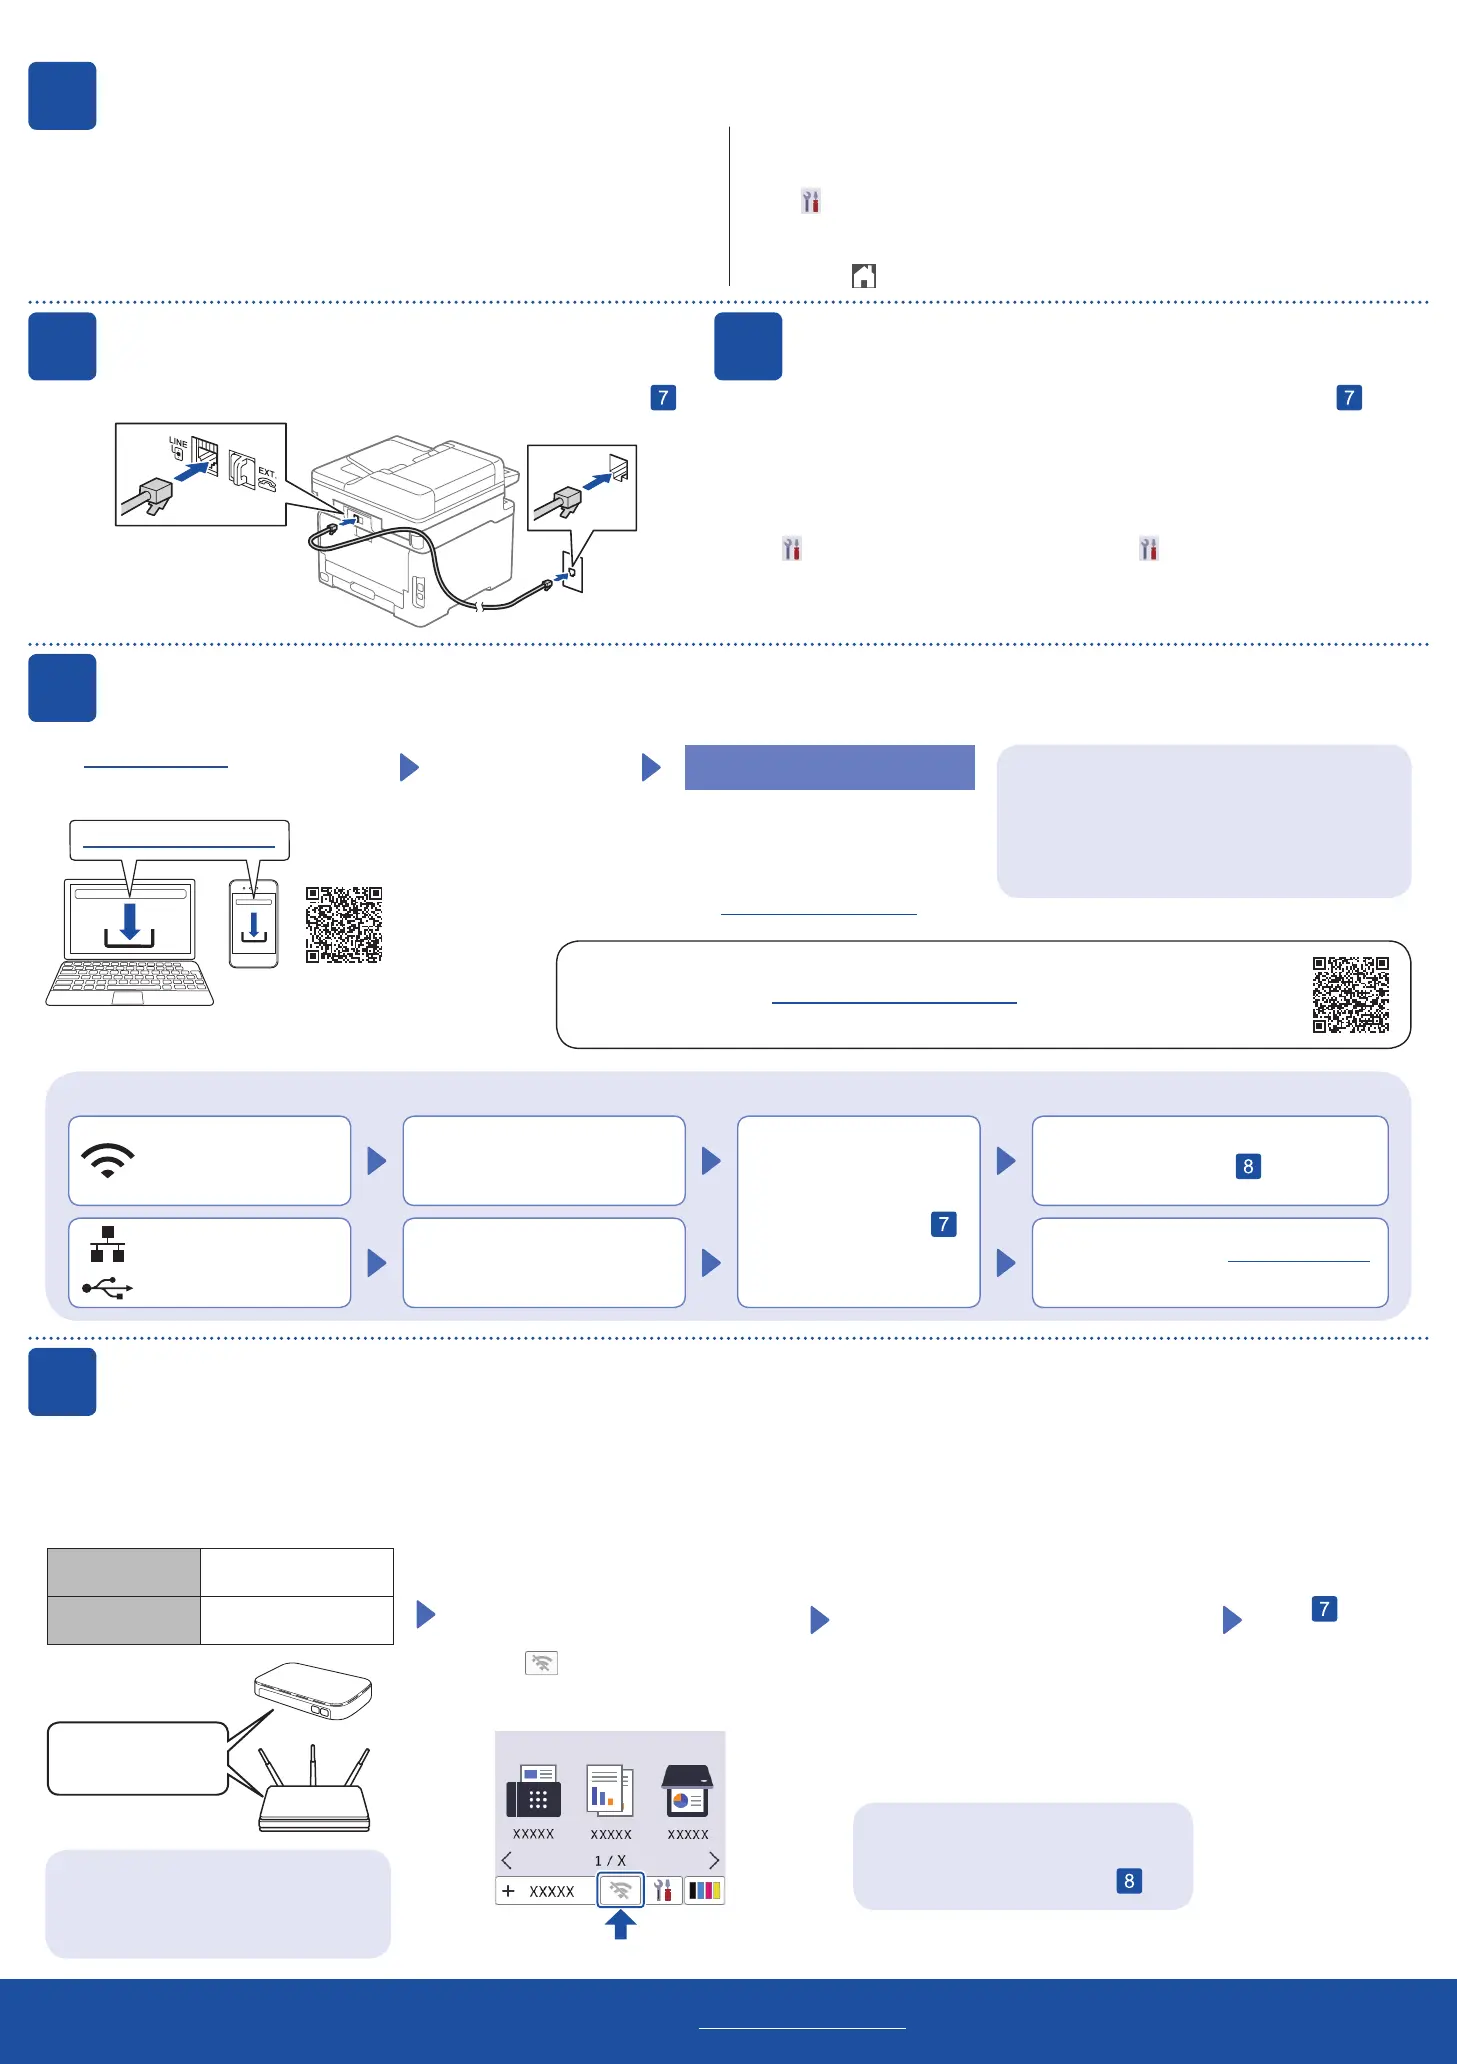
Connect the telephone line cord
(For MFC models)
If you do not plan to use the fax feature on this machine, go to step .
7
Connect your computer or mobile device to your machine
Follow these steps to complete the setup using one of the connection types available on your machine.
Visit setup.brother.com to download and
install Brother software.
Follow the on-screen
instructions and
prompts.
setup.brother.com
Setup Finished
You can now print and scan using
your machine.
To check for the latest firmware,
visit support.brother.com/up7.
Can’t Connect? Check the following:
Restart your wireless access point/
router (if possible).
Disconnect the cable.
Wired network
USB connection
If still not successful, go to .
If still not successful, visit support.brother.com
for FAQs and Troubleshooting.
Restart your machine and
computer, and then go to
.
8
Manual wireless setup (Wireless models)
If the wireless setup is not successful, try to set up the connection manually.
Find your SSID (Network Name) and
Network Key (Password) on your wireless
access point/router and write them in the
table provided below.
SSID
(Network Name)
Network Key
(Password)
If you cannot find this information, ask
your network administrator or wireless
access point/router manufacturer.
SSID: XXXXXXX
Network Key: XXXX
Go to
to install
software.
For LCD models
Press Menu, and then select
[Network] >
[WLAN(Wi-Fi)] >
[Find Network].
Follow the LCD instructions.
For Touchscreen models
Press
>
[Find Wi-Fi Network].
Follow the Touchscreen instructions.
If setup is not successful, restart your
Brother machine and your wireless
access point/router, and repeat
.
Select the SSID (Network Name) for your
access point/router and enter the Network
Key (Password).
When the wireless setup is successful,
the Touchscreen/LCD displays
[Connected].
• For LCD models
Press and hold ▲/▼ to select one of the
following characters:
0123456789abcdefghijklmnopqrstuvwxy
zABCDEFGHIJKLMNOPQRSTUVWXY
Z(space)!"#$%&'()*+,-./:;<=>?@[\]^_‘{|}~
1. Press Menu.
2. Press ▲ or ▼ to display
[Initial Setup], and then
press OK.
For LCD models
For Touchscreen models
1. On the machine’s Touchscreen, press
[Settings] > [All Settings] > [Initial Setup] >
[Local Language].
2. Press your language.
3. Press .
4
Select your language (if needed)
3. Press ▲ or ▼ to display
[Local Language], and then press OK.
4. Press ▲ or ▼ to select your language,
and then press OK.
5. Press Stop/Exit.
For detailed machine information and product specifications, see the Online User's Guide at support.brother.com/manuals. © 2023 Brother Industries, Ltd. All rights reserved.
D027VB001-00
Important Notice for Network Security:
The default password to manage this machine’s
settings is located on the back of the machine
and marked “Pwd”. We recommend immediately
changing the default password to protect your
machine from unauthorized access.
NOTE:
• For more information on using the fax feature, see the Online User’s Guide.
• Your machine is programmed to automatically receive faxes. To change this default mode, see
the Online User’s Guide.
A. Set the date and time
Press [Settings] >
[All Settings] > [Initial Setup]
> [Date & Time], and then set the date
and time you want.
6
Configure the machine for faxing
(For MFC models)
B. Set the Station ID
Press [Settings] >
[All Settings] > [Initial Setup]
> [Station ID], and then set your fax
or telephone number and your name.
If you do not plan to use the fax feature on this machine, go to step
.
Wireless network
Before connecting your machine to a 5 GHz Wi-Fi
®
network, confirm the channels that your
machine supports. Go to support.brother.com/g/d/a5m6/, select your product, and then
click Download for more information.
 Loading...