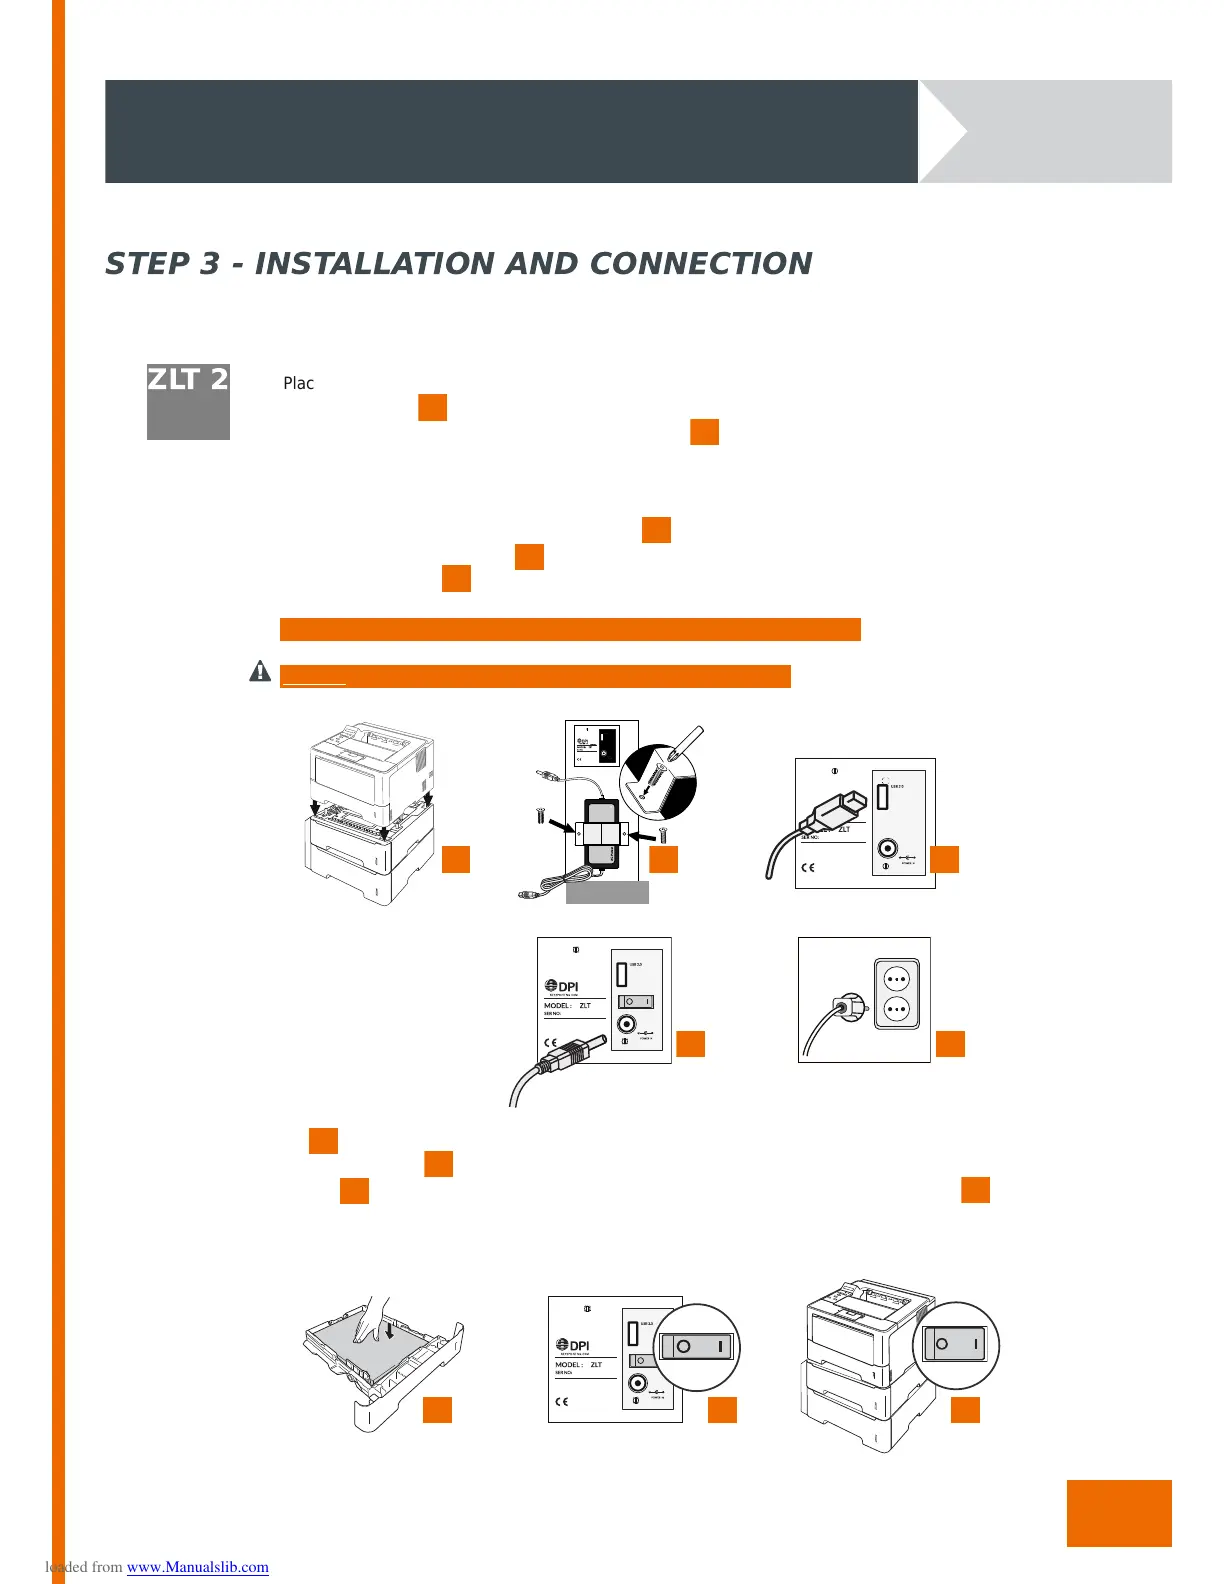
After completing steps 1 and 2, find out how to connect your ZLT below:
ZLT 2
Place the ZLT2 in the desired location.
Place the printer onto the ZLT.
Remove the screws holding the power supply holder in place and keep both the holder and
screws in a safe place. Pla ce the power supply unit into the holder then using the screws securely
fit the power supply unit and the holder in pla ce at the appropriate place on the rear of the unit.
Take care that the AC powercord is facing downwards.
Connect the USB cable from t he printer to the USB socket on the ZLT.
Connect the power connector to the back of the ZLT.
Plug the power cord directly into the wall socket.
Note: Ensure the USB cable is fully inserted into the USB socket on the ZLT
Warning: Do not use extension cords, (multi-s ocket or otherwise)
Fill the trays with paper.
Switch the ZLT on.
Before switching th e printer on ensure that the printers po w er cord is also plugged into the
wall socket.
After installation to your network, your printer is now ready for use.
 Loading...