Home > Security > Network Security Features > Manage Your Network Machine Securely Using SSL/
TLS > Certificates and Web Based Management > Create and Install a Certificate > Create and Install a Self-
signed Certificate > Install the Self-signed Certificate for Windows
®
users with Administrator Rights
Install the Self-signed Certificate for Windows
®
users with
Administrator Rights
The following steps are for Microsoft
®
Internet Explorer
®
. If you use another web browser, consult the
documentation for your web browser to get help with installing certificates.
1. Do one of the following:
• (Windows
®
XP and Windows Server
®
2003)
Start your web browser, and then go to step 3.
• (Windows Vista
®
, Windows
®
7, Windows Server
®
2008)
Click
(Start) > All Programs.
• (Windows
®
8)
Right-click the
(Internet Explorer) icon on the taskbar.
• (Windows Server
®
2012 and Windows Server
®
2012 R2)
Click
(Internet Explorer), and then right-click the (Internet Explorer) icon that appears on the
taskbar.
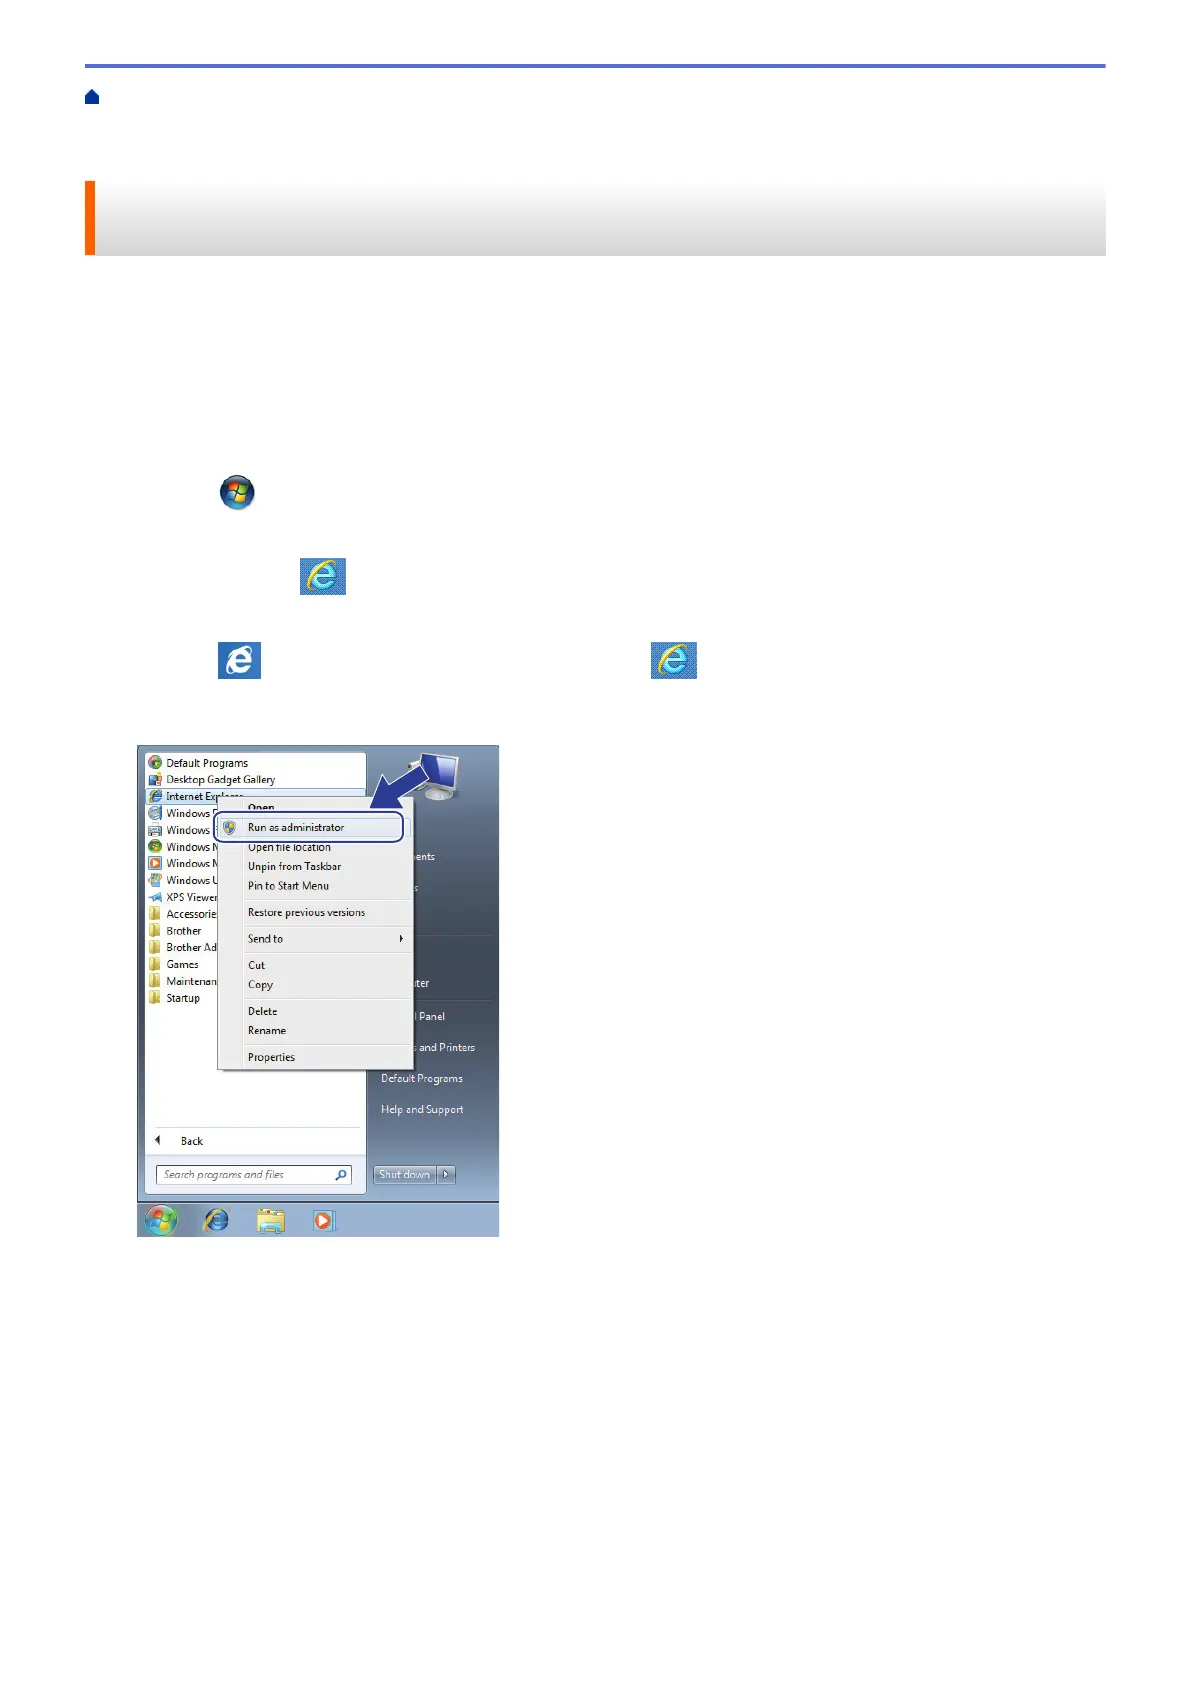
2. Right-click Internet Explorer, and then click Run as administrator.
If the User Account Control screen appears,
• (Windows Vista
®
) Click Continue (Allow).
• (Windows
®
7/Windows
®
8) Click Yes.
3. Type "https://machine's IP address/" in your browser's address bar to access your machine (where
"machine's IP address" is the machine's IP address or the node name that you assigned for the certificate).
371
 Loading...